Reed's House Home Automation OverviewI decided to sit down and do this write up so that my friends (those who liked parts of what I did) would know what to buy, as well as know the reasons I had to make the decisions that I made with regards to my house plan. My overall philosophy is that home automation is the wave of the future; it's just not 100% there yet. I never liked what I saw when someone or a company was selling an entire "home automation" system. The story was always the same: some parts were generally good but nothing was perfect and/or fully integrated. They always seemed expensive and had compromises (some of which I was unwilling to make). That said, when I decided to move, I decided to build a new automation system from scratch. Table of ContentsOverviewGoals The main goals and drivers in building my system.Disclaimers About what you will read and what you wont. The HouseStuff that is integral to the house (furnace, Sprinklers, etc.)
The Entertainment stuffThe TVs, Screens, Sound systems, etc. that delivers content to different places different ways
The Content StuffMy Content system- This is a description of the way I have setup my content (videos, movies and music) and the data behind the system.3D ConentMore detail on 3d Content and my personal views on 3D. MiscMiscellaneous stuff Random Stuff that didnt fit anywhere else..SummarySummary A wrap up summary of my systemLinksLinks Links to all of the products mentioned on this pageGoalsGoal 1: A backupI have a single rule in everything I do to my house automation wise: Always have a backup. We know that phones, computers, even TVs crash, freeze or otherwise fail to respond. No software is perfect. I was unwilling to accept the idea that something could fail when I was using it and I would have no recourse. Therefore, everything I outline has a manual method or a manual way to achieve its purpose. The "automation" is a layer on top of the standard functionality that is a layer of convenience for me. Bottom line is that I don't want "hal" to lock me out of the system or have to fight with a system to get something simple done. Example: I don't want to be locked out of my house because the system crashed- because we know that the system will crash one day (hence, no automatic door locks). Goal 2: Integrate it as much as possibleAs I said above, I could not find a single system that I trusted or worked to my specs. So, I built a system of individual components that was the best I could find it its category or offered me the functionality I wanted (including goal 1 above). The best tool that I found for integration is honestly the iPhone/ iPad. Many of you reading this will remember that I was a hardcore Blackberry guy (see Ireturnedmyiphone.com) until I bought my house in October 2012.So, in addition to changing phones, I moved. Much of what I will talk about was integrated while I switched to the iPhone.The iPhone (and android for the most part with one exception listed below) is a great platform for a few reasons:
So, the iPhone was the best integration tool I could find. I literally have a screen of just "house" apps that lets me see, do, explore my house and it works everywhere I go. Goal 3: Spend wisely.Yes, I could have paid a consultant to come in and I could have spent easily 50k-100k for the stuff I will describe in a fully integrated package that was beautiful (and that would most likely not met my goals above). And, while the stuff I will outline below is not cheap, it's also not ridiculously expensive. I consider it affordable and a worthwhile cost to add the level of convenience I was looking for. I will say that the toughest part of most of the stuff I will outline is the installation. Buying something these days is just one expense, setting it up, configuring it, installing it and testing it is a big part of the cost and time you need to consider. I also refused to pay monthly fees to any company. I would rather pay a higher upfront cost in most cases. Monthly costs mean they are in my business and if I choose not to pay them I lose that function. The subscription model is slowly dying for me- If something has a monthly fee- I'm out. DisclaimersThere is no way I could have done all of this alone. Almost 95% of the install and labor of this stuff I did myself with my friends help. There are many people who spent weekends and days off helping me install stuff around my house. I thank them. Adam, Andrew, Grant, Matthew, Franklin There are many people who will sit around and listen to my ranting and suggest alternatives and provide some ideas based on their experience with particular systems or devices. Grant, Mark, Tim, Lindy, Adam. I also thank people have provide me stuff to "test" and provide my experience. Epson. Makita. Now, because much of this stuff is Internet connected and everything CAN be hacked (though I like to think I have picked the most secure stuff I could find) I am also going to leave some things out of this write-up for my own security and sanity. Security is something I am not going to address here in a major way. Everything is hackable in the world, I have chosen devices and vendors that are the least hackable as far as I can tell (i.e. reputable – which doesn't necessarily mean un-hackable). We all take risks and there is nothing I have automated that will allow someone to walk into my house if they hacked it. Those who know me personally know that I don't generally go "by the book" or the "easy" way. Example: I don't like visible wires inside or outside of the house (the first thing I did when moving in was rip every wire off he outside of the house that wasn't necessary). I absolutely hate when a lazy cable installer staples wires to the side of a house and drills through the stucco to install a cable jack. The irony is that I like wire to go everywhere. So, I usually do it the difficult way and run wire through the walls which requires a lot of planning and drywall skills (which I don't have). Also, since this is not a book and I am not getting paid for this, Forgive the grammar, spelling, punctuation mistakes. I just want to get it down on paper as a reference that someone may make a better decision on their own project by reading my history. So without further disclaimers, here we go. The HouseI bought my home in October 2012. The house was in a "finished" state meaning that the floors, walls, and electrical was in move in condition. The house had been remodeled by a construction company prior to my moving in and thus had not been lived in. This included a completely new kitchen, brand new bathrooms, new wood floors/ carpet throughout. The electrical system had been upgraded a few years prior to the remodel so it was in great shape and had plenty of overhead for adding circuits, etc. As well, much of the wiring was new. However, I decided that I wanted to have ceiling lights installed in some rooms, additional circuits installed for the places that I planned to install critical components. That amounted to having and electrician come over and spend 4 days doing the following:
I had done a significant amount of planning and research before I began so I was also working while the electrician was here. Some jobs and drywall cutting was reduced since we both worked when the walls were open. I don't think there is enough copper in the world if I ever bought a house with open walls, I would put wire everywhere! On a previous inspection I had done of the house I had identified locations for two of the main parts of my system. I subliminally think that I chose to buy this house partly because of the elegance of these locations. The house has NO crawl space below the first floor, but does have an attic on the second floor. The first location I would need was a secure location to put the core of the network and stuff I would rarely need to access. This would ideally be temperature controlled to some degree and free from the outside elements. It could not be near a bedroom or near a living space because it would have fans that run all the time and as such would create noise. I also needed this to be central to the house since wire would run to here from all over the house. This is especially important because I would need to get to the second story attic. I chose a Utility room located on the first floor with a separate secure door and a duct that carried the heat to the second floor attic (that I could run wire inside- The walls, not the duct). I call this the "network" rack. The second location I would need was a place to put my entertainment equipment. This would need to be within eyesight of the main living room. I would need access daily to this area and would ideally be central to the house as most of the wire would also run here to throughout the house. I wanted this to be close to the network rack I outlined above since wire would need to go between the two locations. I got lucky on this one because the "back" of my living room was almost directly above the utility room and, as such, has access to the attic and I could easily run wires from here to the utility room below. I call this the "entertainment rack" "Rack" locations identified, I marked specific locations in each room in the house where I would want computers, cables, etc. as best I could having not lived in the house. I chose to run a permanent conduit from the network rack to the attic. Since this conduit passed right by (behind the wall) from the entertainment rack I installed a larger conduit with a bend going down at a 45 degree angle which would allow me to put wire easily from the network rack to the entertainment rack. 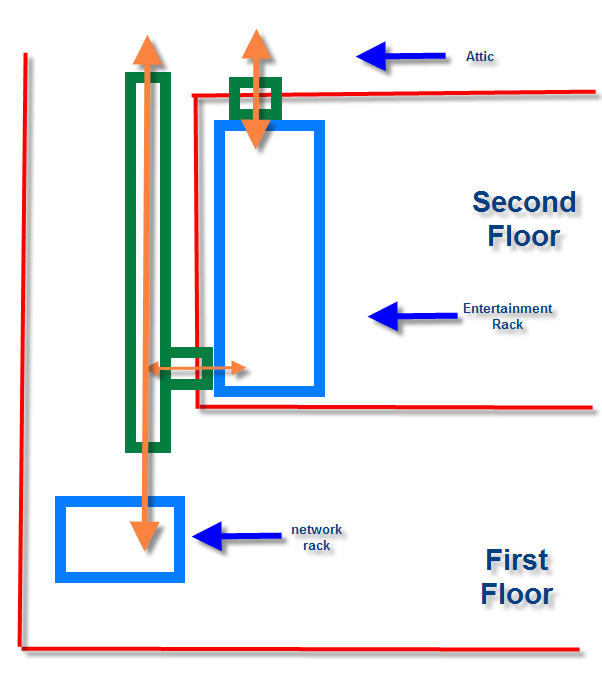
Since I was going to be running so much cable, I put in a 6" conduit in sections from the first floor ceiling to the attic with that special T installed to the entertainment rack. The Entertainment rack would also get a direct line to the attic from the top of the rack for the multitude of HDMI, etc. that would need to be run throughout the house up into the attic. With dedicated circuits installed by the electrician at each location I was ready to begin running wire. I started with Cat 6 wire to each bedroom, the kitchen, living room etc. back to the network rack where everything would terminate. 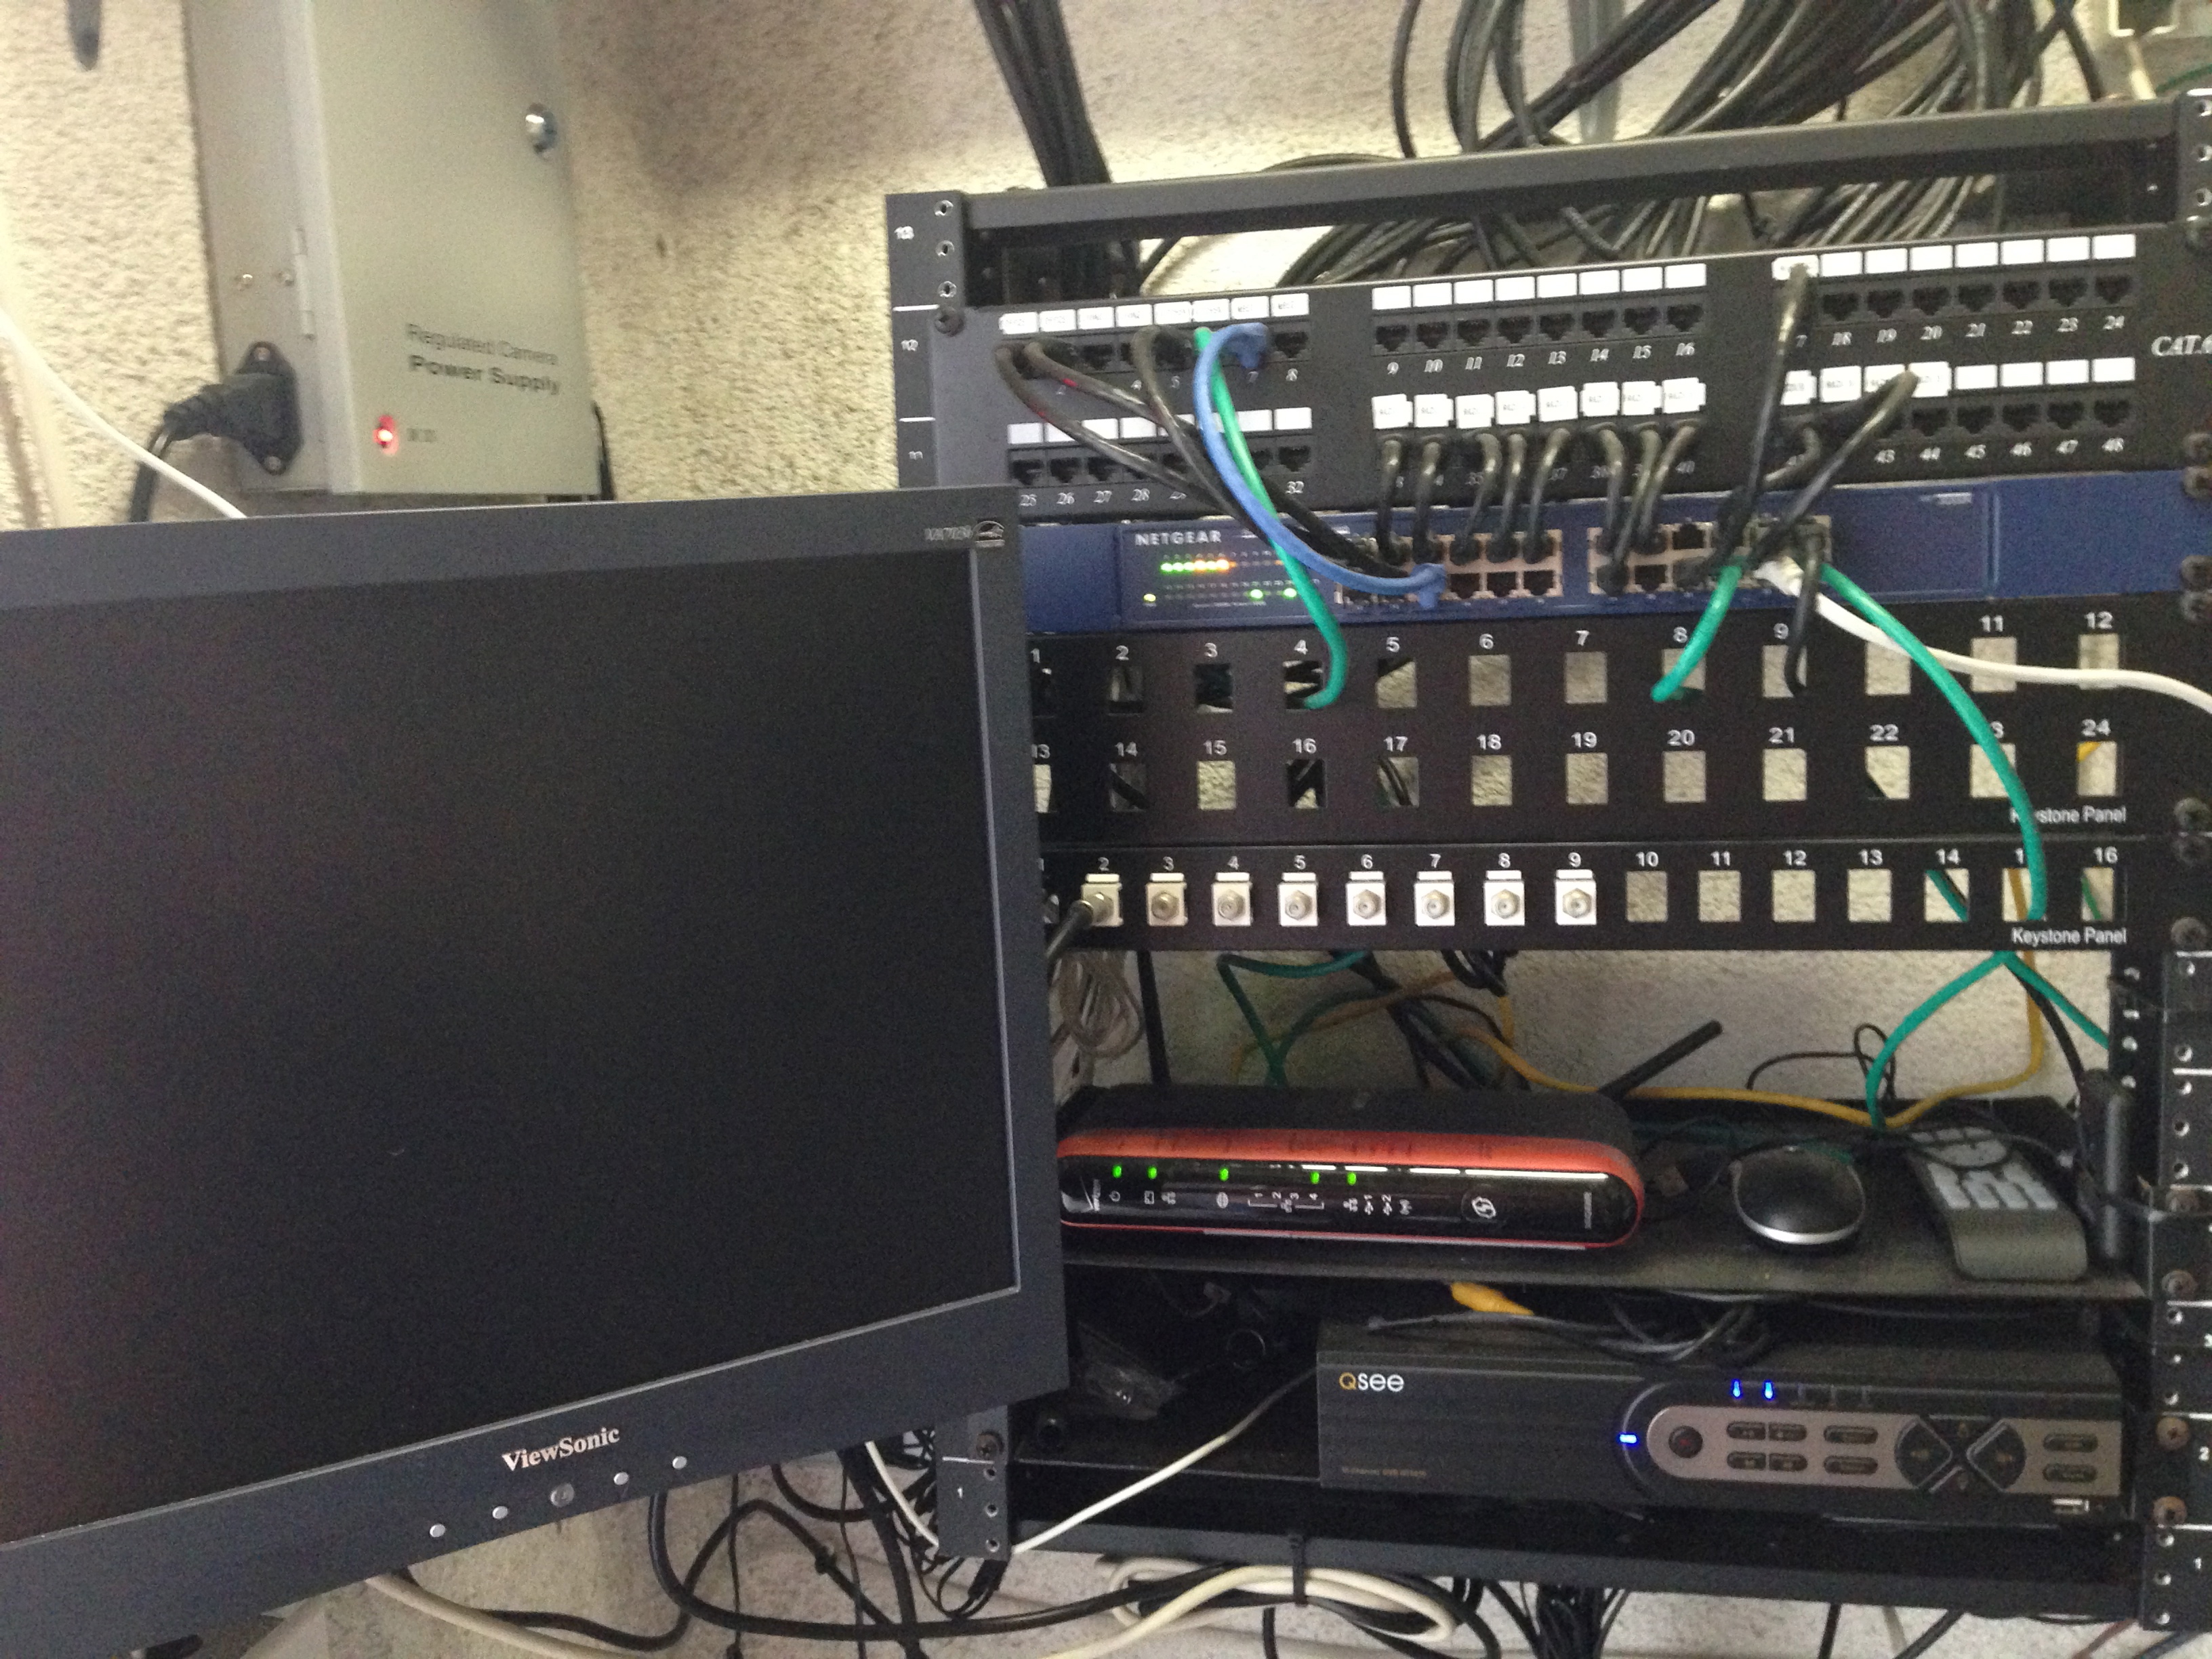 THE NETWORK RACK I also included RG6 in small quantity since most of my digital content would be run on Cat 6 or across a HDMI cable. The need for coax run to each room in houses is shrinking these days. I also decided that my cable boxes would NOT be located in each room. Instead, they would be centrally mounted in the Entertainment rack with IR repeaters as needed. Reasons:
Once, the Cat 5, RG6 was pulled everywhere it needed to go and terminated on the network rack, I started with the HDMI and VGA. I decided that I would have a TV in the living room, Master Bedroom, Office, and Guest bedroom. So, each one of those locations got at least 1 HDMI and one VGA; HDMI to carry the video/cable signal and the VGA to carry the Security camera signal (I'll detail the VGA later). The office also got extra RG6 and Cat 5 to eliminate the need for cascading switches since there will arguable be more devices there. Each TV also got an additional minijack wire and/or cat5 to carry the IR signals. Since the house was in finish condition, running these wires was a chore. It required cutting drywall and fishing through the attic as much as I could. I wanted no wires visible in the rooms or on the outside of the house. I only wanted was plates to be visible 1 foot above the floor boards. No other wire. 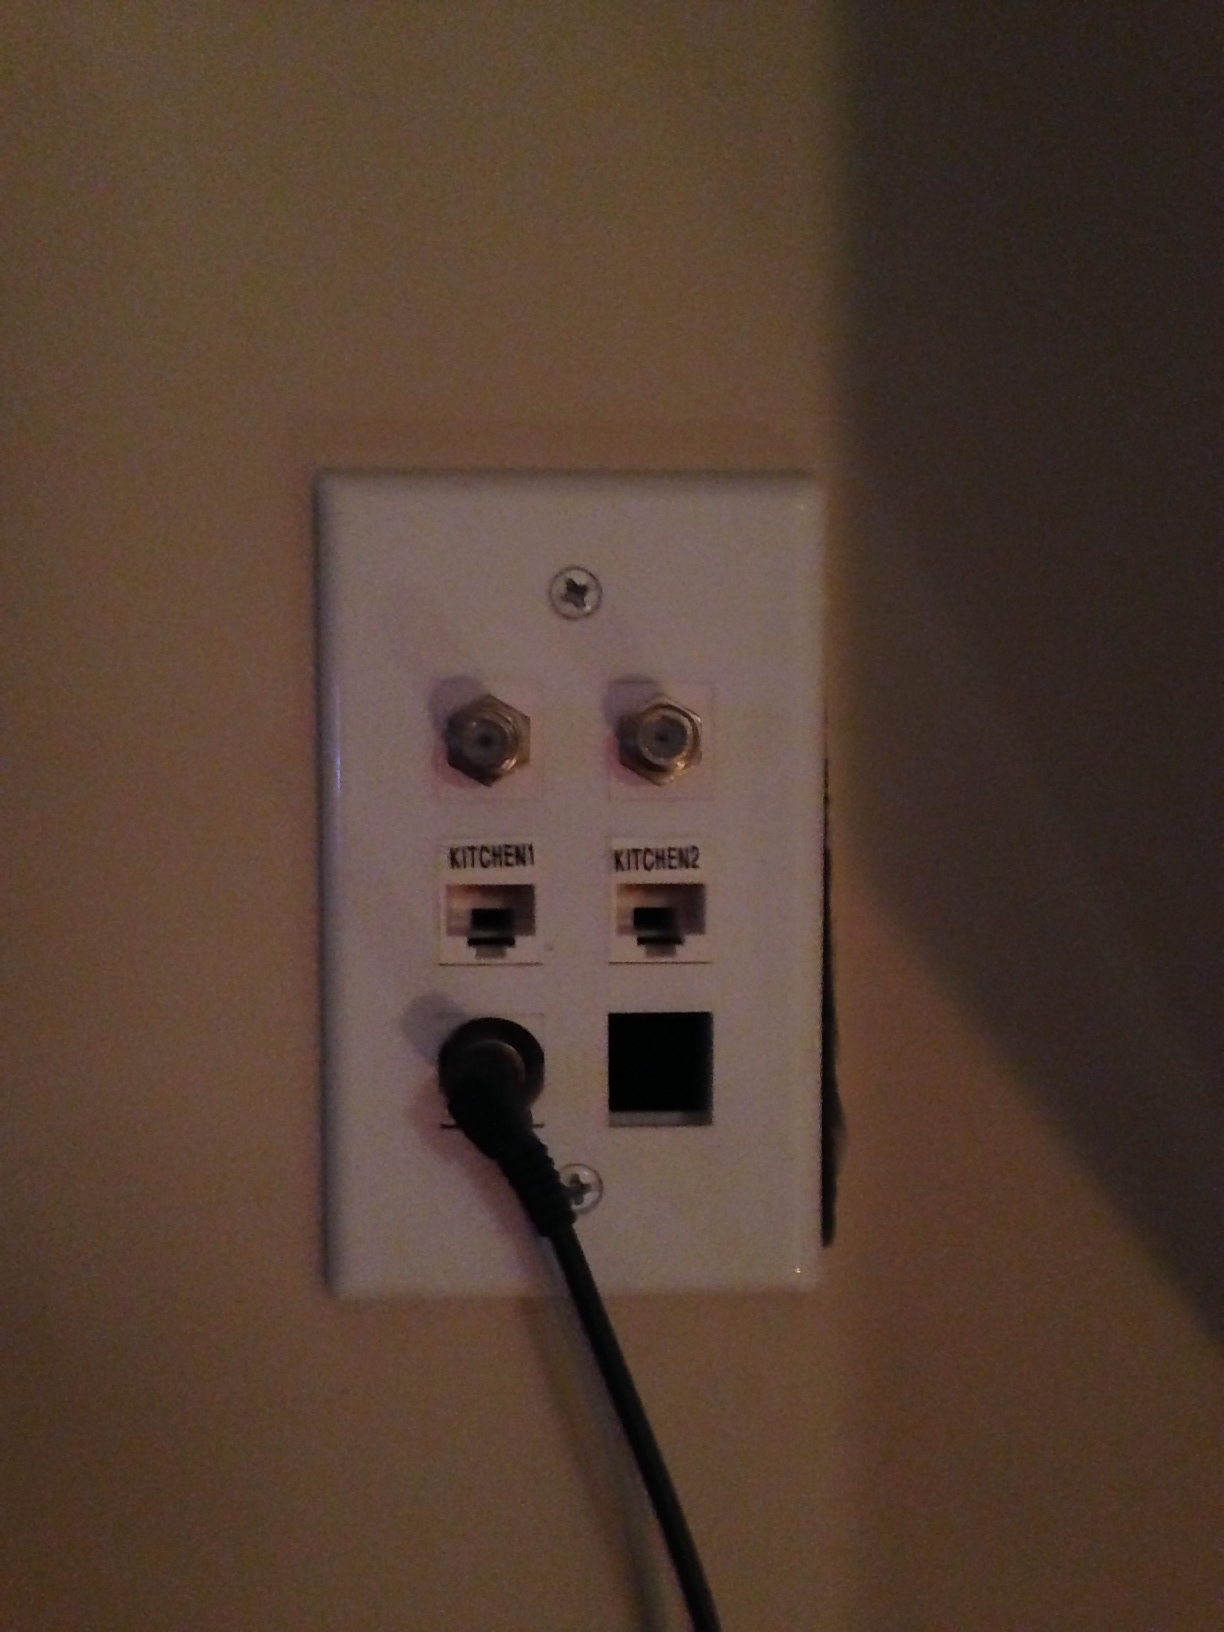 The Kitchen Keystone Jack Http://www.Leviton.com I chose configurable keystone jacks since I could buy the inserts I needed based on what cable I was running to each location. The kitchen got a special extra Minijack so someone could plug in an iPod/iPad/or other device easily to the whole house system. The location I was putting the subwoofer also got an extra RG6 to carry that signal. I had already made a decision on the network provider. Simply put, Verizon Fios is available in my area and its what I had at my old house. It consists of a single fiber optic cable that goes into my house that carries all of the signals I need (internet and TV, and phone, but I don't have a land line). It did require me to put some equipment in a secure location where the fiber could be run. When the installer showed up, he was a super cool guy that was way into what I was doing and not like the lazy cable installers of the past. I clearly told him my plan to run the fiber from the line across the street directly into the attic and then down my conduit to the utility room where I could wall mount the ONT (optical network terminal) and distribute throughout the house my internet and my cable as needed. The installer saw what I was doing and did a BAD ASS job of wiring stuff as clean as he could. The ONT consists of the box that converts the fiber to "cable", a phone interface, Ethernet and also the BBU (battery backup unit) that keeps the ONT running in the case of a power outage. 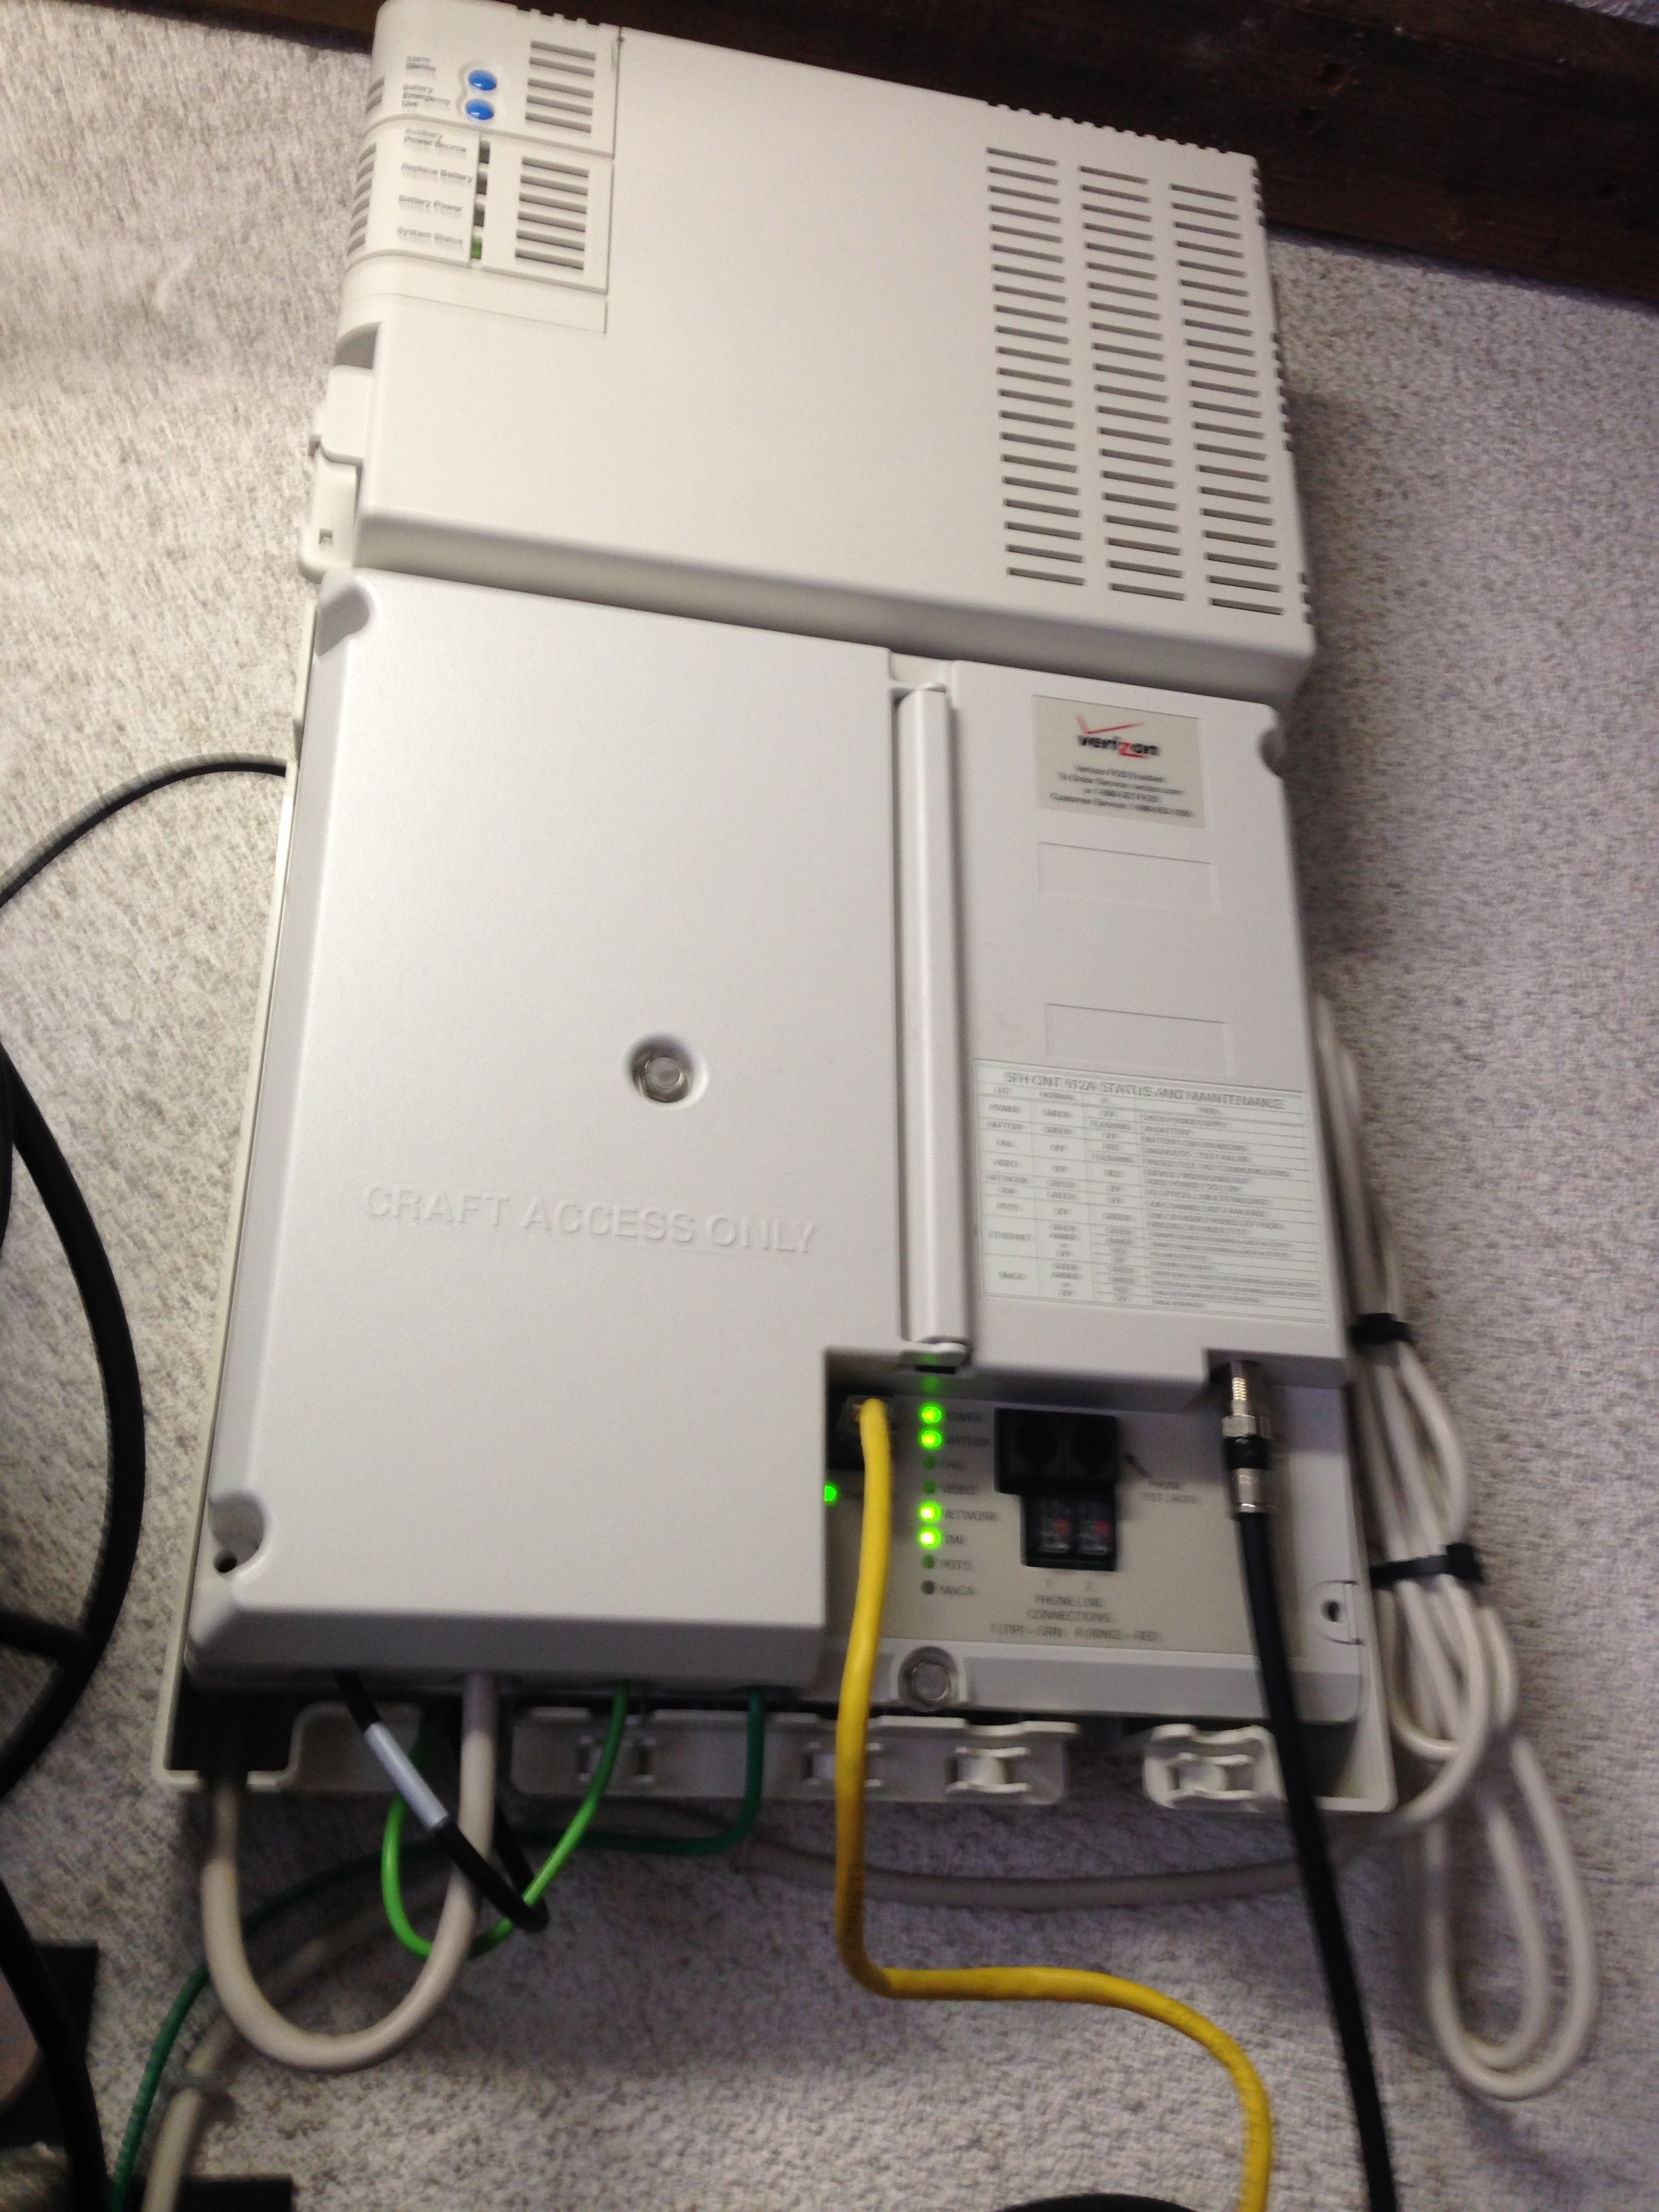 THE ONT AND BBU http://www.verizon.com/fios After he left, me and a few friends pulled all other wires off the house that came from the line. This included the Cable Coax wire from the local cable company, the old analog phone lines, and anything else that wasn't electric. I cut 'em and left them hanging- cleaning up my neighborhood and improving site lines for my neighbors 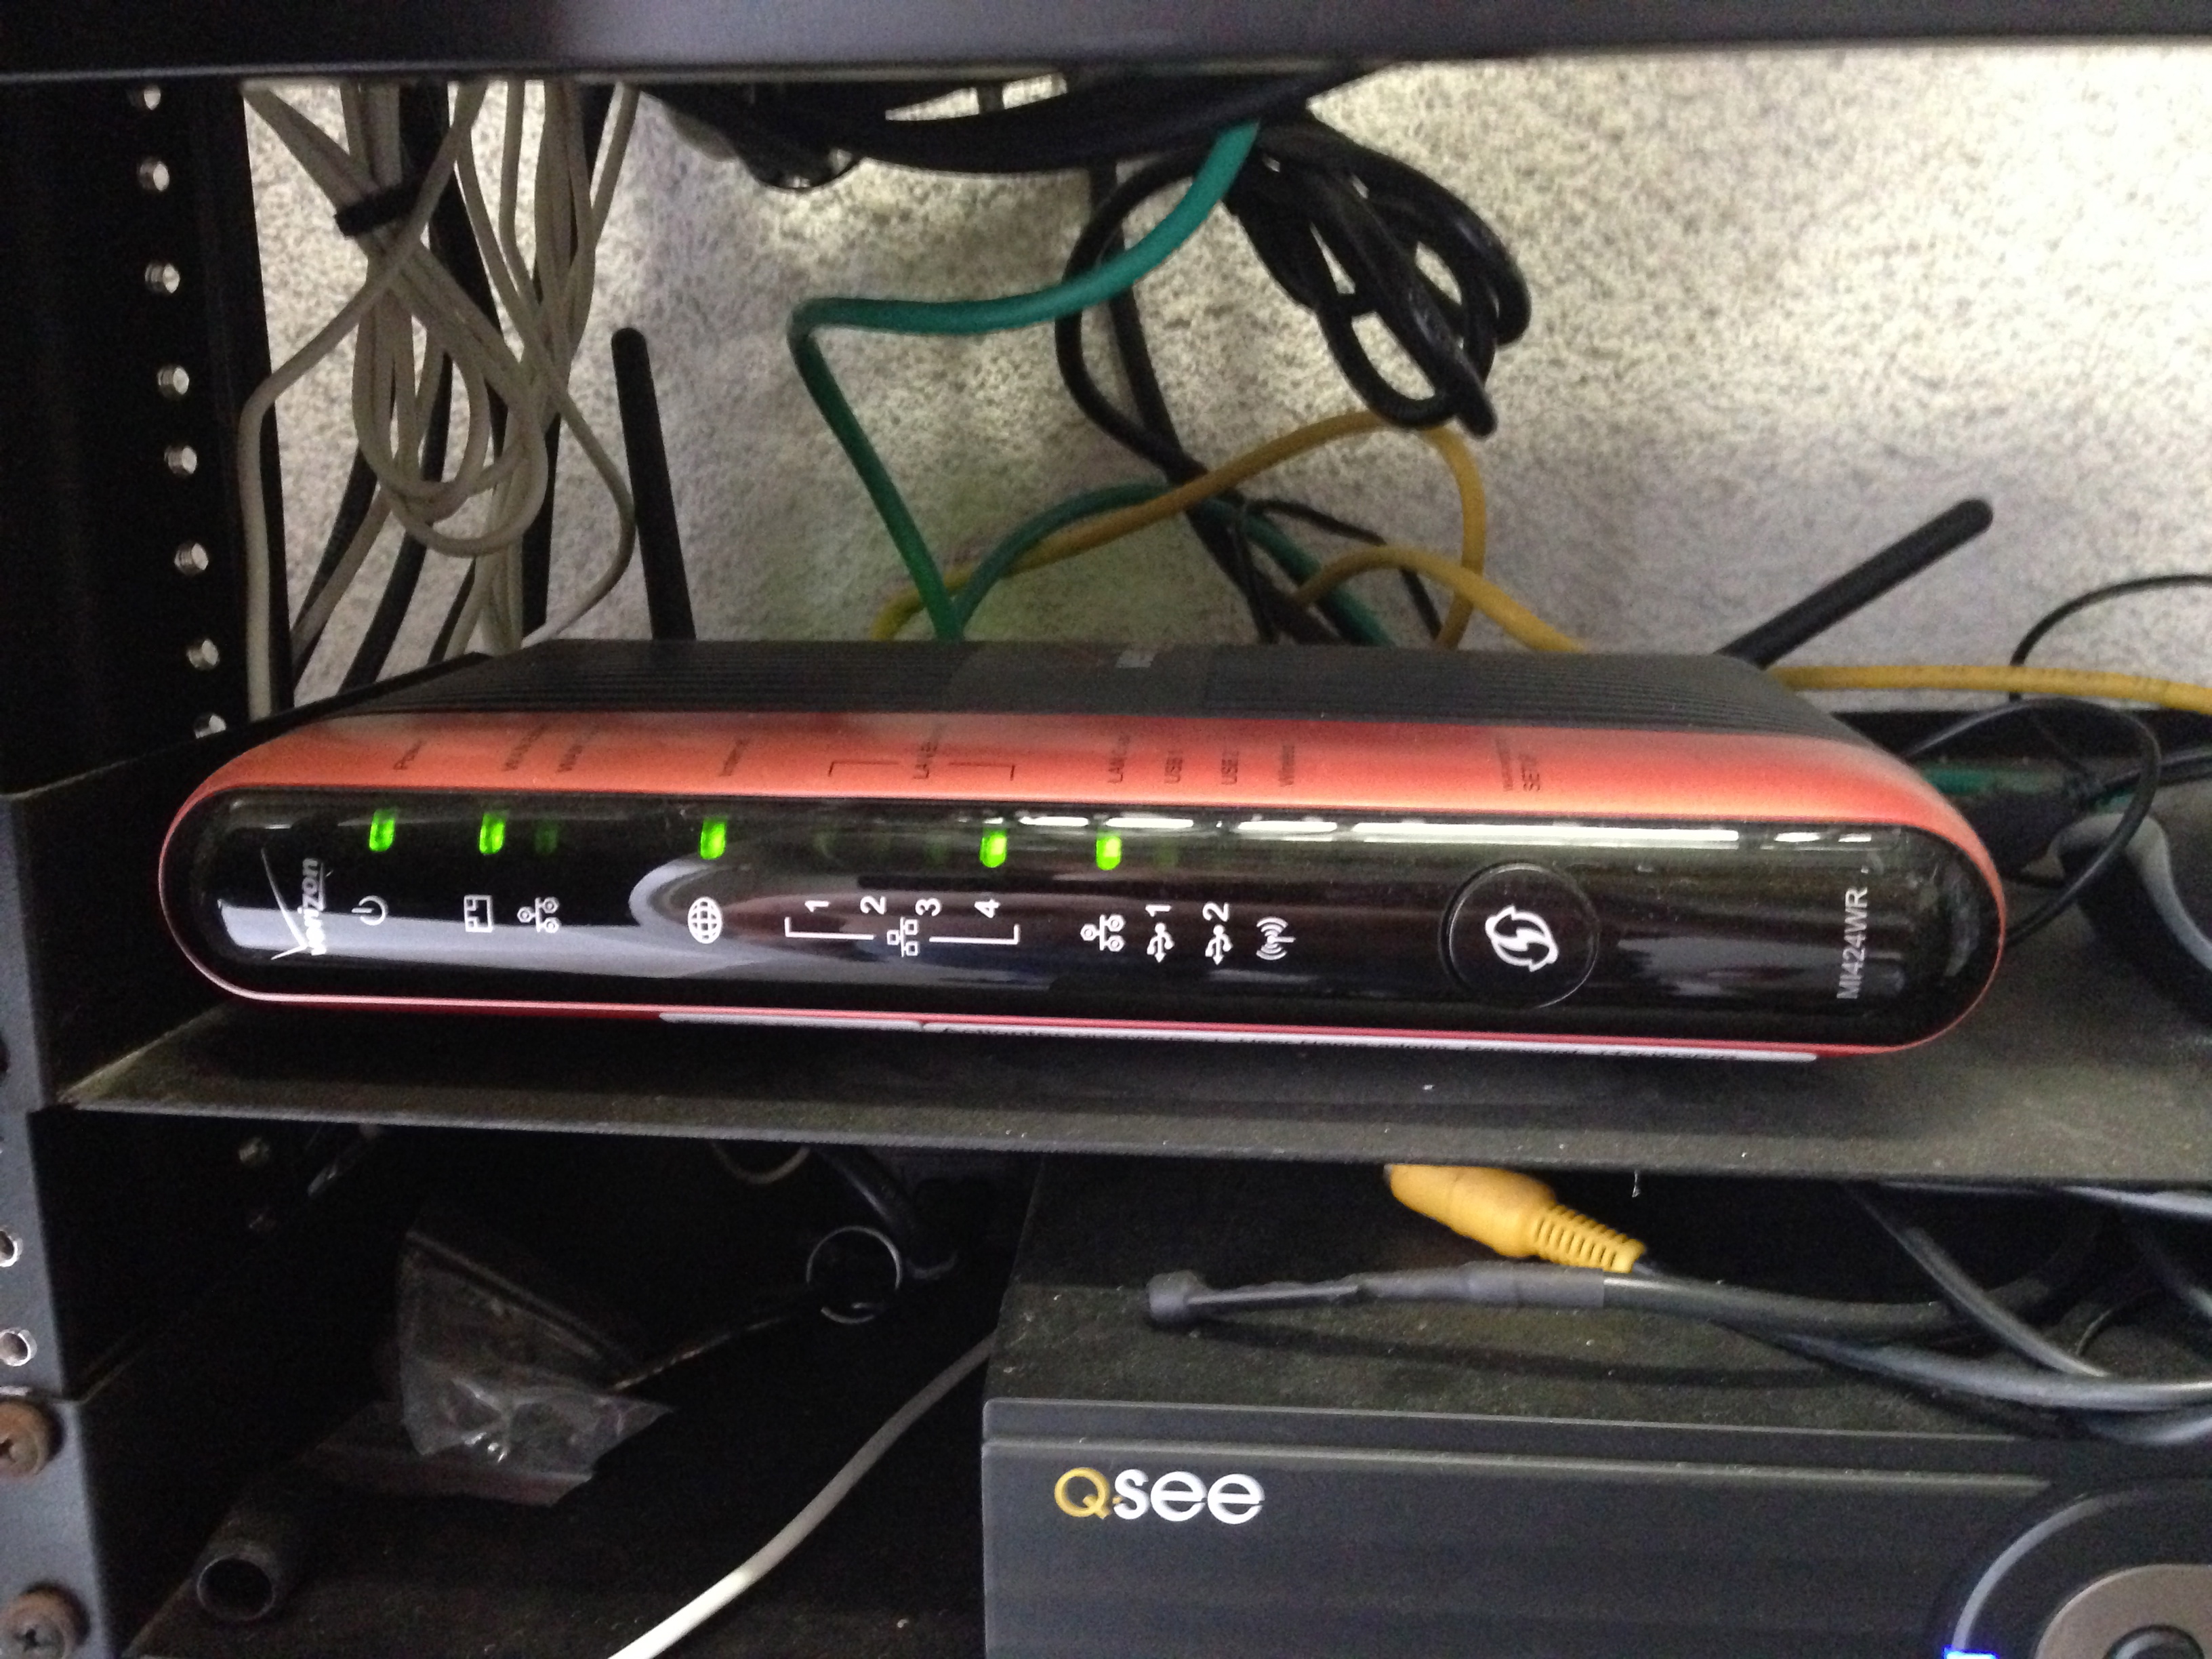 THE ROUTER http://www.actiontec.com Because I had chosen to use Fios, there is one concession I knew I would have to make. I would need to use the Verizon router or risk losing some TV functionality. This is due to Verizon having a MoCa bridge built into the router allowing the Set Top Boxes to use the internet to deliver content (Video On demand) as well as enable the STBs to essentially be internet connected devices with IP addresses. Due to this, I could use my iPhone to control the DVRs either as a remote or to remotely set programs to record, etc... The functionality wasn't completely flushed out when I did my install but I knew that Verizon would figure it out. And they did- improving their apps over the past year or so with STB updates to add functionality. I will outline some of this later. The Verizon technician gave me the latest coolest router he had- the actiontech- which has enough functionality, but has horrible menus unless you know what you are doing. Bottom line, I figured it out and am now quite the expert on Actiontec when it comes to port forwarding. Even though this includes wireless as part of the router, I didn't like the location in my house fore wireless nor the functionality of the Actiontec wireless so I disabled the wireless from the router and treat it only as a wired router/ gateway. Wirelesshttp://www.asus.comBecause of the disabled wireless in the actiontech, I needed to find a new wireless router. Initially, I used a Linksys wireless AP in my home. I ran a cat 5 up my conduit to the attic from my utility room and put it in the middle of the attic for the best reception. I plugged it into the outlets in the attic the electrician had installed. A few things to consider: I am the kind of guy that will climb into an attic at the drop of a hat, but that's not realistic even for me at midnight if the wireless crashes (which the Linksys often did). So, I needed a way to reset the power from my second floor without climbing into the attic. I went to home depot and found a RF remote controlled outlet (3 of them). I hooked the wireless AP into that and put the remote in my hallway drawer. So, worst case, my AP freezes (as they do) I could walk to the hallway, press the power off on the remote and then back on and the AP would be reset (hard reset power wise). This is really convenient and I found I had to do that a lot with the Linksys (they suck since cisco bought them). I also found the reception was horrible on this AP despite the diversity antenna and the central location. About 9 months ago, a colleague (Larry) tells me he found a new AP that he really liked made by Asus. After we played with one at work for our work network and I found it easy to use and had great features, I decided to buy one. I then replaced the crappy Linksys with the Asus wireless AP and have not looked back. It almost never crashes (but I can power cycle it if it does) and has significantly better range. It has another cool feature: It has a setting that allows the user to control the mW of transmit receive power. I turned that setting all the way up and magically I can now get Wi-Fi reception all over my house and even outside my house. There is ONE issue with the setup as I have it today. The natural state of the remote controlled outlets is off. So, if my power goes off and then back on, the Wi-Fi stays off until I press the ON button on the remote control. This is annoying but the power doesn't go off that often here so it's rarely and issue. Also, most of my major devices are wired so this will not have a big impact if I am not home. Wireless to me is unreliable but convenient. So, I count on it where required but I prefer a good old fashioned wire to be plugged in if I can. IMAGE COMING SOON! Network SwitchHttp://www.netgear.comSince the Actiontec router provided above only has 4 ports, I knew that would go quickly as I already had more devices than ports. Planning ahead, I bought a Net gear 48 port gigabit Ethernet unmanaged switch. I don't need management because it's just me in the house and I can control the devices I need to manually for QOS. I wanted gigabit because I would be moving big files around (see the entertainment section below) and why would anyone go for less than gigabit? The netgear was intriguing because it was line speed on all ports with a backplane that could handle full bandwidth on all ports. Many people don't know that Linksys saves money by having routers with lower than full line speed backplanes which means the router will hold the packets if it cant transmit them fast enough which translates to a slow network. If you have 48 ports and each can transmit full duplex 1 gb then you need a backplane that can handle 96pb. That's what the net gear has. It's rack mounted, has a good reliability rating, and was a good deal. I'm not an expert on switches so take what I said above as a guideline based on one guys' internet research. Security Camera System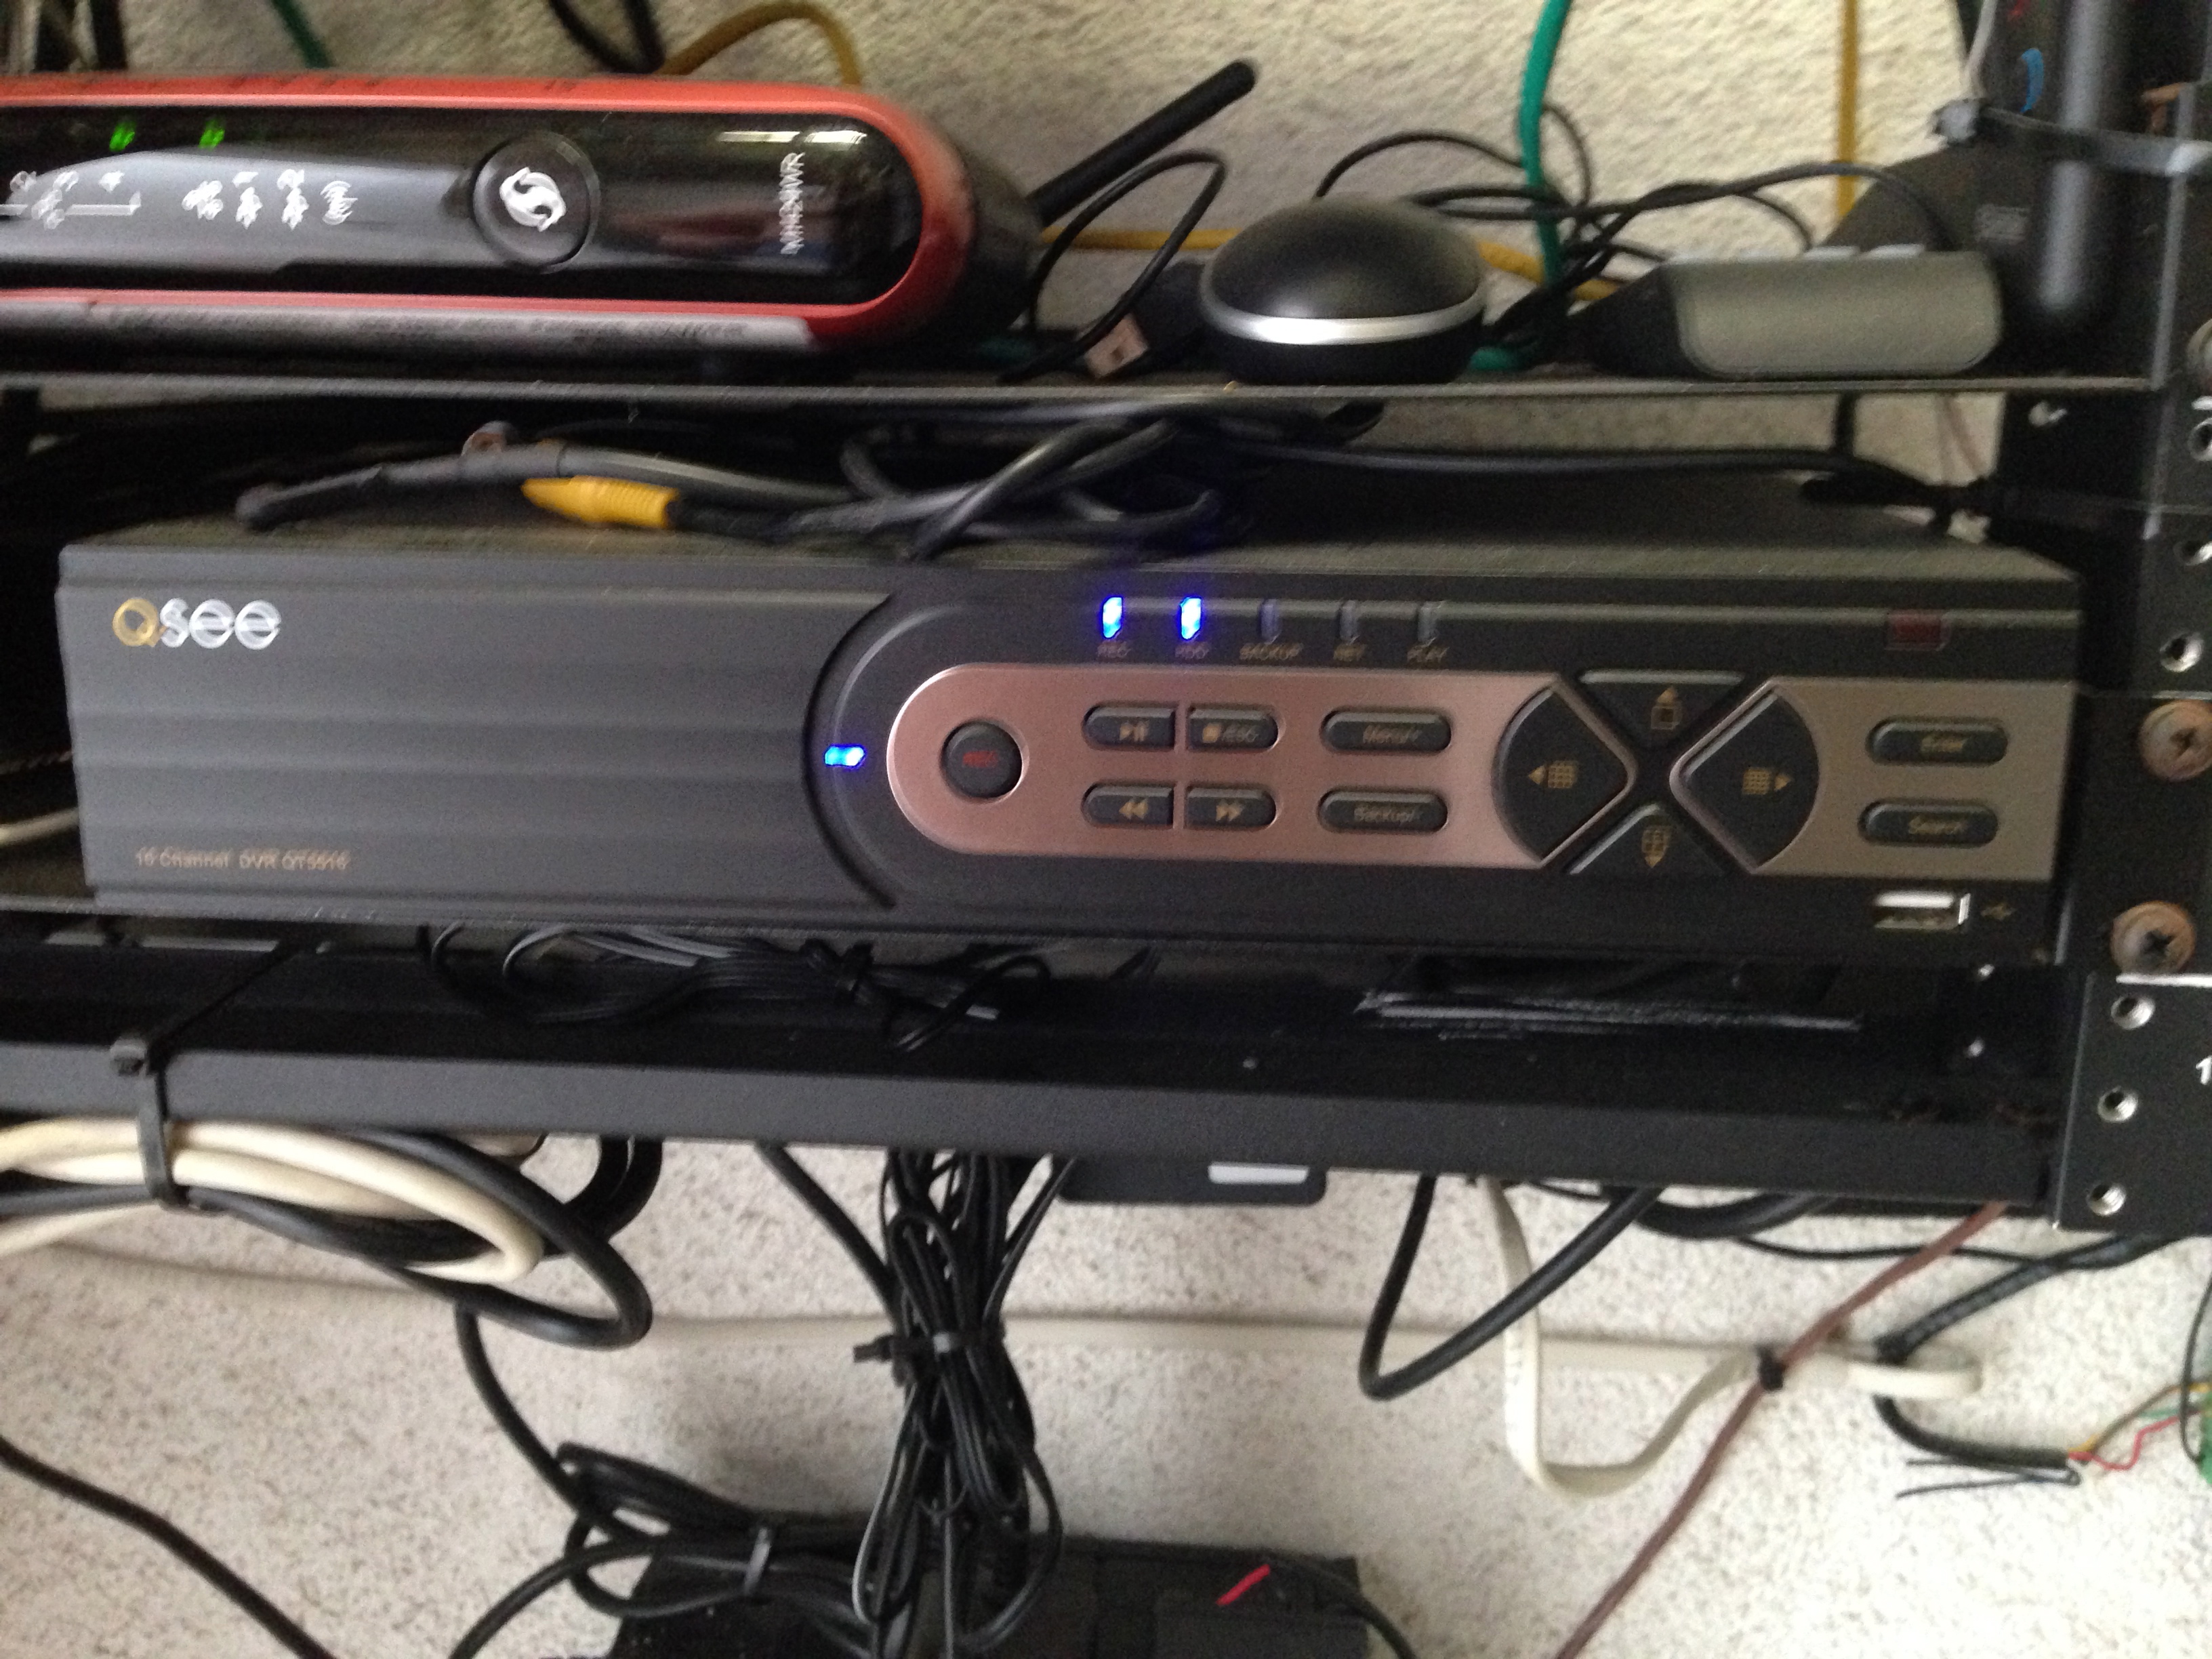 Q-see DVR Included in what I consider the "house" part or structured wiring is a security camera system. I chose to buy a Q-see system which is an affordable and easily configurable (if you know about firewalls and networks) system. Costco had a great deal on them so I purchased an 8 camera system. 6 months later I wanted more, so I upgraded to a 16 channel system and gave my 8 channel dvr to my parents for their house. I chose to have a wired system (vs. wireless cameras) because I don't find wireless reliable, especially something like a security camera. Also, with wireless cameras you still have to run power to each location, so what's the point? With a system like Q-see they include the cables that have a coax and power connector in a single cable which both carries the video signal and power for the camera. So, if I have to run a wire or power to each location, its actually easier to put this combined wire (I'm not an electrician) to each camera location and then I get the benefit of a centralized DVR system that has direct wired (reliable) connection to each camera at all times. The analog cameras included in the system were 700 TVL so the resolution was good enough for what I want- enough to see a face of anyone on my property, a license plate driving by, or my neighbors cat setting off my motion lights. Yes, there are HD systems out there for a lot more money, but this gets the job done. One day I will upgrade. Q-see was not the most highly recommended. Much like offshore technology developers, their menus and systems are not easy to use but highly configurable if you know what you are doing. I was confident I could wade through the menus and make it work (and return it to Costco if it sucks- Yes, I like Costco). Key to this decision was that they did offer a well reviewed iPhone app that allowed remote viewing- The whole point of the system. The system had IR night vision as well which is great because, having cameras means nothing if hey don't work at night. However, since the remote app required a computer/ iPhone/iPad to view, I needed to have a backup plan (goal #1). The Q-see system would be located in a secure location, which would not be easy to walk to and view the connected screen. This is where the VGA cables come in. I decided that each TV device I have would have a VGA input and that input would be used to inject the Security camera signal. On each TV throughout the house, you could just change the input to VGA and be able to view the security cameras. I ran a VGA cable from the network rack (DVR LOCATON) to the entertainment rack where I put a splitter that would carry that signal to each TV (minus the guest room) over VGA. I installed the cameras just under the eaves of the house (too high for anyone to mess with) and carefully planned the coverage to that my entire exterior lot was covered and every major entrance had at least one camera on it. Also, aimed in such a way that the IR would be able to reach the ground and what I wanted to see at night. I expanded the hard drive to allow as much recording time as possible for historical record and in case something happened at my house I didn't immediately notice I could go back and figure out (as happened with my garage door once). Q-see has an issue that I didn't think would be when I started with them. Since I have 16 cmaeras and each camera is wired back to power at my network rack, I needed to have 4 brick power supplies (included with the q-see system) connected to power outlets that then split to 4 cameras each. I essentially had a bundle of wires that looked horrible and was a rats nest. I decided to fis that buy purchasing a power console for the cameras. This device takes a single outlet and plug and converts it to the necessary DV power required by all 16 cameras in a single clean box. I had a few transformers from q-see fail on me, so this was a great way to upgrade the system. I recommend this for anyone with over 8 cameras.  Q-see Power unit The iPhone app and iPad apps have been updated a few times since I started with Q-see. Some good, some bad. They made it much more complex to use, but added way more functionality. This made it easy for me to be able to monitor my house and my parents house in a single screen, but added a whole level of complexity for my parents who just want to click a button and see their house from their iPhones. They should have a "simple" and "advanced" mode in this app for both types of people - me (advanced) and my parents (simple). I had a few issues with bad cameras and cables but Q-see and Costco stepped in and replaced them- Thanks to Costco I have a 2 year warranty also- another reason to like Costco. This is one of my most fun devices since I can get a piece of mind that my garage is closed when I leave, the door is closed and everything is ok at my house even if I am 3000 miles away on a trip. This is real piece of mind for me. Driveway Gates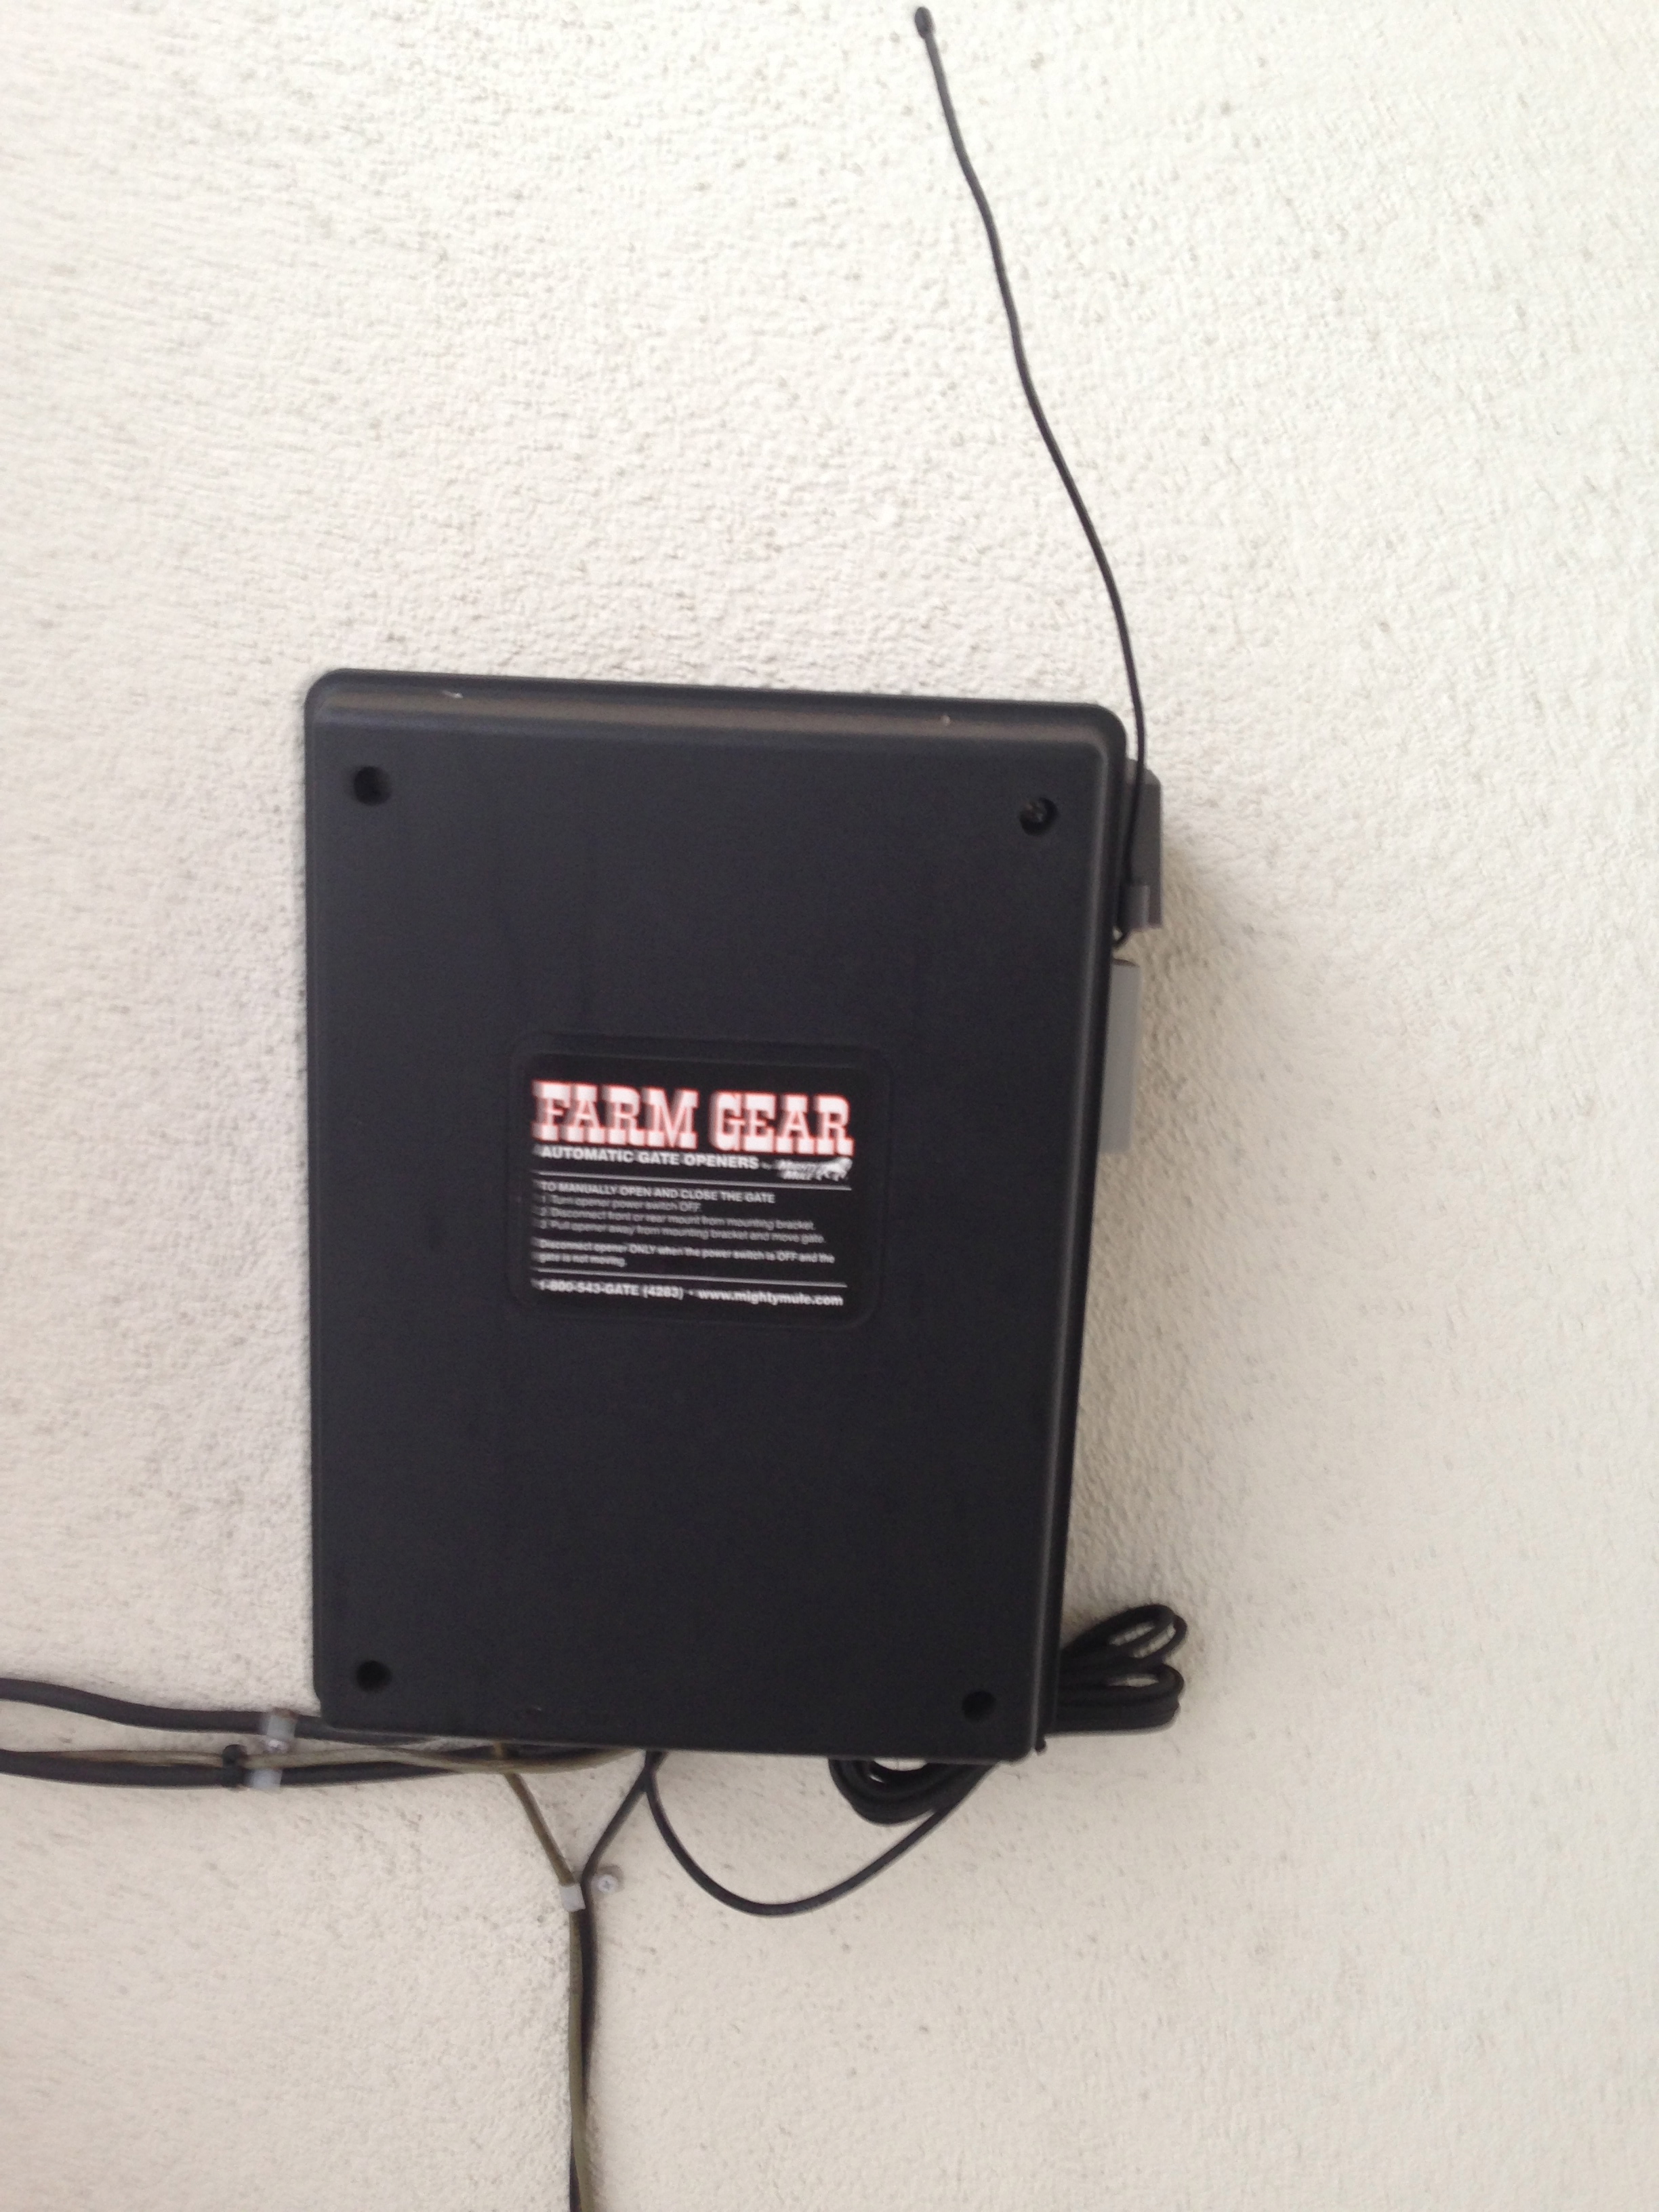
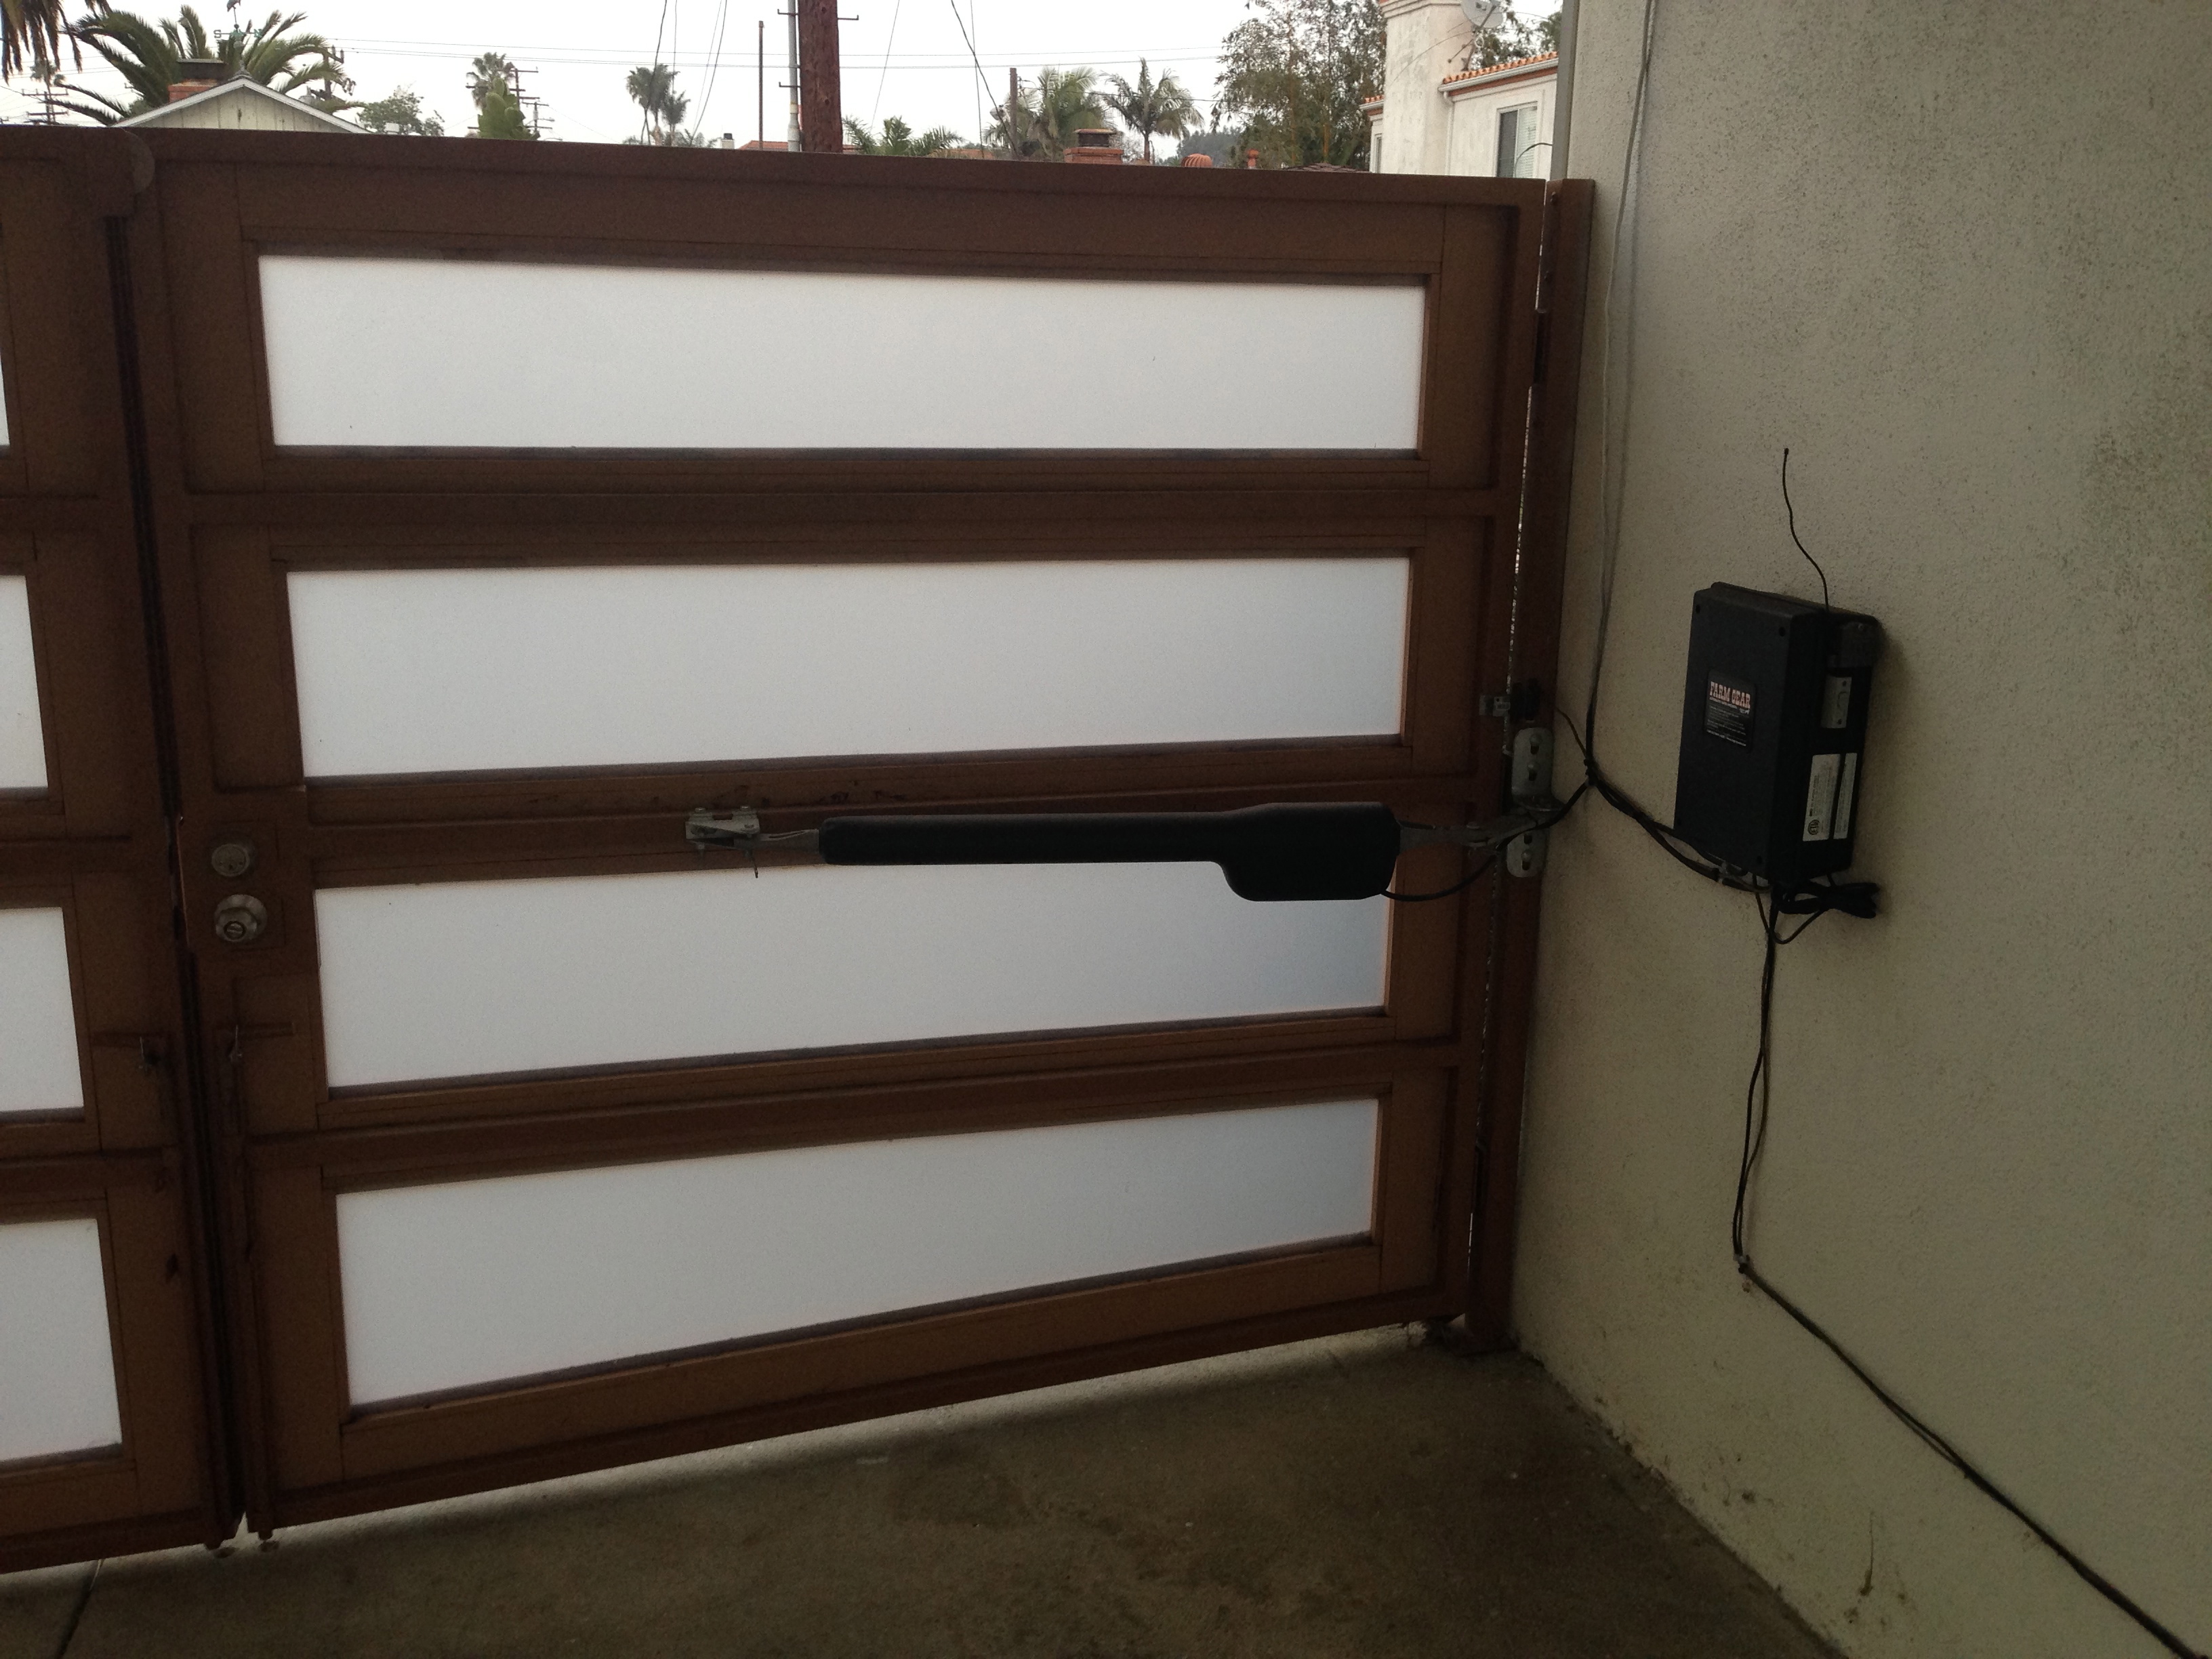
Electric gates control box During the remodel of my house, one cool touch that the remodeler installed (before I bought) was wooden gates on the driveway. Since the garage is in the back of the lot and you essentially drive UNDER the living room it makes the courtyard somewhat secure and the house look good from the street. When I moved they were manual meaning I ahd to get out and open them both by hand, drive through and then close them. I initially looked at putting in a garage door in that space and replacing the gates, but the cost and the change in look (the gates match the front door and the look of the front of the house) made me think twice. My main concern was that I would be driving in and out of that gate 2-5 times a day and was not going to get out and open it manually each time. No chance in hell. So I needed to find a way to make the gates move by remote control. In comes some more internet research and a company called Farm Gear. They make a complete system that allowed me to electrify gates on a remote control. Even better, Costco sold them. The system could be self installed and included all the linear actuators, electronics, wire, etc. It would all be hidden behind the gates (when looked at from the street). They even had options for the necessary push to open (since the driveway slopes up and the gates are cut at an angle, they needed to go out. Once that was configured and ordered I was nervous, but excited that it may work. I installed this system myself with some custom made brackets so I did not damage the wood fronts of the gates. Everything went in as advertised. It was not that hard to setup. It did require one call to them to help with programming since gates had to open in sequence. Gate VideoA few issues I deal with. On super windy days, (I mean 35 mph winds) the gate facing the ocean will sometimes get too much resistance from the wind (since the gates are solid wood) and I will have to get out and push them open manually. This is a concession I am willing to make on days with crazy wind (which are few thankfully) since the system cost me about 800 and does exactly what I wanted every other day. Another issue I dealt with was that the gates took about 20 seconds to open. This was more annoying that anything since I would pull up to my house and prepare to back into the driveway (I always back in for visibility while pulling out of the driveway reasons) and block the street. I would have to wait 20 seconds for it to open. So, I tackled the task of figuring out how to make this work better. I figured that I could integrate the gate system with my phone/ internet so that when I am around the block I could press the button and open the gate and it would be open by the time I pulled up. Thankfully, the Farm Gear guys had though about this and included a simple replay on their motherboard that when closed would activate the gate. This is where the iobridge comes in. Iobridge is an "internet of things" device that allows you to control, over the internet, real things. It's extremely configurable and includes an iPhone app and the infrastructure to make it all work. After getting one to play with and the necessary modules that it needed, I began to play. The integration of iobridge's simple relay and the farm gear motherboard made this extremely simple. I press a button on my phone and an internet signal is sent to the iobridge in my utility room to close a relay which sends a signal down a wire to the farm gear control panel telling it to open. Since the ioBridge module worked perfectly and had 4 total accessory ports (of which I was using only one) I started to think what I could use those other ports for. I then decided it would be nice to have a monitor in the iobridge application that would tell me if the gate was open or closed. With a simple magnetic switch from the local electronics store, some wire to the iobridge, the iobridge iPhone app now tells me if the gate is open or closed right in the display. Ok, I still had 2 ports left. The whole Iobridge exploration started with a nerd (I use that term lovingly) like myself using the iobridge to open and close his garage. So, I ordered another simple relay, soldered it into a spare garage door opener in my utility room and abracadabra, my garage door was now internet controlled... The entire cost of this gate and garage automation was $190. $100 for the iobridge, and the rest for the relays and parts. 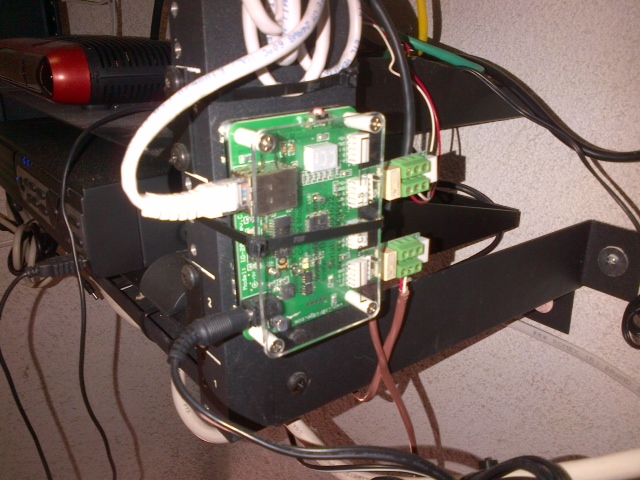 http://www.iobridge.com/ The IObridge control module What does that mean for me, now? Well, when I am a block away, I pull out my iPhone, pull up the iobridge app and press two buttons on the large display. 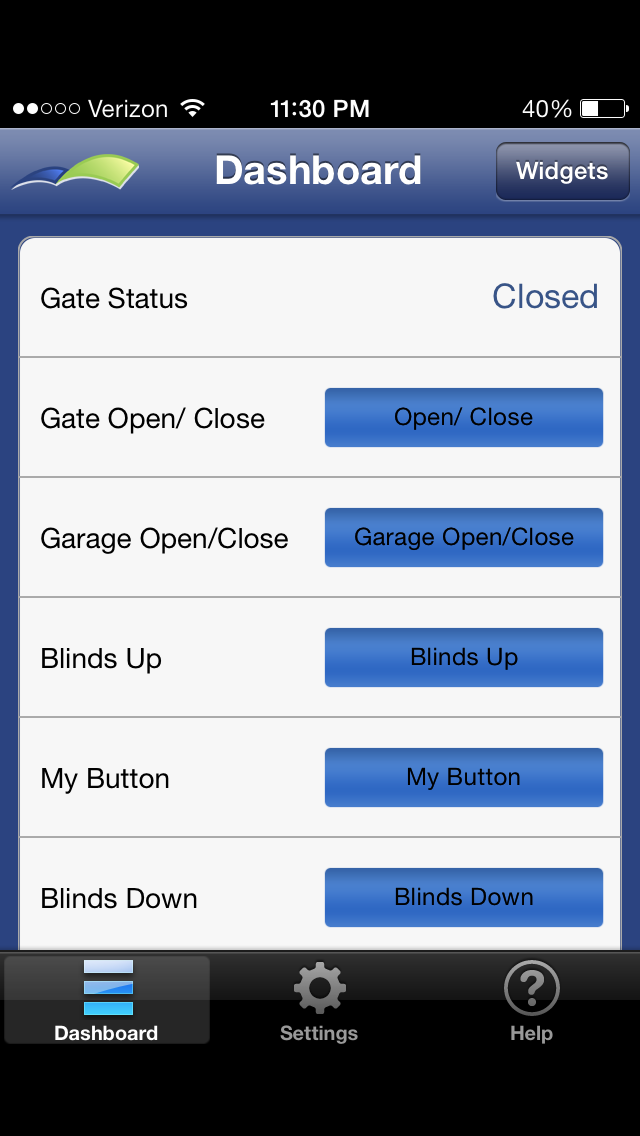 THE IOBRDIGE APP SCREEN ON MY IPHONE Then 30 seconds later when I pull up to my house my gate and my garage are wide open. I just put it in reverse and back in without getting out or even thinking twice. Oh, and I decided to play around with in the iobridge interface and I found that since I had a sensor that noted if the gate was open and closed I could send myself a email notice whenever it opens or closes. I setup a special email account which gets "house" emails and every time this gate opens I get an email sent to this account (with a timestamp). That way I know if my housekeeper, Gardner, friend or family comes or goes at my house. Coordinated with my q-see system I can tell exactly when someone comes in and look at a video of that in the playback by times VERY COOL. I also used it to count how many times I used it during the first year! 1250 Times... I would say it was worth it for under 1000 bucks. This is the type of magic I always wanted in my house and this project really was like the thing that got me hooked. I still have a 4th port on that IO bridge I am trying to find a use for! BlindsI have 3 large windows in my living room that have a little view of the ocean. I had some blinds quoted from a local company and the numbers were astronomical for manual horizontal blinds. I decided I was not going to play that game for some string and wood. I knew I wanted simple white horizontal wood blinds so I found some places online to buy these much cheaper and install them myself throughout the house on the regular windows. I, however, was unsure what to do for the windows that faced the ocean. So, for a few months they were not covered. I finally decided what I wanted to do: I wanted motorized blackout blinds. This was a complex decision. From the street there is a very limited view inside my living room which is good. As I said, the view is great so having blinds that block the view sucks. I am lazy and thus would not open or close them often- so I would be paying for a view I wouldn't see often. With motorized blinds I could press a button and block out the sun or the few angles from the street, blackout the room to watch my projector during the day, basically have privacy when I want it and a great view when I want it without having to walk around and pull strings. I searched online and found Blindsgalore.com had a great deal on motorized Bali/somfy blinds with white (the house trim color) for about $500 per window. One decision I had to make was battery powered or wired. Since I always wanted it to work and didn't want to play with replacing batteries, I opted to spend the extra effort to wire them in. Once installing the blinds (6 screws- simple), I just had to drill a small hole through the window trim header and feed a wire down/ up from the attic. After procuring the right bits that would cover the 18 inches between the trim (the right tools are everything) and the attic space, I was able to feed the wire and put the transformers in the attic connected to the outlets the electrician installed (again, thinking ahead). What that means for me, is with the push of a button 1,2 or all 3 blinds go up or down. Gate VideoYes, I'm lazy. But, more lazy than you are thinking right now. Because I thought about what I did with my gate and figured for a few hundred more bucks I could have a Iobridge device that opened my blinds from my phone too with the SAME app. So, I bought a second remote control and an Iobridge with the necessary relays. I asked my soldering buddy (he's a serious F'in solderer and did some of the best work I have ever seen wiring) to wire up the contacts on the remote control. 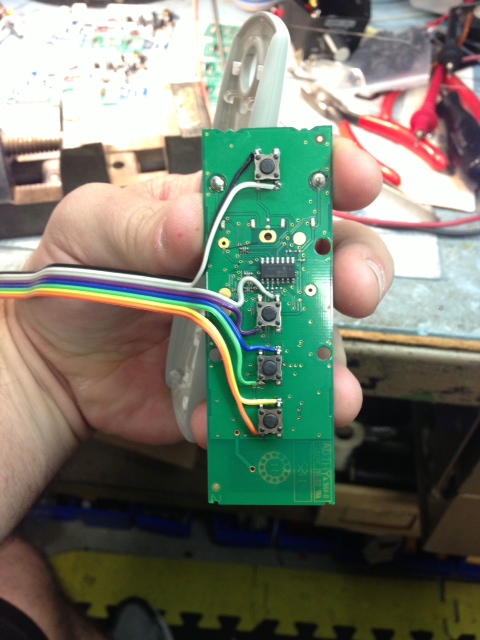

This is the Blind Remote taken apart to be wired up to the IoBridge and then mounted where I can use it via the IOBridge and also as a wall switch. I hooked the remote up to the Iobridge and am now able to control my blinds anywhere. What does that mean? If I leave the house in the morning and forget to close the blinds, I can open the app and close the blinds to avoid sun damage to my floors or furniture. When I press the button to open my gate, I can press the 3rd one down and have my blinds open at the same time so when I walk into my living room 5 mins later its bright and sunny and I can enjoy the view. I'm just waiting for siri to get her freakin act together so all I need to say is "open sesame" and my gate, garage and blinds all open when I get home. If Apple ever opens up the API, that's first. And screw you apple for not doing that yet. I want IPhone macros! Few comments on the IO Bridge stuff. They have a very robust API, but it requires hard programming knowledge and some hosted servers if you want to the custom integration that they offer. I just wanted a simple way to activate these devices, so I use their stock iPhone app with the "ugly" buttons. Also, as I stated above, automation is a nice to have not the only way to make this stuff work. The blinds have their own coffee table remote control and wall switch in case the internet crashes or the iobridge stops working, I will still be able to open my blinds. The garage obviously has its standard garage door opener in my car to use in case the internet goes down or the iobridge crashes. The Gate has its own remote control... yep you guess it, in case the internet goes down or the iobridge crashes. I even put a keypad outside to open the gate so my housekeeper or family can get in. All of the base systems (garage door opener, gate, blinds) are standard from the manufacturer and the iobridge gives me the automation control from my phone no matter where I am. Completely awesome- I use this app several times a day. I'm working on a few more ways to use iobridge in my house, so more to come on this one. Thermostat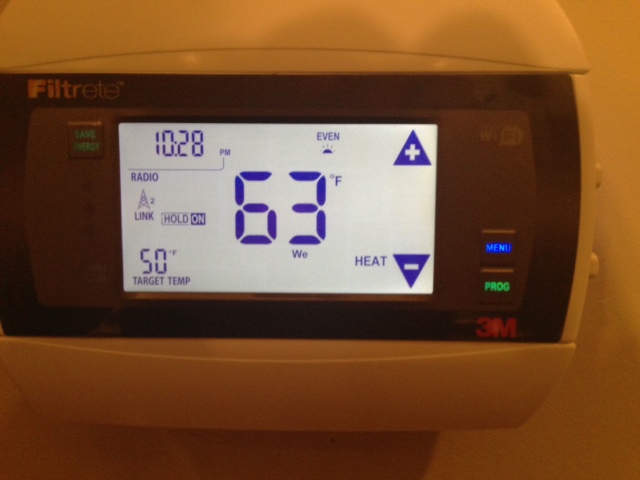
For those of you that read this and don't directly know me, I live in southern California. We don't have a ton of temperature issues here. I live near the beach, so I don't even have Air Conditioning (I just open a window). What I do have is a gas furnace for when the temperature falls below 60 (and I use it at 59!!). I wanted a way to be energy efficient with it, so it wasn't running when I wasn't there and I had direct control. After a little research I considered the Nest thermostat but really didn't want a thermostat with a mind of its own. After some research I found that 3M had a thermostat for sale for only 120 or so bucks that had a Wi-Fi module. It required a thermostat with a C-wire for power (which I wired up on my old thermostat easily). Now, I would have liked this to be a wired thermostat, but I realized that there is not an inexpensive one out there that met my needs. This one has a GREAT iPhone app. It allows you to program the schedule (if you want it to run on a schedule) as well as it offers you remote AND direct control of the thermostat from the app in a great interface. Perhaps the most simple installation was this device. It now allows me to turn the thermostat on and off directly from my phone. 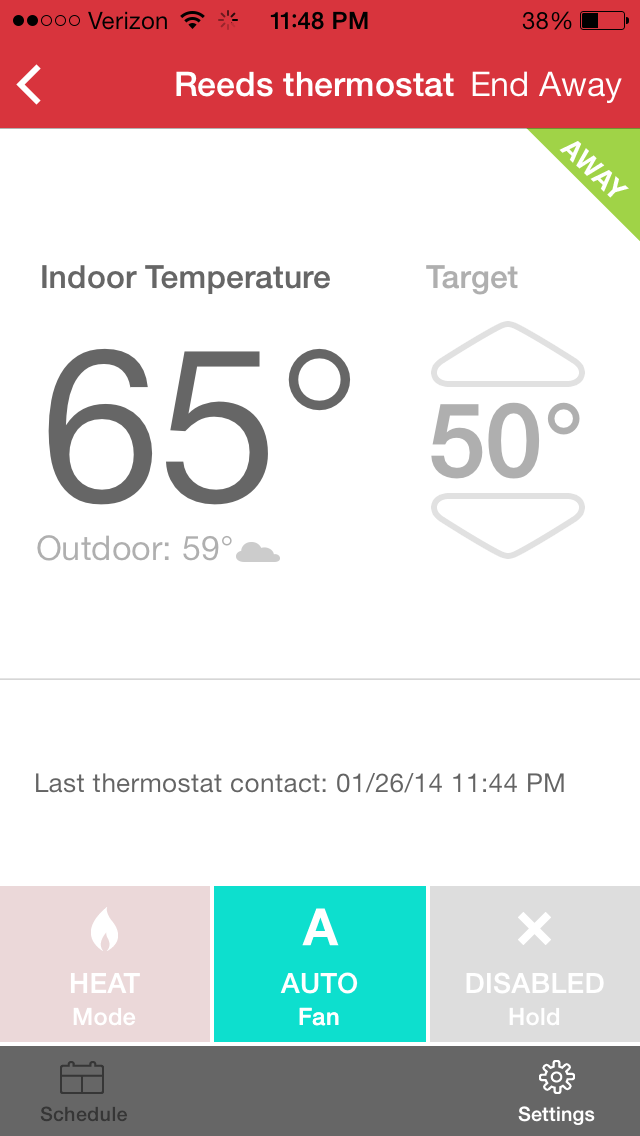
My use case is the following: Its cold and I leave work (about 30 mins away). On a cold day, just after I leave work I pull up the app and press it ON and the house begins to heat up. I can look at the thermostat temperature to see if that's even necessary since it shows the inside temperature. Then, by the time I get home its warm. And what's nice, is when I leave it on and I am home it follows the schedule I programmed (turn down at midnight and up at 7:00 am)... A few cool ways I use this (since I am the only one living in my house): If I go to bed and I'm not cold I leave it off, but lets say I wake up and I'm cold. Well my phone charges right next to my bed, So I reach over and grab it click the app open and my thermostat kicks the furnace on- a few minutes later my warm is room. Another cool use- is my bad memory. I sometimes forget if I left the furnace on or off. Now I just pull up the app and can turn it off to be sure. This is serious piece of mind for someone with a bad memory. So here's the negative of this thermostat. It's NOT easy to setup. It took me a bit to set this up and I had to rely on some tips from folks on the internet. Thankfully people out there felt my pain and had the same pains and were able to give tips. I have unique Wi-Fi network requirements (not outlined for security reasons) so it added complexity but was worth it once it was setup. I would have, as I say above, preferred if it this was wired not wireless. So, if my power goes out and the wireless turns off and I m not home to turn the AP back on the thermostat goes offline until I get there to turn on the Wi-Fi. Annoying but as I said the power doesn't go out that often. I find that the thermostat- sitting in my living room/ kitchen- is also a great way to see if something is wrong with my Wi-Fi. It has a red light that blinks when it loses connection to the Wi-Fi so short of my trying to browse the web that's a good indicator that something is wrong with my Wi-Fi (i.e. time for a reset). And again, the console meets the goals outlined above- if the internet dies, or my phone breaks, I can walk up to the thermostat and press a button the old fashioned way to make it hotter or colder. And BONUS it keeps the schedule on the thermostat itself so even as a "dumb" thermostat its got the same functionality as the thermostat I had in my old place minus the annoying switches to program the on/off times. Remember this is a free app and a $129 thermostat. Great job 3M for OEMing this and for Radio Thermostat for developing it. Irrigation Caddy (sprinklers)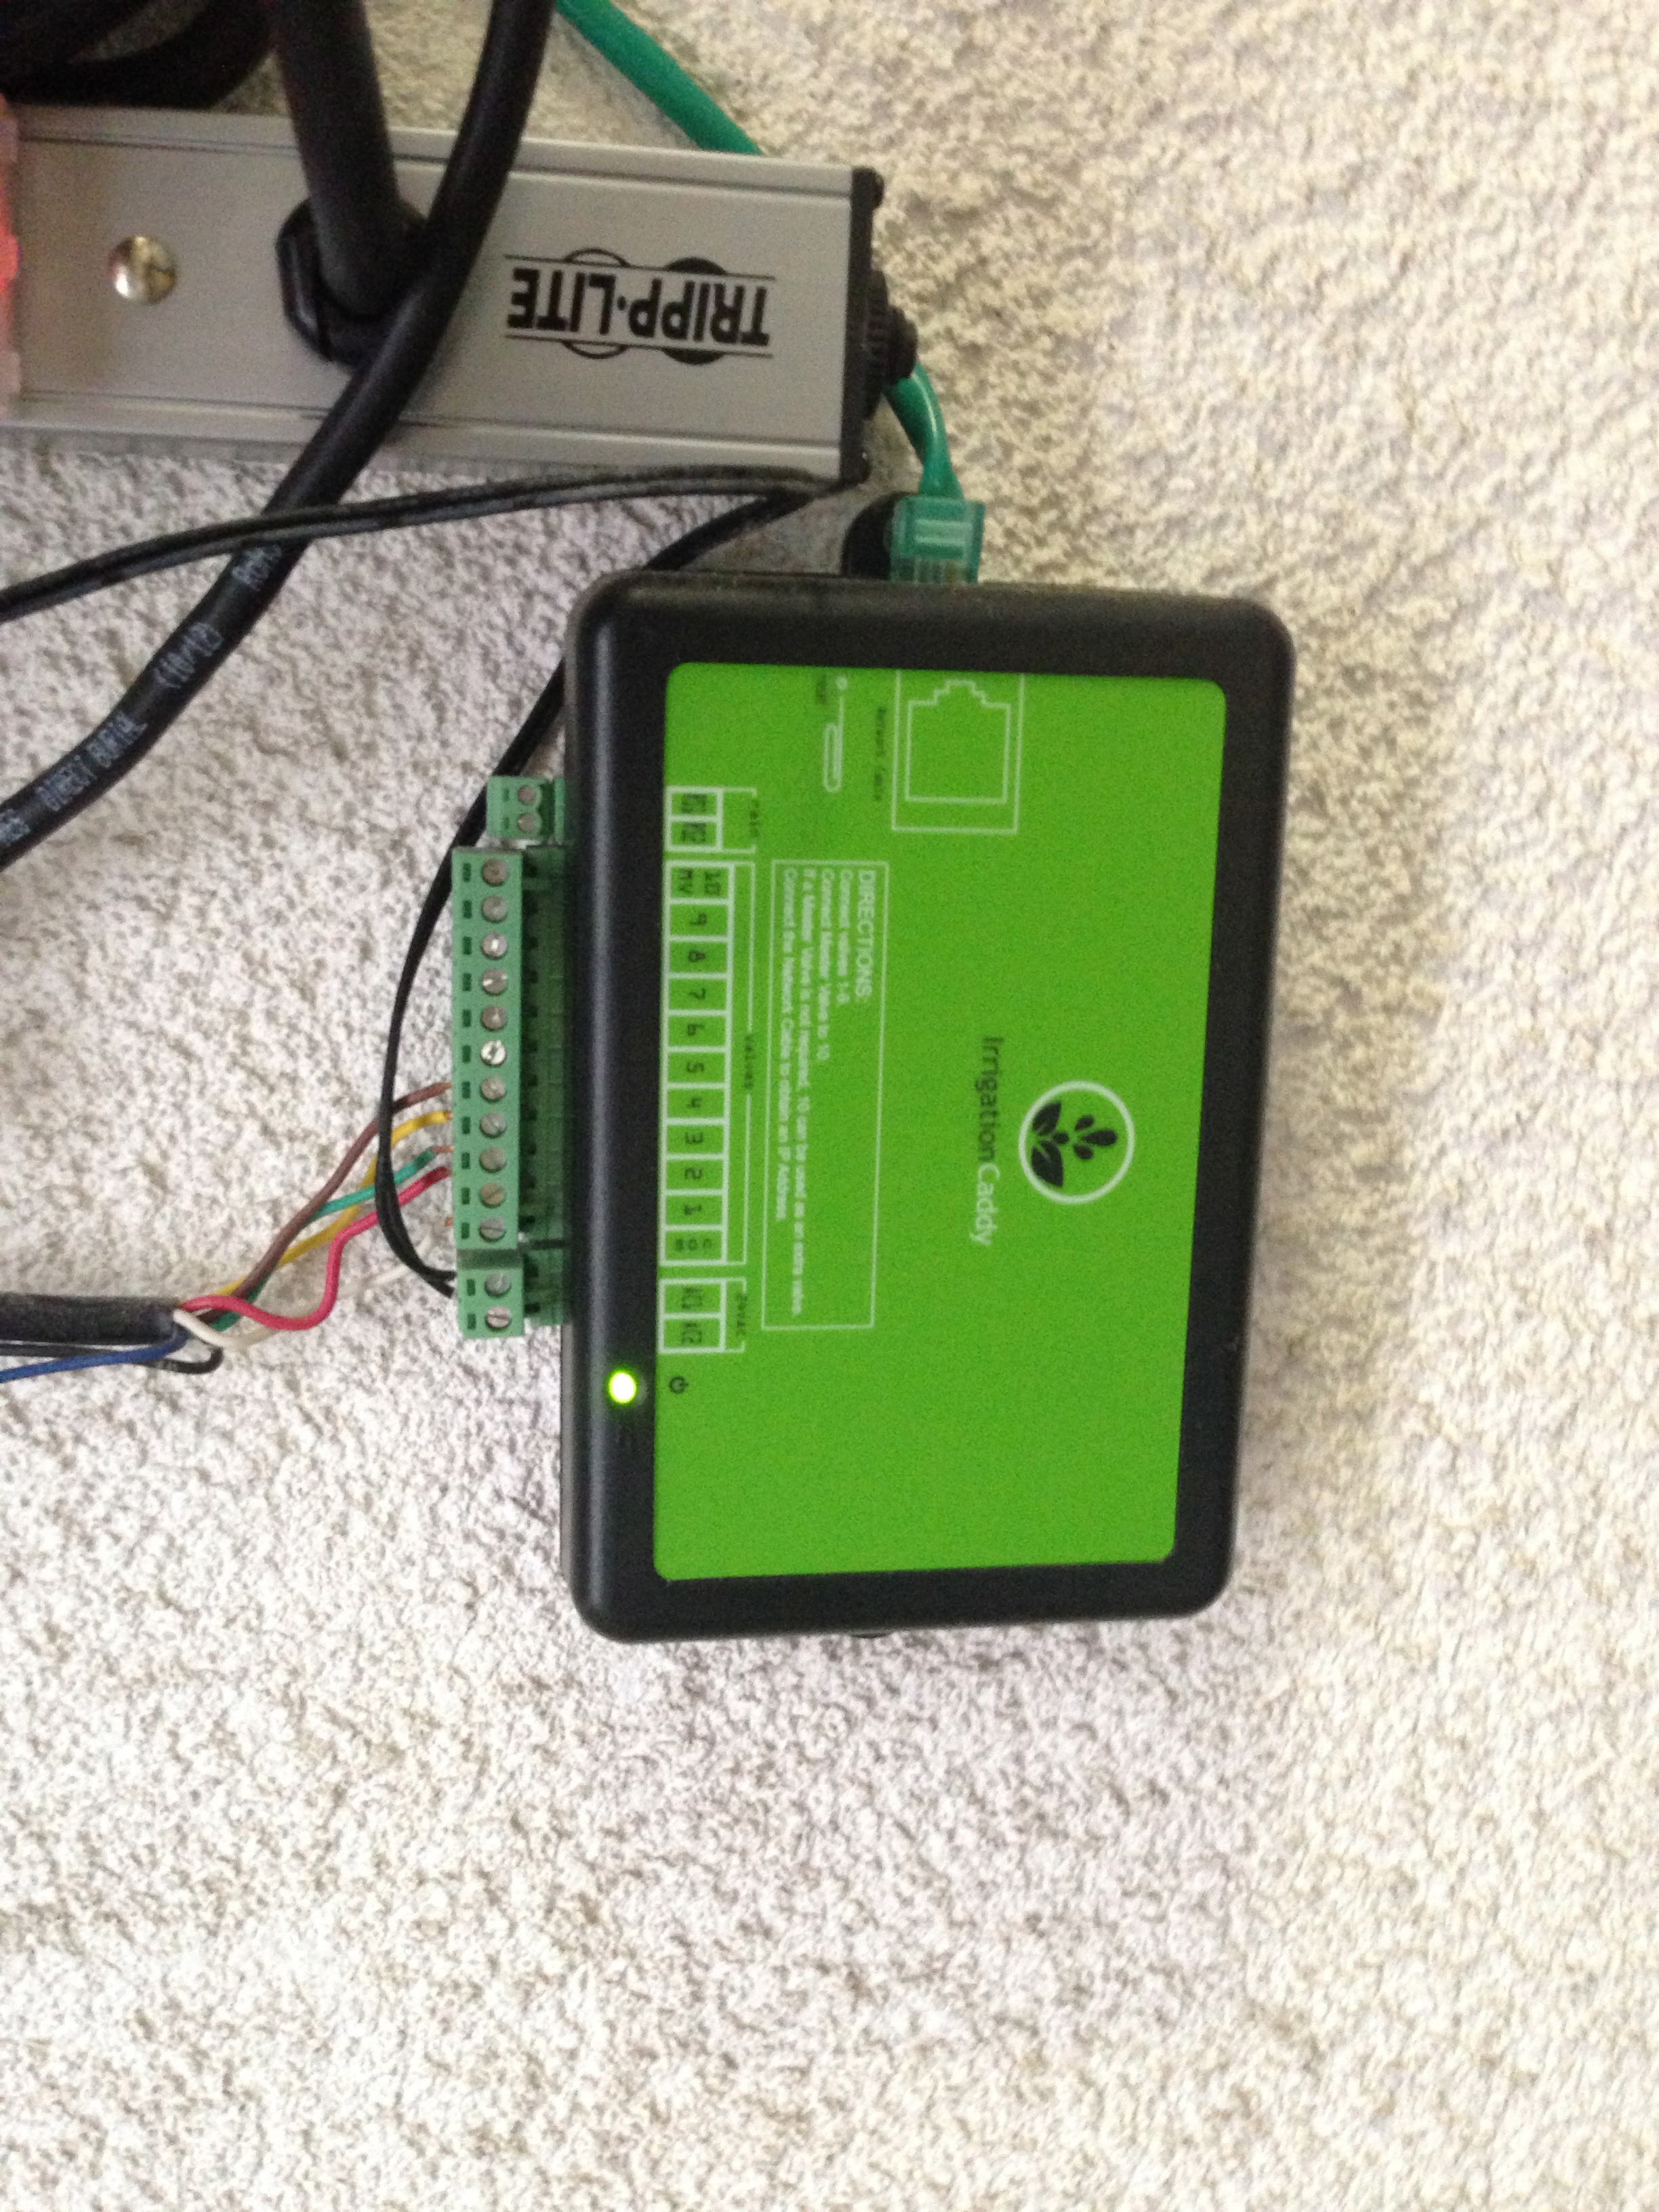 Irrigation caddy control box As I do travel for work and as stated above have a bad memory I wanted to give myself control of as much as I could safely from wherever I am. After I had moved, I was traveling to Chicago for a week for work and had my old sprinkler system running on its normal program. Well, I come home in a cab from that trip to find water pouring out of my driveway. Turns out the solenoid valve on my sprinkler stuck (not following the commands of the timer) and had been running for 6 hours flooding my backyard. Now, I would have caught that on my security cameras, except that I was on a plane with no internet access (remember those days when you had no internet on a plane?). I began to think about what would happen if I had seen it on the security cameras- I could have called someone to run over to my house to turn it off. Smart people will tell me that the system I am about to describe would not have fixed this issue. As I just described, the solenoid was physically stuck. What this situation exposed was that I had no control of my sprinklers. What if it was raining and I wasn't home- they would just run. So with that, I began looking around for something that would give me the ability to control my sprinklers remotely and more easily (programming sprinklers sucks). I was only looking for something with a webpage I could log into. That's when I found Irrigation Caddy. This is a magic box as far as I am concerned and almost identical so the Iobridge in the sense that its just a series of relays that the box controls via an internal schedule and I can control via an app from my phone. However, Irrigation caddy is in a package (app and interface) that is well developed, well thought out, and easy to use specifically for sprinklers. Greenskeepers must go crazy over this! I simply had to replace my previous sprinkler timer with this small box and connect to the same wires to the solenoid and had a network connection on the other end. Note the wired part of that comment- Reliable! During the install I chose to relocate the control box to inside the utility room so it was out of the elements (I guess if that's not an option for you, you could just get a weatherproof box). Setup was not as simple as it could have been, but once configured, the web interface was easy to access and work. Then comes in the app that allows me to access the ICaddy from my phone and if it's raining, turn it off without having to go run down to the timer and flick a switch. Or, as I showed above, if I am out of town, I can just flick the switch from japan if it's raining in LA (ill see it when I check my cams). The box has no buttons or controls on it, which you may think violates my rule on redundancy. However, since my gardener can turn on each sprinkler manually at each valve to test them, the timer is just a way to do this automatically and on a schedule. I.e., worst case, the Icaddy fails, I could turn the sprinklers on by hand when I have time. Also, It doesn't require an internet connection to operate since the schedule is stored on the device itself meaning it will run regardless of a network connection. 
I just purchased a $20 rain sensor option, which allows me to mount on my house and plug in a rain sensor which will automatically turn the system on/off depending on the amount of rain it detects. I haven't mounted that yet, but its simply two wires and a whole bunch of automated function. One of the most annoying parts of sprinklers is programming them. I remember my dad spending hours doing this when I was a kid. Then, when I grew up, I would spend hours reading manuals on turning dials and looking at tiny one character LED displays trying to make sure it would follow my commands and schedule. If the only benefit for me of the Icaddy is that it allows me to easily program the sprinklers, its worth it! It's a simple web interface that shows when the programs will run (and you can have multiple programs preset) and for how long VISUALLY. Another cool thing is that I can use the iPhone app to trigger a zone. Great feature when I am fixing or aiming the sprinklers on the weekend. I just click the button on the iPhone, put it in my pocket, adjust the sprinklers, pull it out of my pocket, turn off the zone and move on. Now, the 12 year old in me has had some fun with this one too. I have logged into my security camera system and waited for someone to bring their dog by my house and allow the dog to crap on my lawn. I will then trigger the sprinklers and watch the guy and his dog go running!. Eventually the dog or the human will learn. Synology
As I said above, the Iobridge was the coolest home automation device I have. The Synology is the coolest, most useful piece of electronics I own and I'm only using it to 50% of its capability. Fundamentally, a synology is a Network Attached Storage (NAS) device. It's got multiple hard drives in it and its attached to the network for you to put files on. But the folks at synology, with software, have turned these devices into essentially a IT department/Custom iCloud/ your own internet in a box. The physical device is a simple, stylishly designed, box that holds hard drives with a small Linux based computer embedded. It's the power of the small computer that the folks as synology have unlocked for the guy like me who doesn't use Linux and doesn't have the time to be the actual IT guy. Through a simple, well designed, multitasking web interface I can do any number of these things:
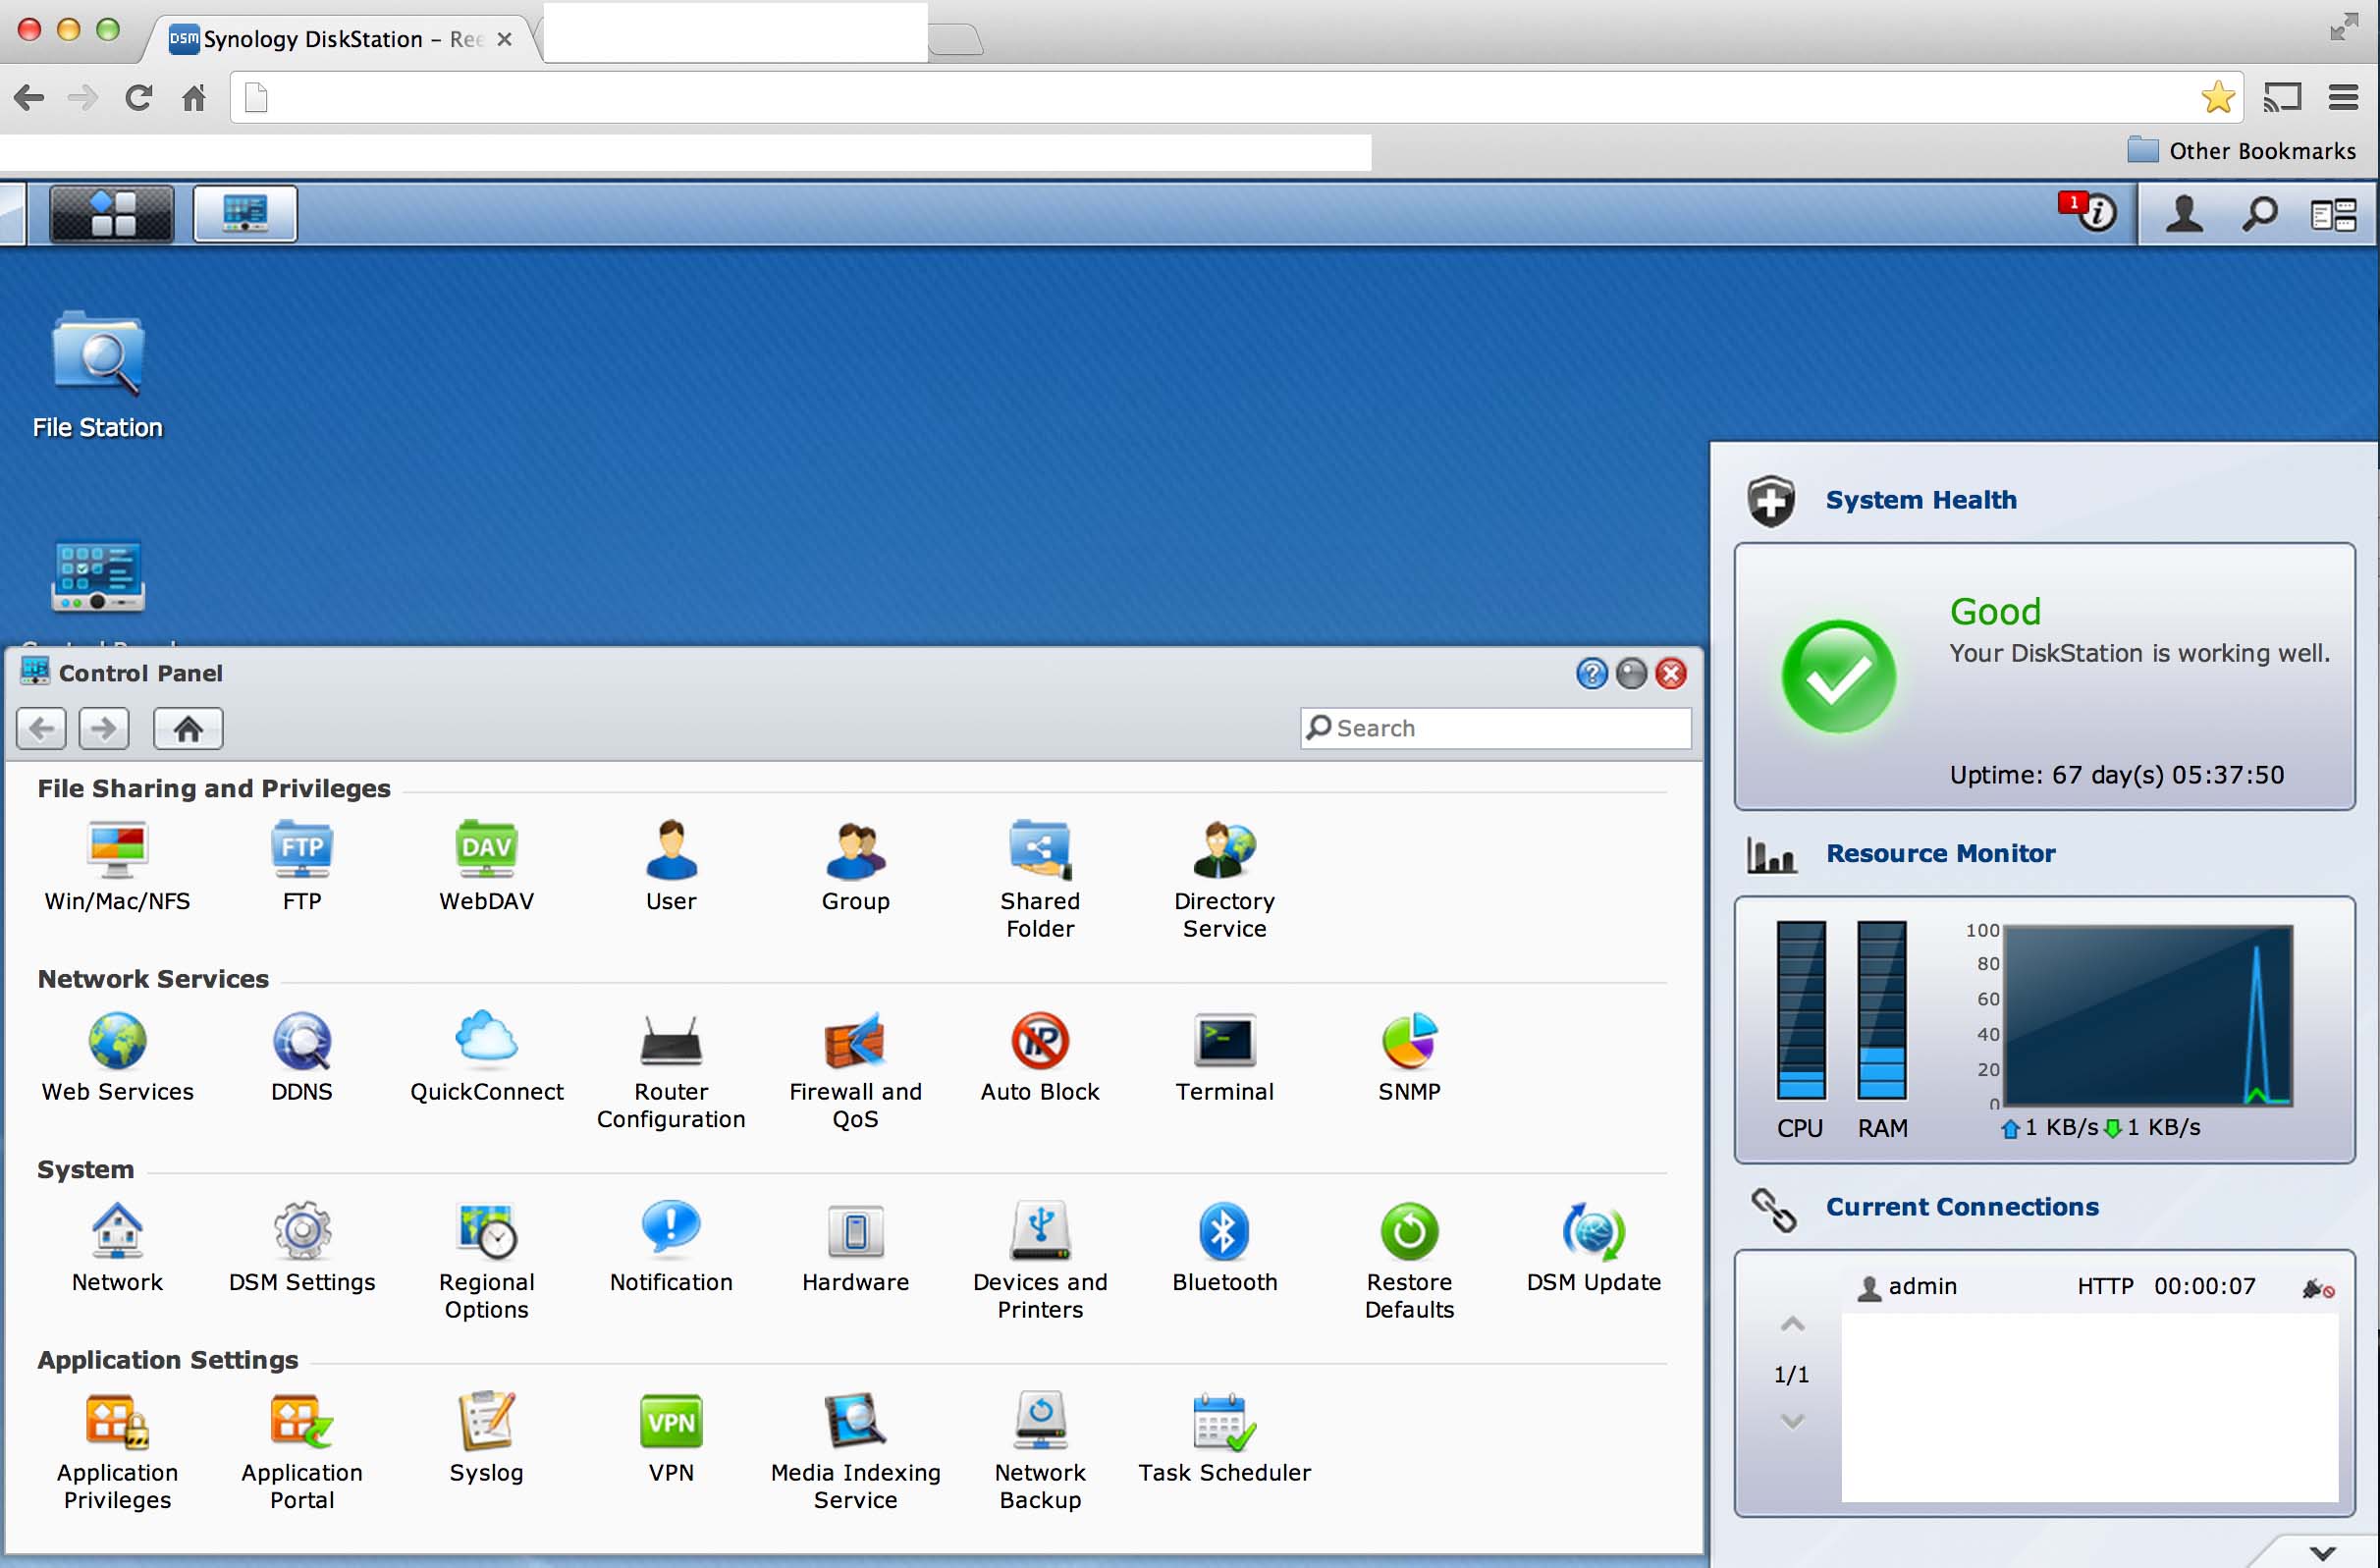 DSM (Disk Station Manager) Home screen with the control panel window open Without boring anyone about how I set it up, I will say that I use it mostly to store my large movie collection (digitized DVDs/ Blu-rays/ TV shows, etc.) so I can access them from anywhere I am in the world (and since I have fios with a fast upload pipe- I can stream to myself) or locally to any device that can play content (which will be explained later). I can access my data files and documents, pictures, etc. wherever I happen to be in a redundant LARGE hard drive. For those of you NON-technical types that stumbled across this site, redundant means that if one hard drive fails, I don't lose my data. I remove the failed drive, replace it, click a button to rebuild and go on with my life - my data still in tact. That's important when you have stuff you don't want to lose like pictures and tons of content. I actually have 2 Synology devices. My original 4 hard drive DS409+, I use as the main house gateway and for downloading torrents, VPN and hosting webpages for development. This holds some data and mostly serves as a temp storage location. My newer Synology (DS1812+) is an 8 bay device which (currently) has 6- 4 tb hard drives in it for a total 20 TB of usable storage. This serves as my main content storage for all of my "stuff" including most of my movie collection, music, etc. What great is as I fill up the drives, I can simply plug in a new hard drive and add it to the current volume without reformatting or losing any data. This device is what makes all of my digital video streaming possible. It's the central location that is ALWAYS powered on to be accessed locally or remotely. The great thing about this is that when its not being used, it powers down the hard drives so they don't spin. Powering them down saves power and lengthens their life. As I said, I am only using this about 50% of the functionality of this device. Much like apple, they created an APP store they call the "package center" where you can install new apps (mail servers, VPN, media centers, etc.) with one click for FREE. Someone with Linux skills out there put the package together and pre configured the software for the synology thus eliminating the need for me to figure out how to use Linux. It's also an amazing graphical UI experience. This software (they call the DSM pictured above) is what makes this device an absolute must for any technology guru out there. If my house was burning down and I could grab one thing, My synology would likely be what I went for. Other Stuff
There are a few other things that I installed that don't warrant their own section so I will put them here. So, in typical "me" fashion, I installed this in my Livingroom. The reason, because its cool to press buttons on remotes and have blinds, screens and lights all change around you. http://www.lutron.com/en-US/Products/Pages/StandAloneControls/Dimmers-Switches/MaestroIRDimmer/Overview.aspx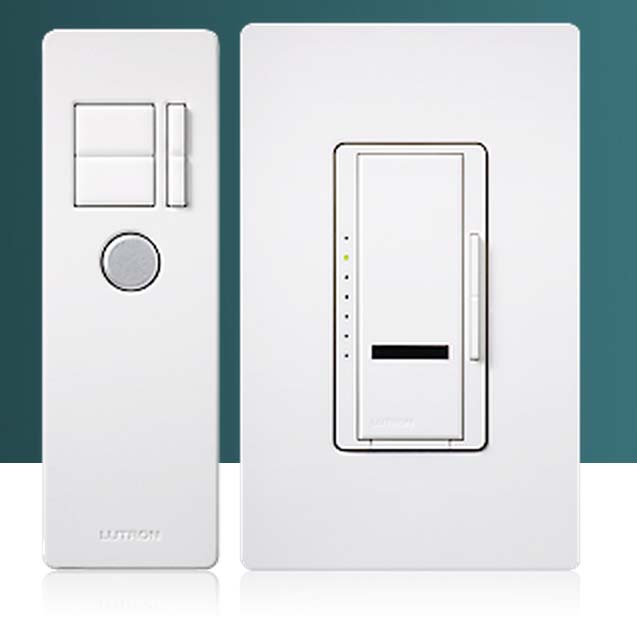 THE ENTERTAINMENT SYSTEMThis is the Entertainment rack located at the back of my living room. Everyone likes to remind me that this is "ugly" as if I was blind. I know that. My plan once everything is more stable is to have my cabinet guy come in and install a matching cabinet around this box that essentially hides it from view. More to come on that. I am a guy who loves watching TV and Movies. My goal was to build a system that was hi-fi enough where I would have no need to go to the movie theater. The theater, while a fun experience, has become something of an expensive and no longer fun experience. I cant "pause" it if I want to go the bathroom, I need to deal with people who don't turn of their cell phones, I have to listen to other people talk over the movie, etc.. Basically, other people make the movie going experience no fun. So, my desire was to build a theater that made it so I didn't have to go the movies and would be missing as little as possible. A few things stand out when you have a goal like that- screen size and sound quality. ProjectorThe basis of my movie experience is the Epson projector. Disclaimer- I work for Epson and did not pay for the projector. Instead I get the latest projector and, through my prophetic writing style, provide my colleagues feedback (good and bad) about what's working and what's not. Today, I have the latest 3d projector we have in stock- the Powerlite Home Cinema 5020Ube. This projector is simply put, BAD ASS. I have had projectors starting with our 8100 over 9 years ago and seen the quality and features really develop to something that I consider to be better than a theater. I have 3d, just like a theater, a 96" screen (large like a theater), quiet operation (low fan noise), and I am sitting on my own sofa. The projector is easy to use, doesn't require any maintenance or work and just works and looks great. 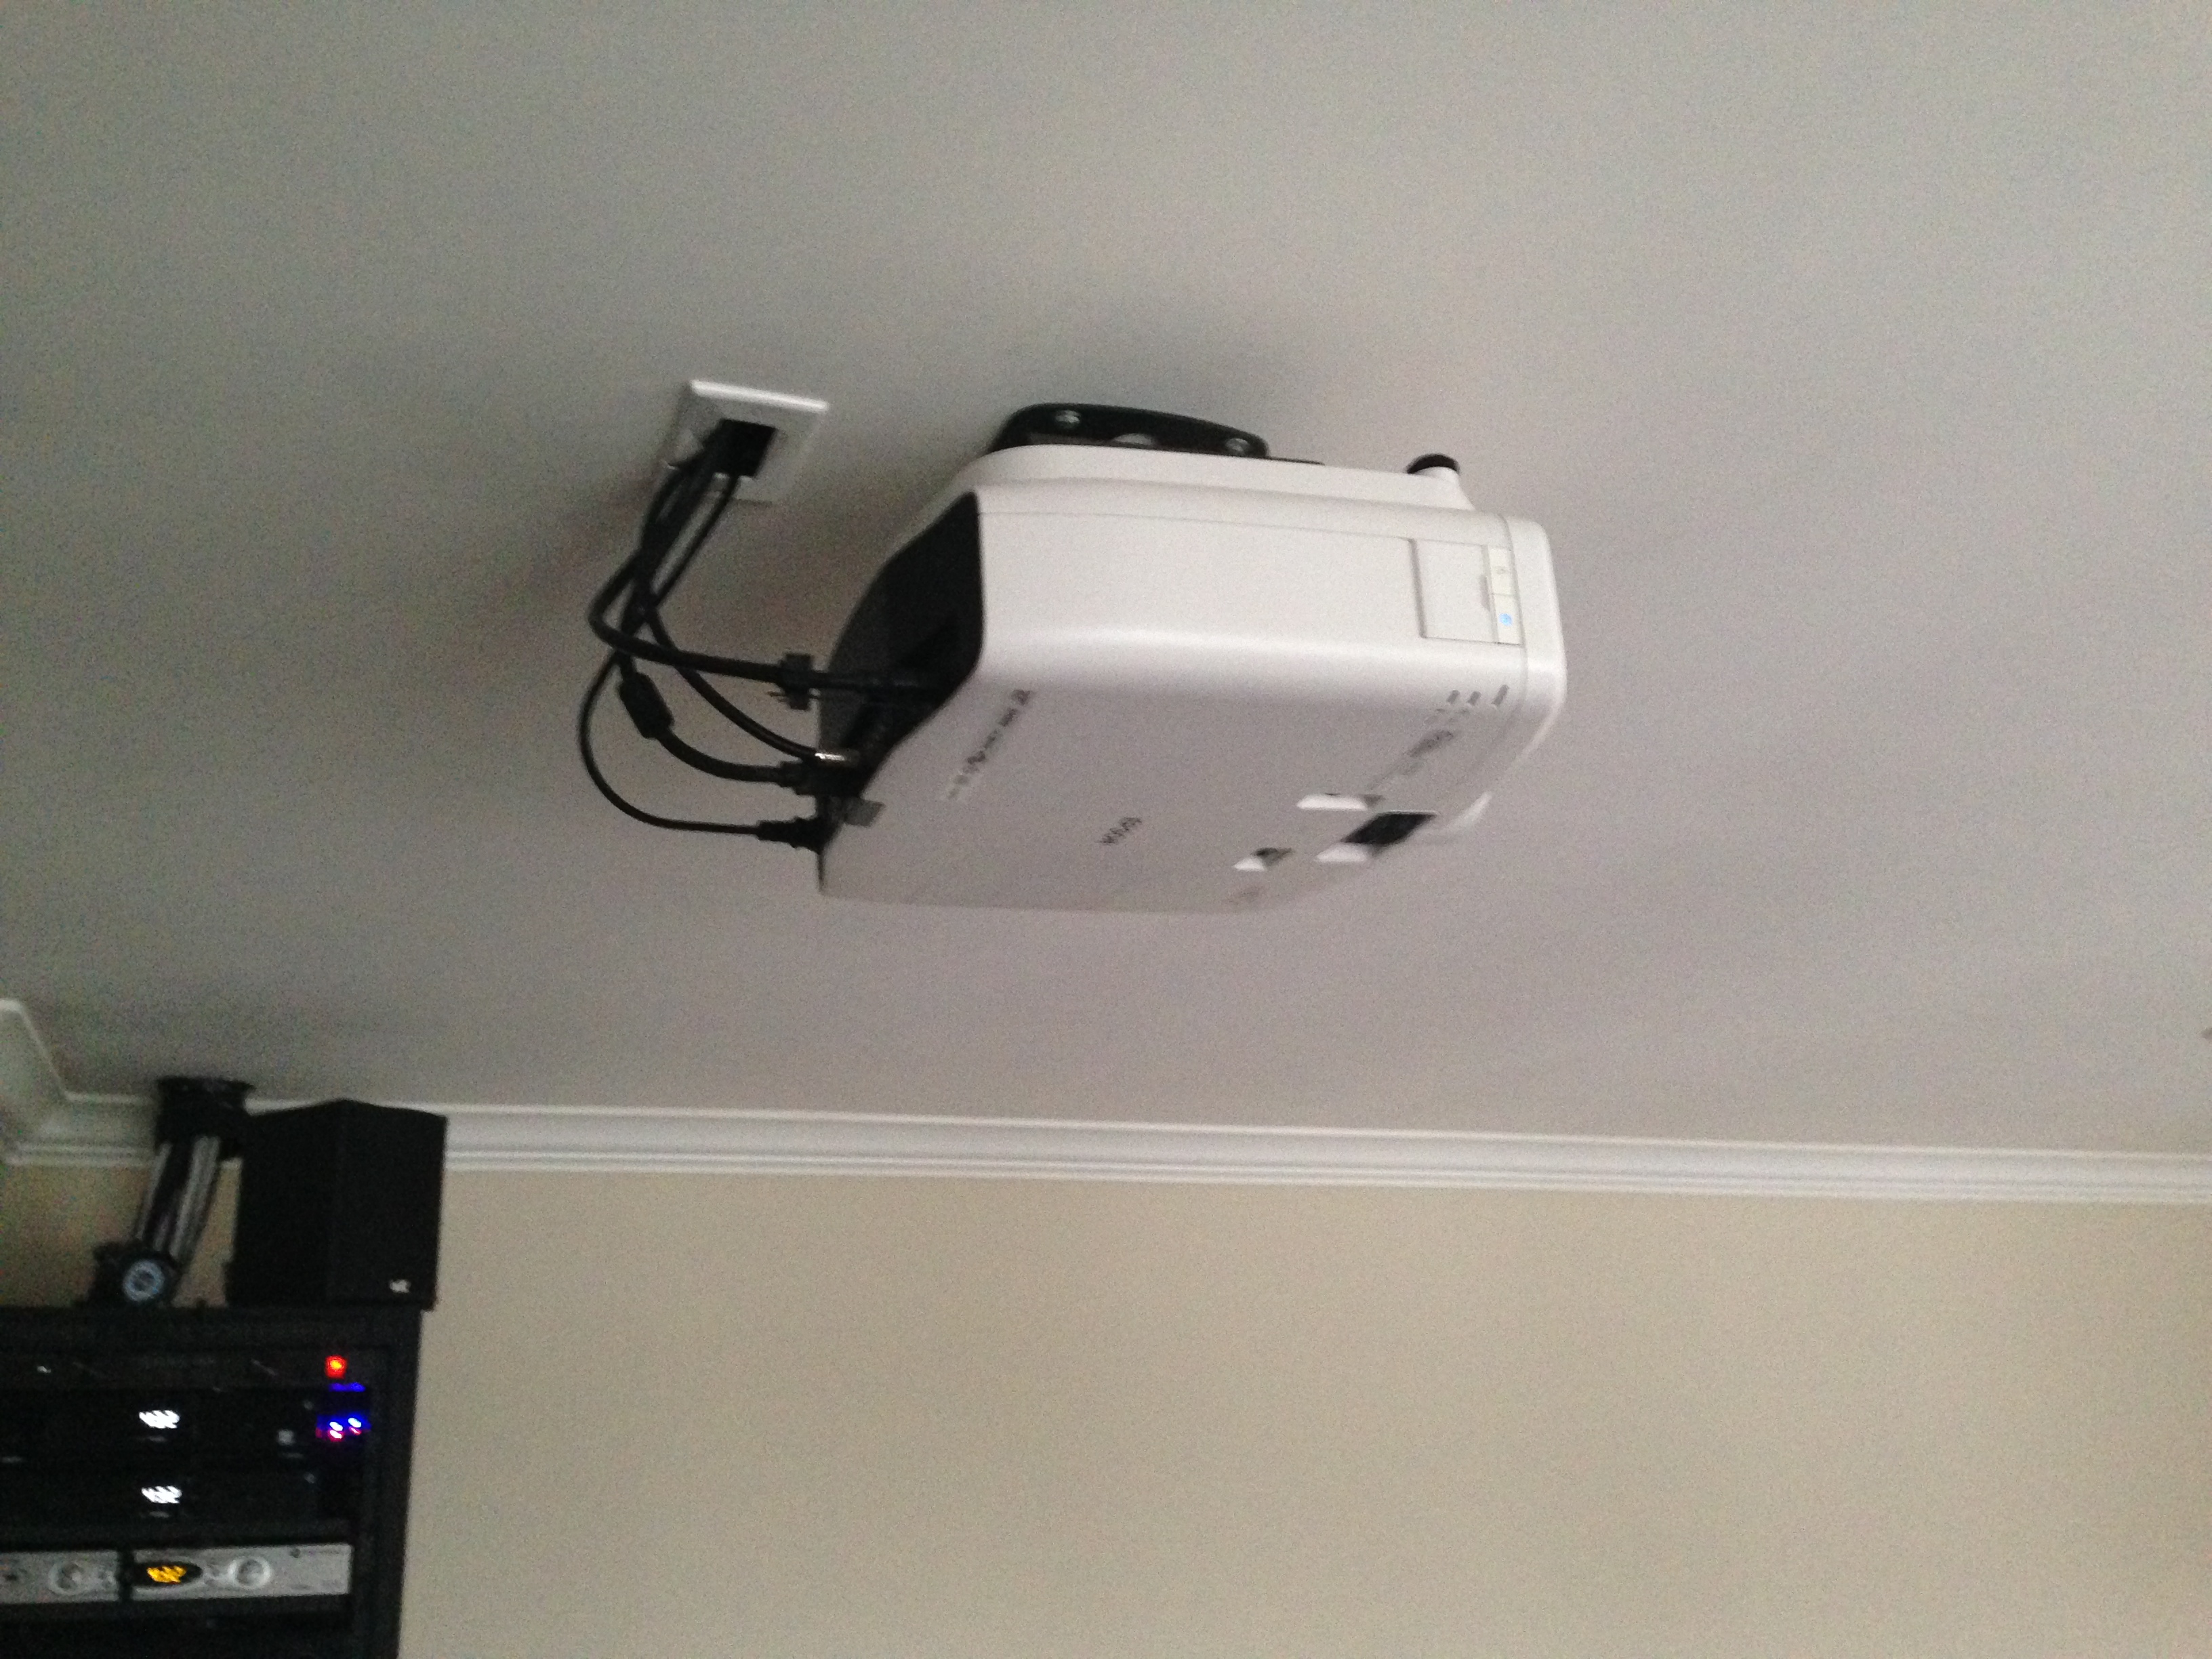 Epson Home Cinema 5020UBe In most homes, front projection is pretty much he only way to go due to size, and space. Some people put their projectors on their coffee table because that's on the only place they can make it work. The benefit to me of a projector based theater, is that its virtually 0 footprint (i.e. nothing is on the floor or taking up space) and a huge picture. For me the only solution was to ceiling mount the projector. Up there, it would be permanent, would not be blocked by a person, out of the way and has the least amount of impact on the room. All I needed to do was to run power (outlets in the attic) and VGA. HDMI., etc.. easy to do because I have the attic directly above it. Projector ScreenThe screen was a huge consideration because, the desire to have a 0 footprint system, meant that I would not have a fixed screen on the wall. Instead I would mount a screen in the attic that dropped down when I pressed a button (or wired into the projector). Because I would also have my front speakers mounted on the ceiling I determined I would need a sound transparent screen. This is a screen that has tiny holes that let the sound go through the screen so you can hear the speaker placed behind it. That led me to Elite Screens. They had an in-ceiling projection screen that was electric and came in a sound transparent material. The screen took about a full day to install and was a ton of work in hot and cramped spaces. Blinds,Screen and Lights VideoThe system they provided to flush mount the screen on the ceiling (I paid extra for it) did not work because my ceiling was too thick and they made no accommodation for anything more than 1.5 inches thick drywall. I had to modify the system quite a bit, but finally got it mounted. Once it was mounted and the hole cut for the screen, I was able to check out he picture. Having used this projector on a white matte screen previously, I am able to make the following judgments with objectivity. This screen purchase was perhaps the one I regret the most in everything I have done. The material has a significant amount of light bleed behind which then reflects off the LCD permanently mounted to the wall and gives a ghost effect and/or hot spots. The screen also has a moire pattern especially visible in white areas, which make the picture look worse than I know it is. I am extremely disappointed in the elite screen product and wish I could just give it back and get my money back, but alas, it's installed in my attic.  Screen Moire due to the Elite Screen Product One of my next projects will be to replace this with a Stewart/Draper or other screen that is better constructed. My center speaker (the one behind the screen) is mounted up against the ceiling in a custom cabinet I had built custom. Directly above the LCD is the Center Speaker Behind the White Speaker Grill. This also shows the permanent LCD I use to just watch tv. In retrospect, I could have put a standard white/ matte screen and have the black header material at the top of the screen be sound transparent which would eliminate the light bleed and the possible artifacting any sound transparent screen could cause. The above complaints aside, the picture does look amazing, it is huge and the 3d is super cool. 3DI will talk a bit about my content in a bit, but the 3d is a cool feature. The new Epson projector has a RF system to synch with the glasses, which is much better than the IR system I used in the past that would essentially block out and overload my IR remotes. This new RF system is awesome, the glasses fit comfortably, and the batteries last a while. I only find I need to charge them every few months (but I don't watch a ton of stuff in 3d). Part of the issue to me is the lack of 3d Content that I want to watch... A movie like Avatar or the occasion action movie makes sense, but I am not going to watch normal TV in 3D. LCD TVsBehind the projector screen, as you can see above, I have a 60" Sharp LCD mounted directly above the fireplace. This TV is floating with not visible cables or boxes (minus the channel going up). The cable box is located in the entertainment rack to the rear of the theater with all of the other boxes throughout the house. My Master bedroom also has a 55" LCD TV that is floating, the cable box being mounted in the entertainment rack located in the living room. Both the main living room and the master use a Channel Vision IR repeater system to send the IR signals back to their respective cable box located in the entertainment rack. 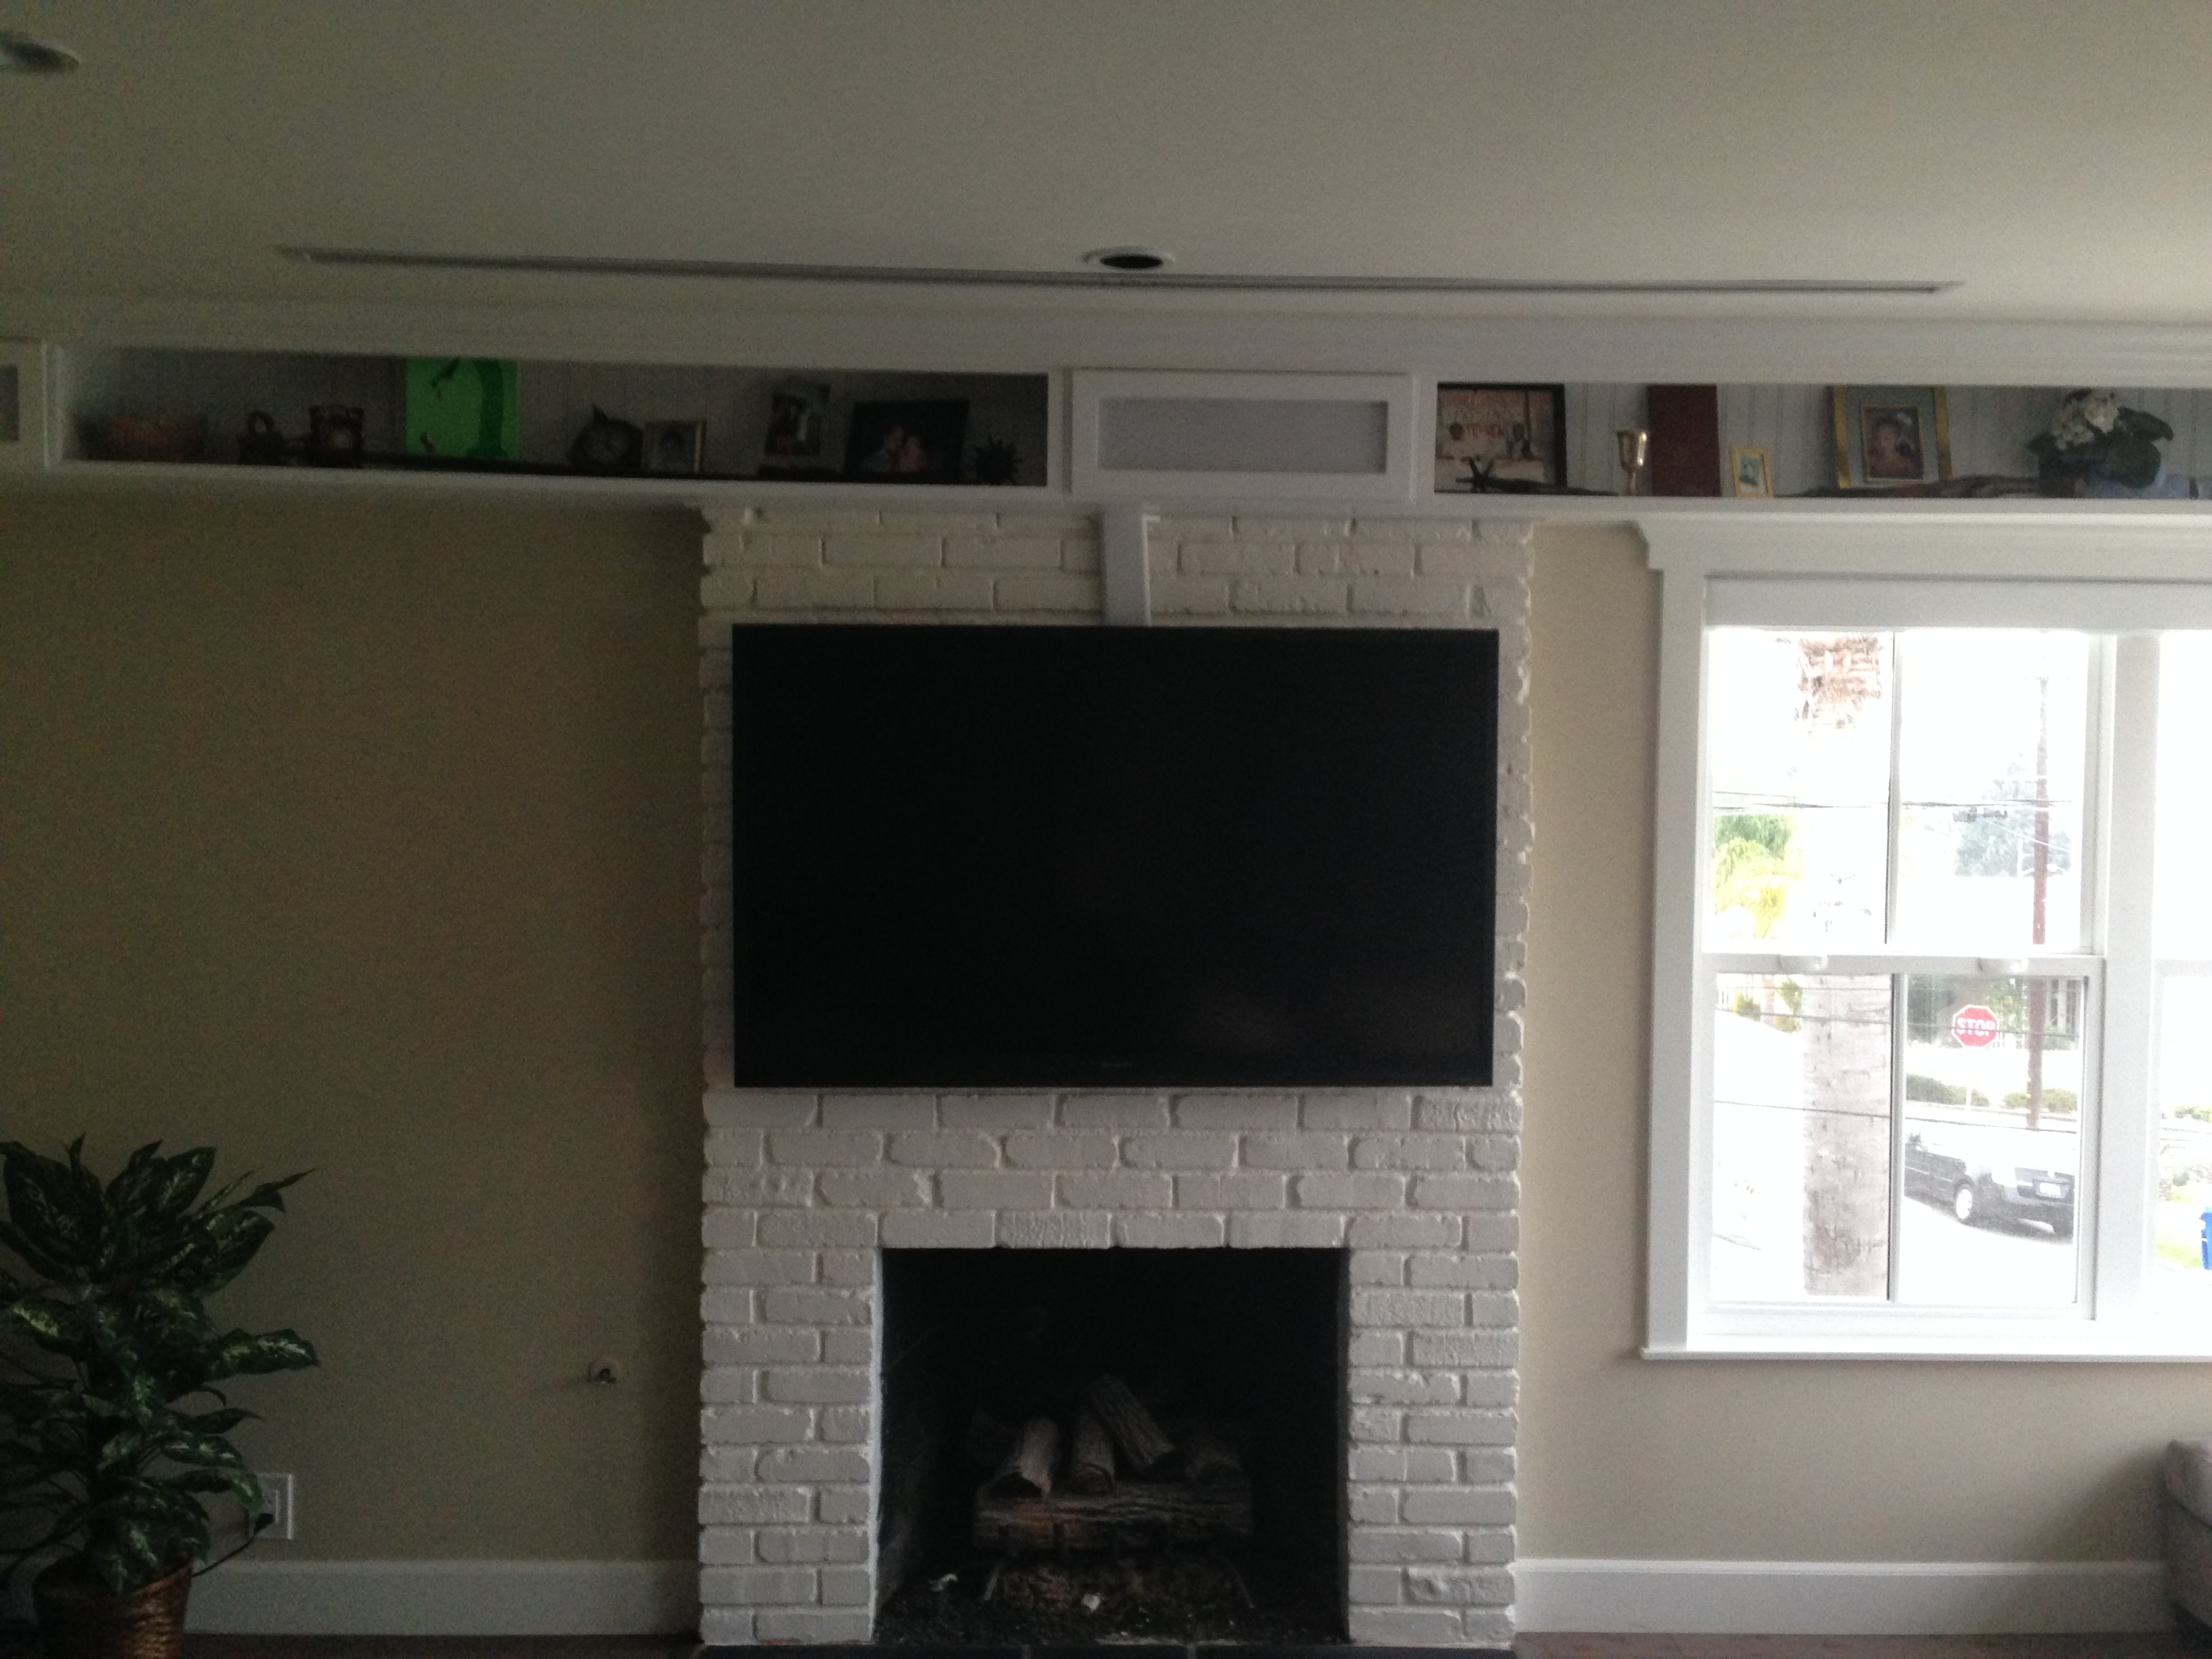
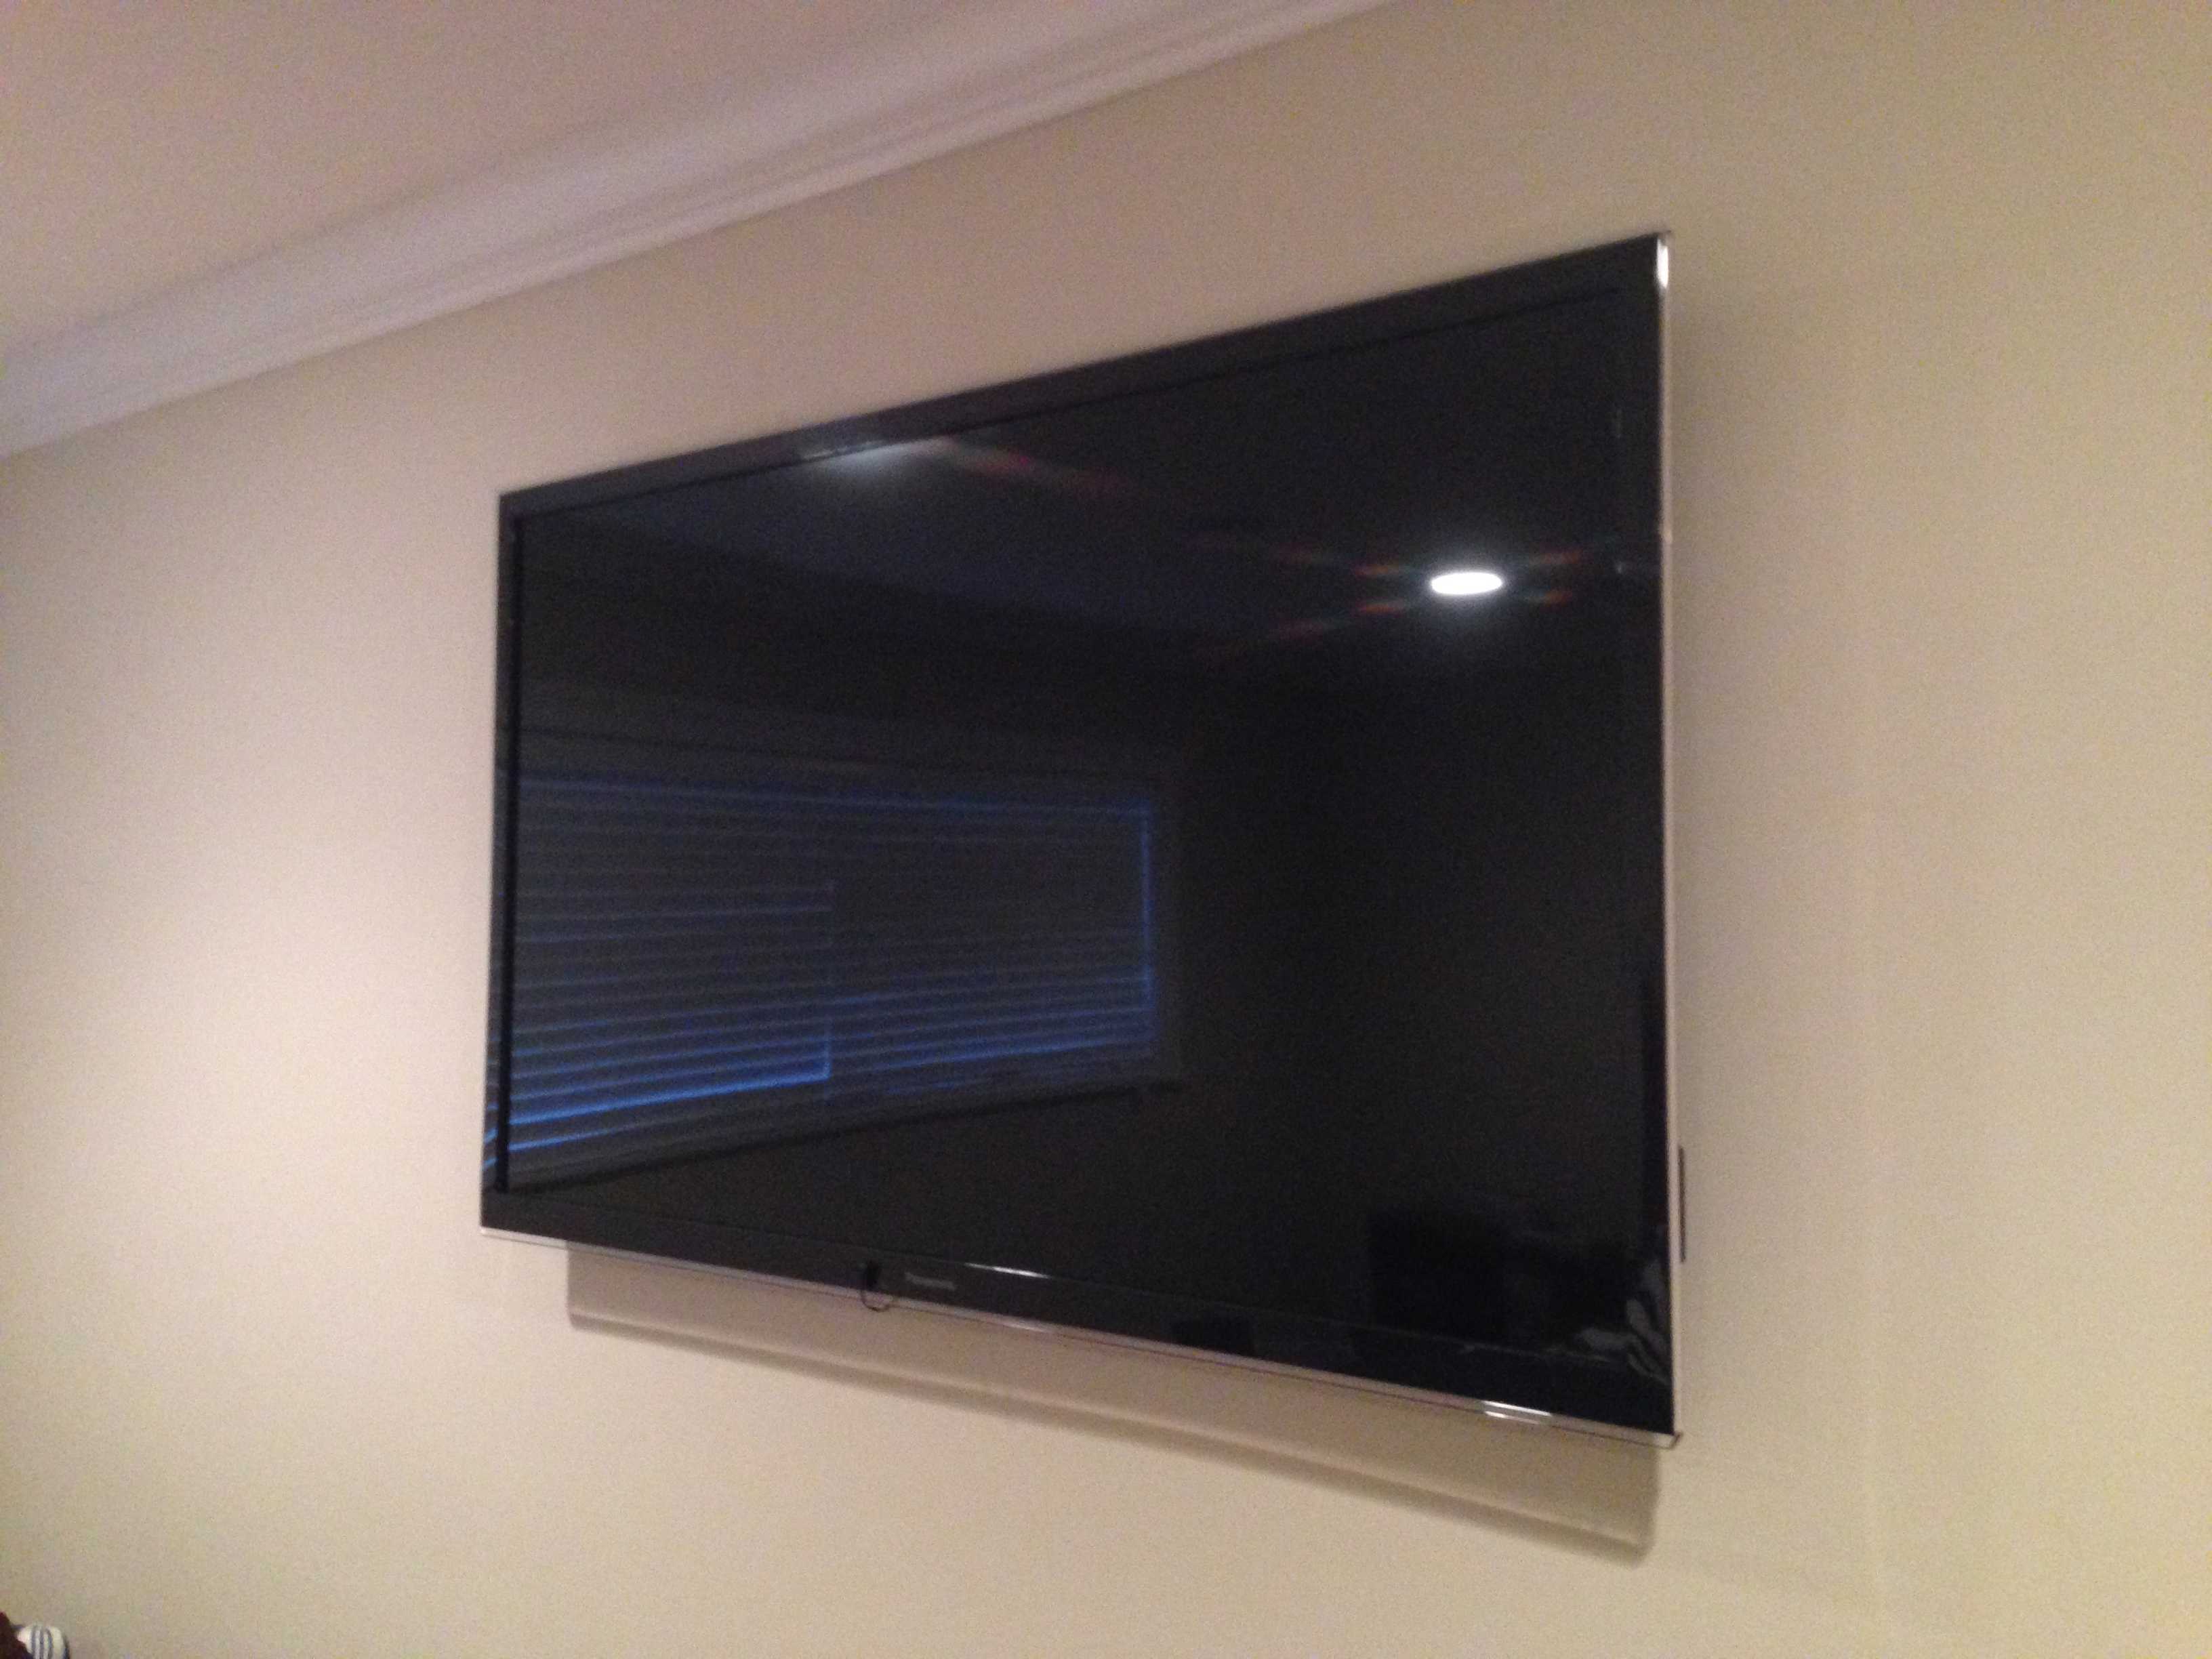 The Panasonic master bedroom TV has a few cool features that were included as a bonus. The TV itself has a Cat 5 jack on the back of the TV (which connects it to the network with an IP Address) and has some smart functions which lets you use DLNA to watch movies (see below for this). This TV also has a passive 3D system (with passive non battery powered glasses). I also mounted a TV in the office that is directly connected to a 3rd cable box I have located in the rack. Since I rarely watch anything in the office, I also wired this cable box up to the Russound system and mostly leave this system tuned to a music channel to play music throughout my house. Set Top Boxes (STBs)Now is a great time to talk about the Verizon system provided. I have 3 fios STB (set top boxes) all located in the entertainment rack 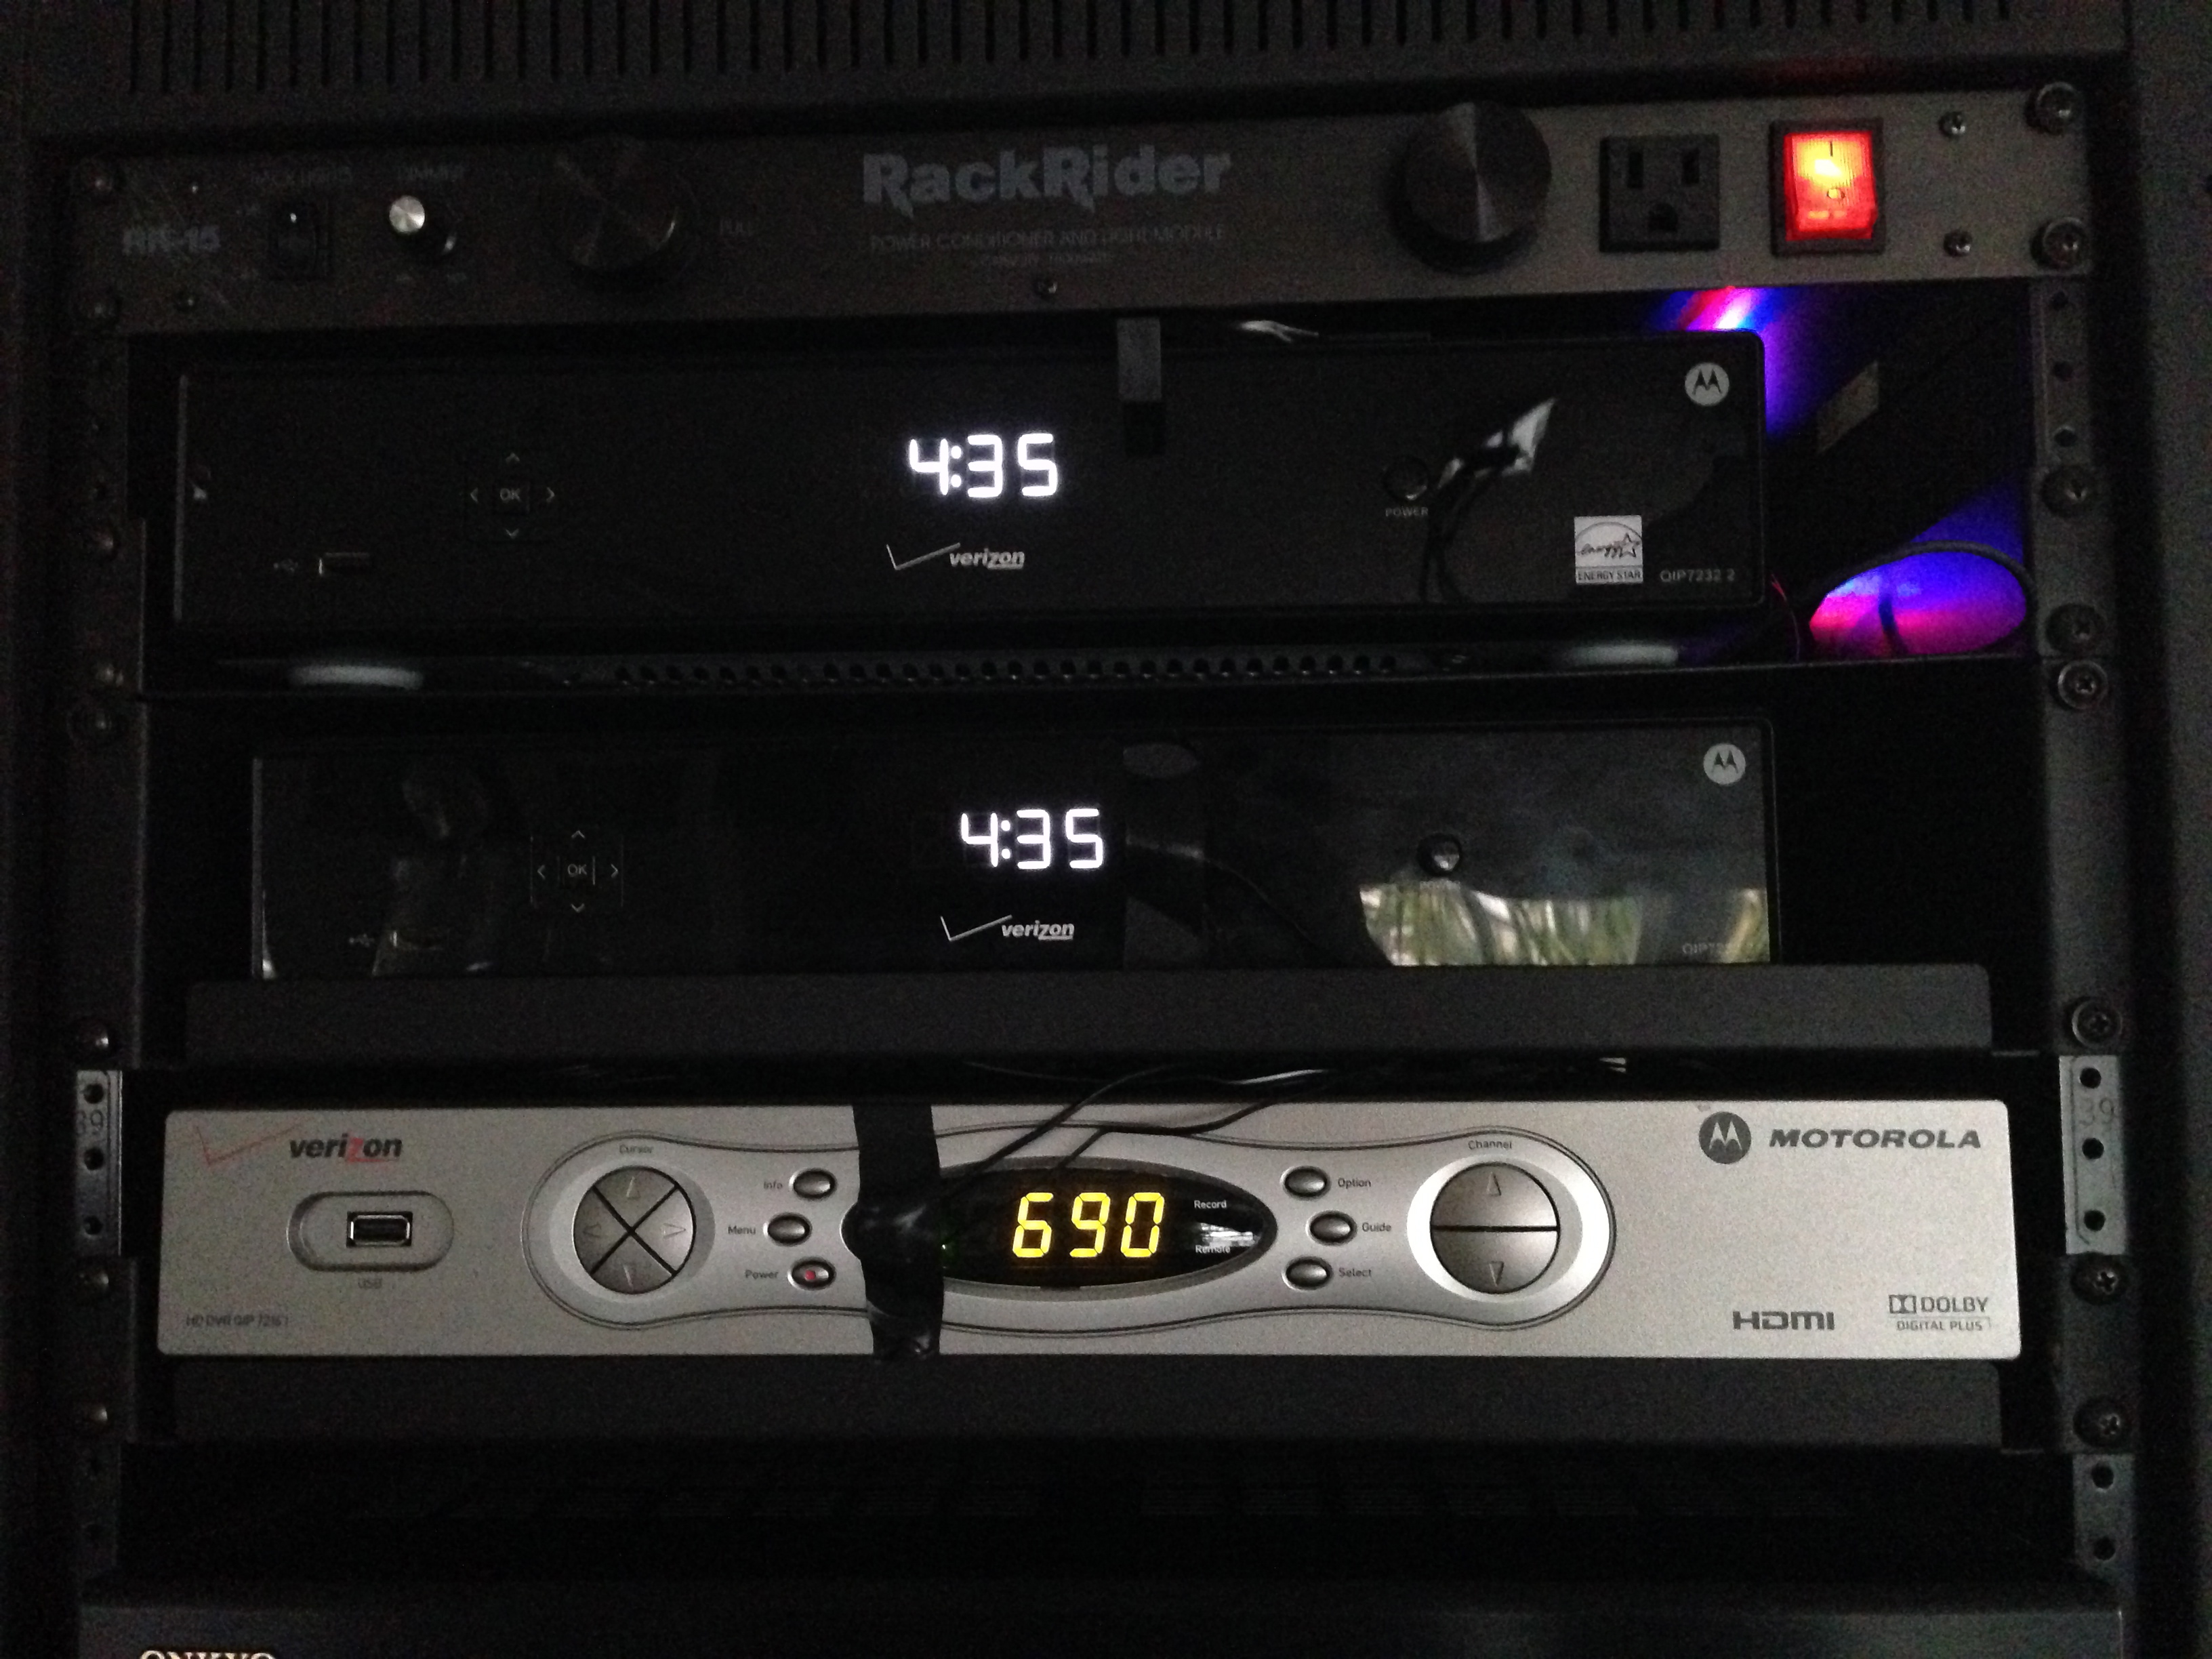 My 3 Set Top Boxes from Verizon I chose to locate these here to simplify wiring and also allow the TVs in each room to be floating without the burden of finding a place to put the cable box nearby. Also, the STBs tend to get hot so I can more easily manage this at the top of the entertainment rack. A few nice features that verzion offers is the "home media DVR." this extra few bucks a month (I pay 12.95/ month/ dvr) allows me to treat each dvr separate or together. This means I can watch anything stored on any dvr on any TV. Therefore, I have essentially 6 tuners in the house and 1 TB drives in each DVR for 3 TB of storage. Verizon also has allowed external storage to be connected, but I have yet to need that. Currently, I clean off the DVR and download any content that I want to keep to watch later. In addition to the Fios boxes, Verizon offers free iPhone/iPad apps. These apps used to be separated and segregated from one another (I had 4 apps at one time for Verizon on my phone) and apparently Verizon heard my confusion and decided to put them all together into a single app. With this app, I can program my DVR to record shows (in my house or away), I can use my phone to control the STB as if it were a remote (but the signal goes via the network), Watch TV on my ipad or iphone (while in my house, but I have hacked that), and a bunch of other non cool stuff. The reason I mostly use this app is to program the DVR when I am out and want to record something I forgot to select and also to control the office DVR when I am wandering around the house listening to music channels. The office DVR is hooked into the Russound whole house audio system and therefore I can essentially listen to this DVR in any room in the house, and, with the Verizon app, I can change the channel visually from my phone selecting the type of music/ channel I want by using the TV listings screen. This is very cool if I want to change the type of music I am listening to around my house. I HAVE programmed the Russound control panels to use IR to change the channel which allows me to use the Russound wall mounted control panel up/down button to move the channel up or down but without a display on the screen (feedback from the DVR telling what channel its on) I am kind of guessing by listening to the music that is playing for what channel I am on. This is why the Verizon app is cool in this situation. Onkyo System-AudioCentral to the sound system in my main living room is my Onkyo receiver. I chose Onkyo because their price is reasonable, their features are high (THX, decoding types, Apps, etc.) and the sound quality has never disappointed. Yes, I could get separate Macintosh power amps for each channel, but having a single system that includes HDMI switching and decoding is convenient. The Onkyo I have is the NR 5001 system. It has 7.1 channels and more than enough power for my M&K THX 750 thx certified sound system. I run almost every source into my Onkyo and its right at eye level in my entertainment rack. This is the HUB of my home theater. 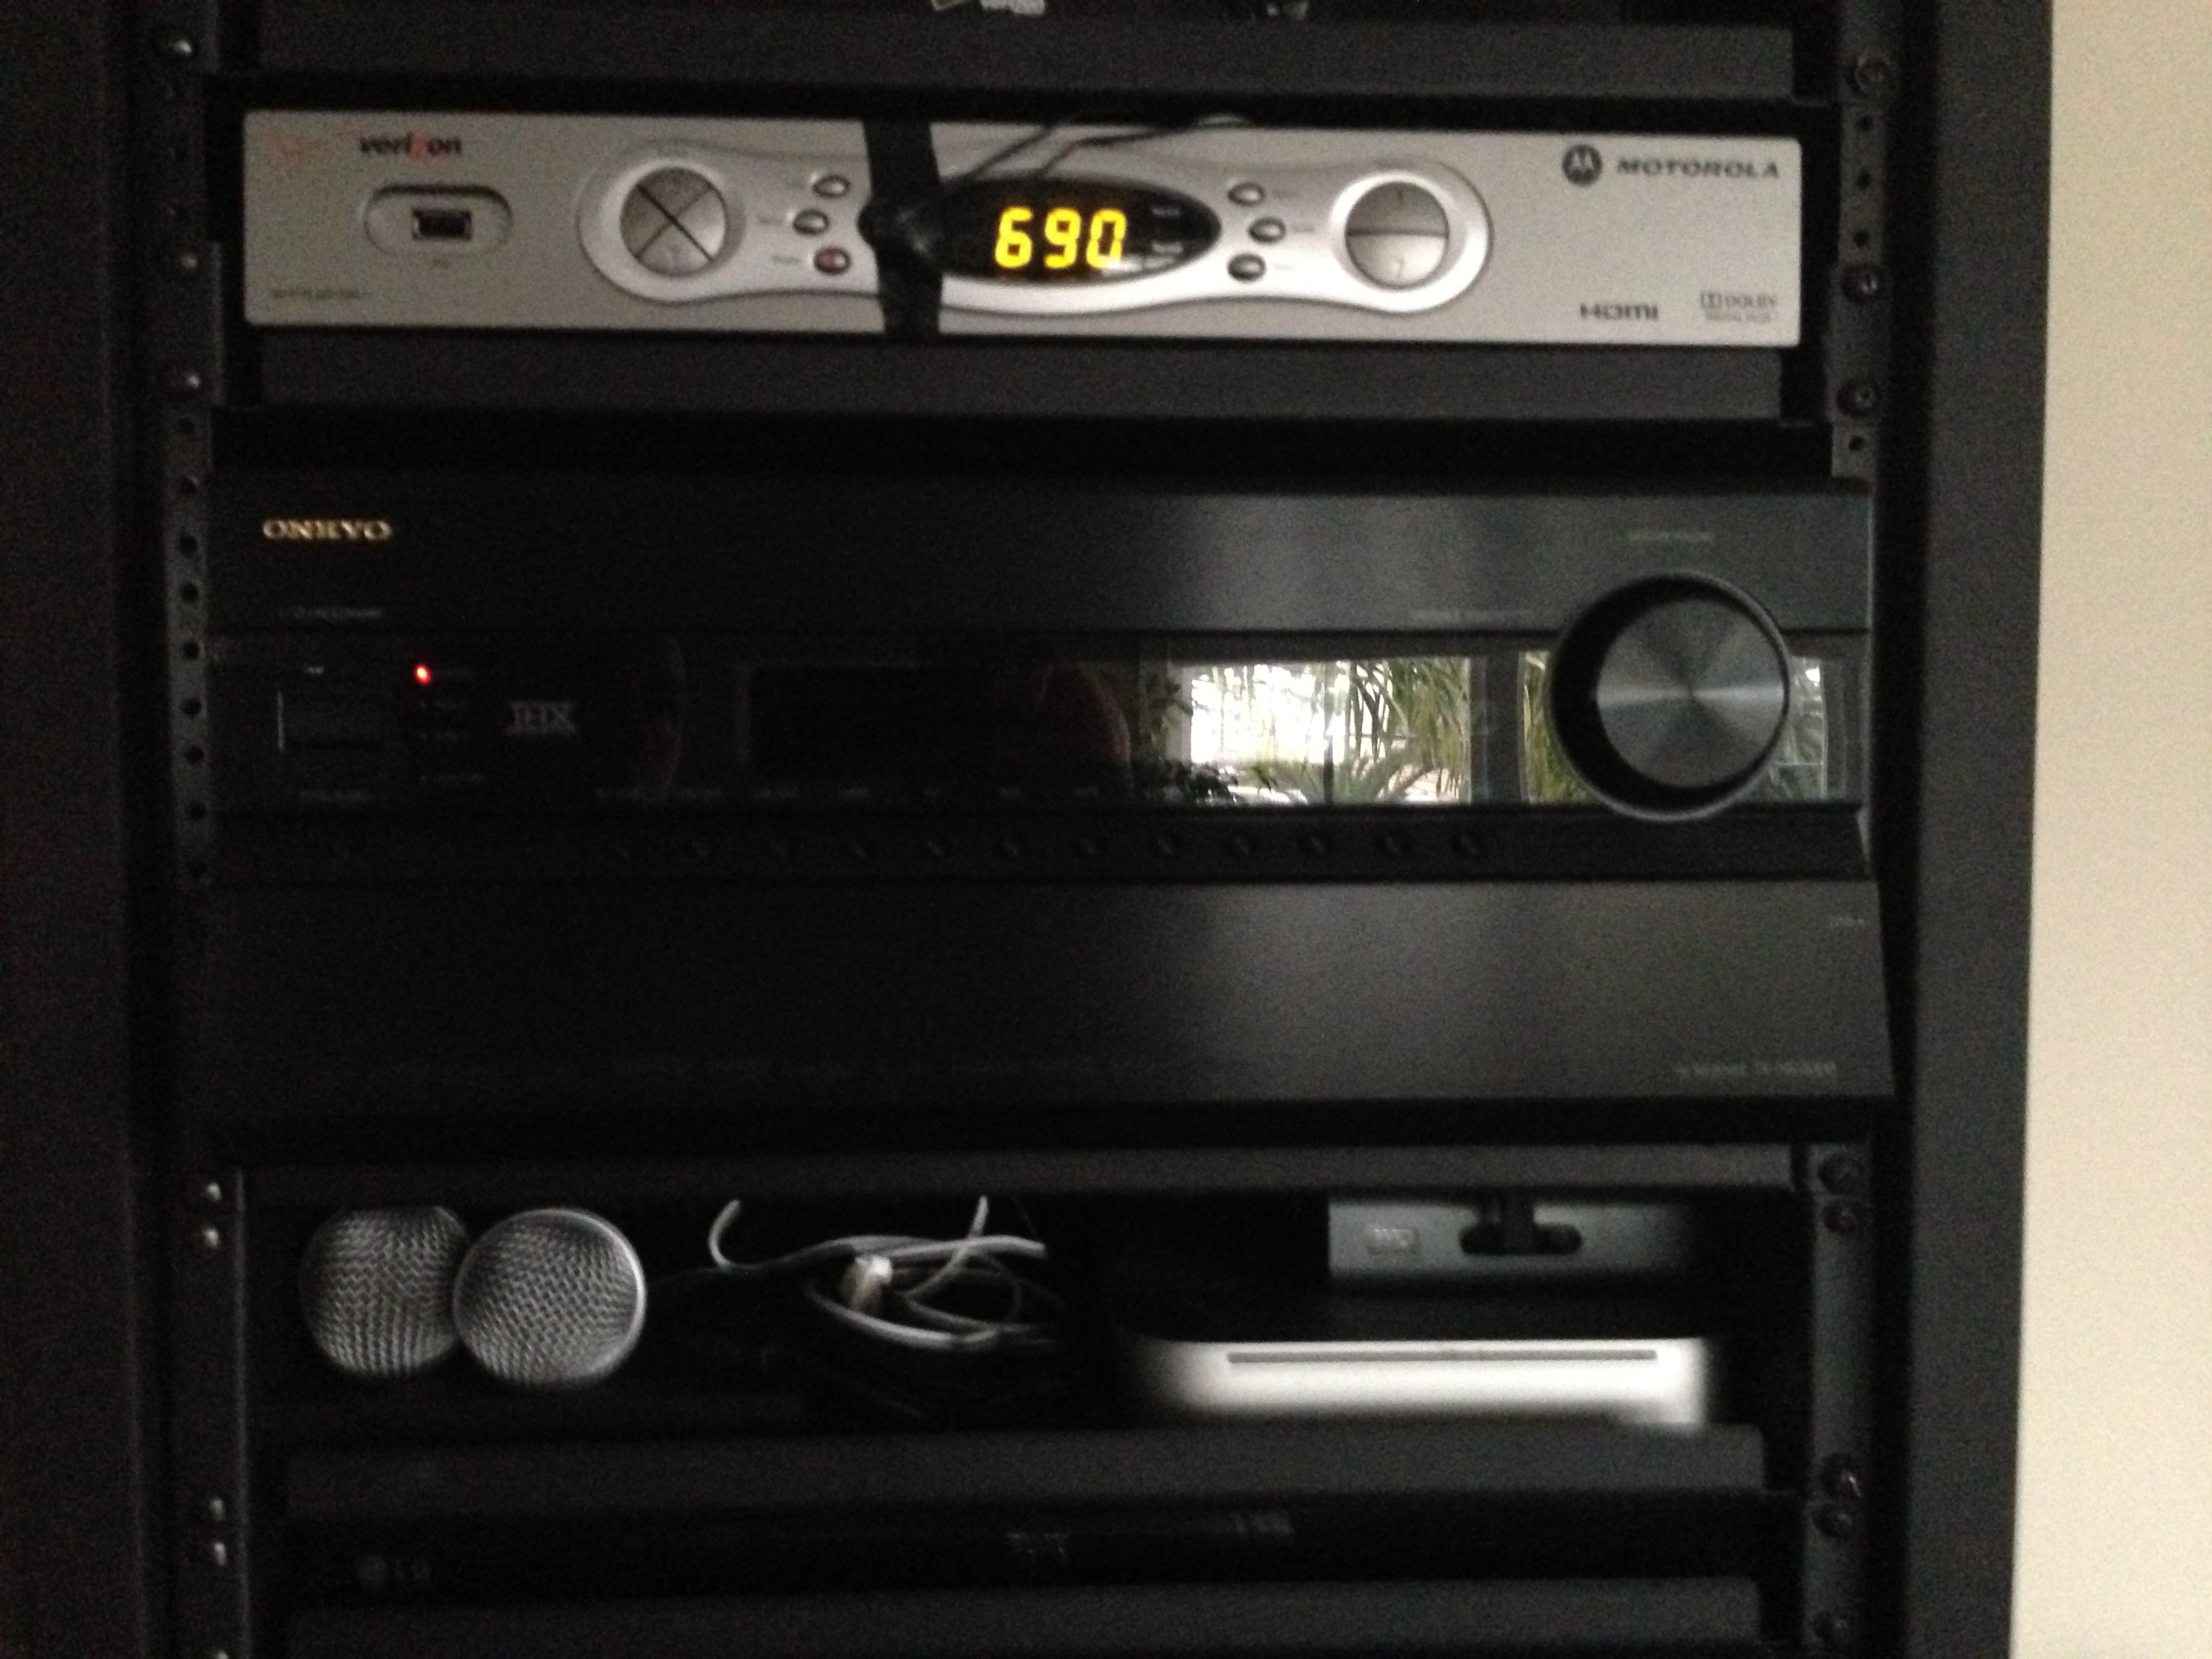 The Onkyo has 2 HDMI outputs as well (a main and a sub). This is key because I have two displays (LCD TV and Projector) which are directly wired from these ports. However, I made one decision when wiring up the STB and the LCD TV that is key to understand here. I decided that I didn't always want to turn on the "big sound" system every time I watched TV on just the LCD TV. I would then always be controlling the sound on the Onkyo and the signal would be going through that system. So, I made the system a bit more complex to make it easier to use on a daily basis. The HDMI comes out of the back of the living room STB, into a HDMI splitter (2 way) which then has an HDMI that goes into the Onkyo and another that goes directly to the LCD TV itself. This way, I can turn on the cable box, turn on the TV and use the internal TV speakers just for simple TV watching. If I want to watch another source on my Onkyo, I just change the TV input to the second HDMI port and then the TV becomes a slave to the Onkyo, I turn down the tvs internal speakers and I get the big sound. I find that for most daily TV watching, I am just using the TV and the cable box (using the internal TV speakers). When I want to watch something with big sound (a drama, movie, etc.) I will spend the extra 30 seconds to turn on the projector, drop the screen, and power on the Onkyo. I hope this makes sense- cause it's a bit confusing to type out, but what this really means to me is that when my dad or someone comes to my house and wants to just watch TV, they can use the fios remote to power on the TV and the STB and not need to worry about turning on anything else. As I said, I do watch TV 60% of the time on the LCD and using the internal TV speakers. Not everything I watch (the news, etc.) needs to be on a super huge screen with THX sound. Onkyo does also provide a free iPhone/iPad app which allows you to control the basic functions of the receiver. I find that I use this mostly to control the volume when the remote is not handy. Since the Onkyo has a cat 5 connection in the back , the remote signals will travel from my phone across the Wi-Fi to the Onkyo instead of the simple IR. Cool feature that I don't use that often but nice to have. Speaker SystemOne of the best investments I made 10 years ago when I first moved into my first house was to spend a lot of money (at the time) on great speakers. I did a ton of research and found the M&K (miller and Kreisel) THX 750 System to be the best quality THX certified system I could afford. Oh, and specs aside, they sound amazing. The system included 3 main speakers (Front, Center, Right), 2 rear speakers (Smaller in size), and a subwoofer. The sub is perhaps the best sub I have ever heard. It reproduces amazingly low frequencies and often shakes the floor. A good sub to me is always what makes a speaker system better. After I upgraded to 7.1 I added 2 identical and additional rear speakers for the full 7.1 experience. I LOVE this system, I love the sound and enjoy watching movies or just listening to music on it. It never disappoints. Russound "whole house" AudioNow its time to talk about the Russound system I installed. First, I will explain that I love to listen to music. I enjoy it in the shower, in bed, in the living room, or in the courtyard just hanging out. So, I looked for a "whole house" audio system that I could install that would give me at minimum these two functions:
There are some inexpensive systems out there, but I finally landed on the Russound because it was a clean looking system (the controller/amp and the panels) and it had a ton of functionality. Unfortunately, Russound has an authorized dealer channel what wants to charge you an arm and a leg to install over and above the expense of the system. I (obviously), can do that myself and wont pay someone for it. Luckily, I was able to find someone online that would sell it to me without installation. I also was able to sign up (thankfully) on their website to download the configuration software and firmware updates which allows you to completely customize the source names, IR, system settings, etc. 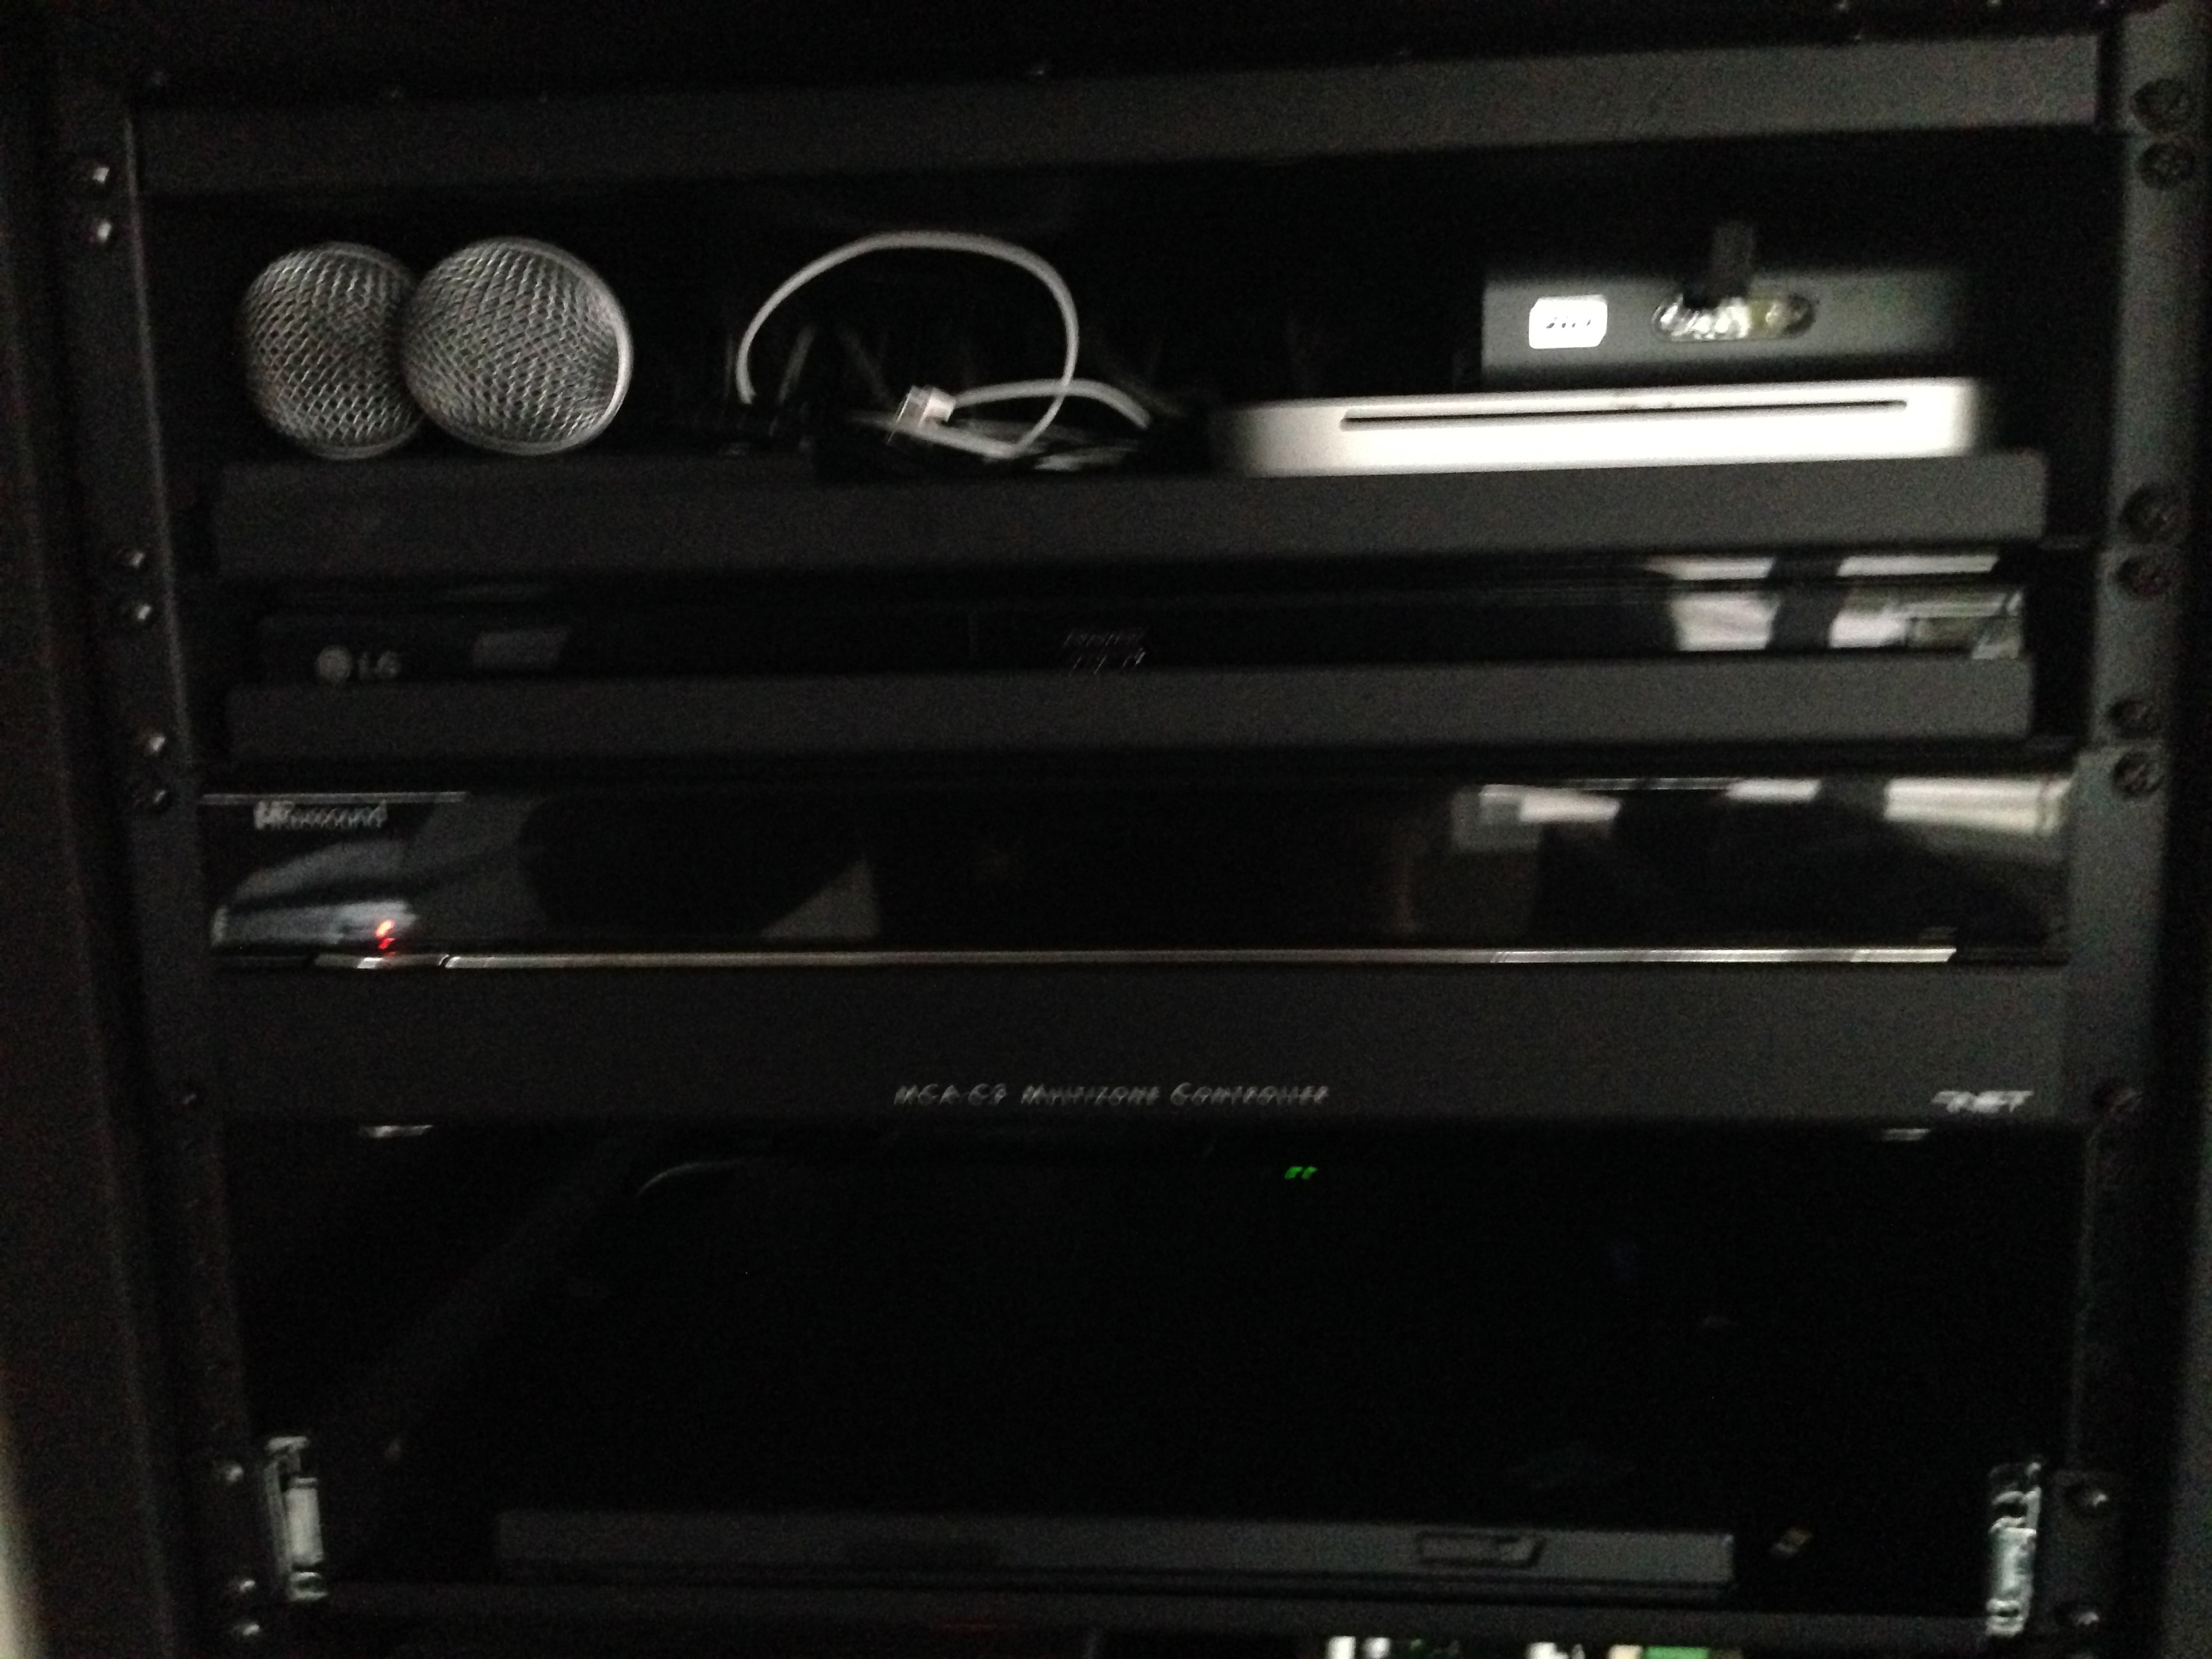 The Russound main controller located in the entertainment rack So, what is the Russound system and what does it do. It's a central amplifier and source controller wired to ceiling mounted speakers in each zone with a controller in each zone. So, my dining room, master bedroom, master bath, office, laundry/workout room and once completed (my deck) all have speakers mounted in the ceiling and a controller located somewhere on the wall. 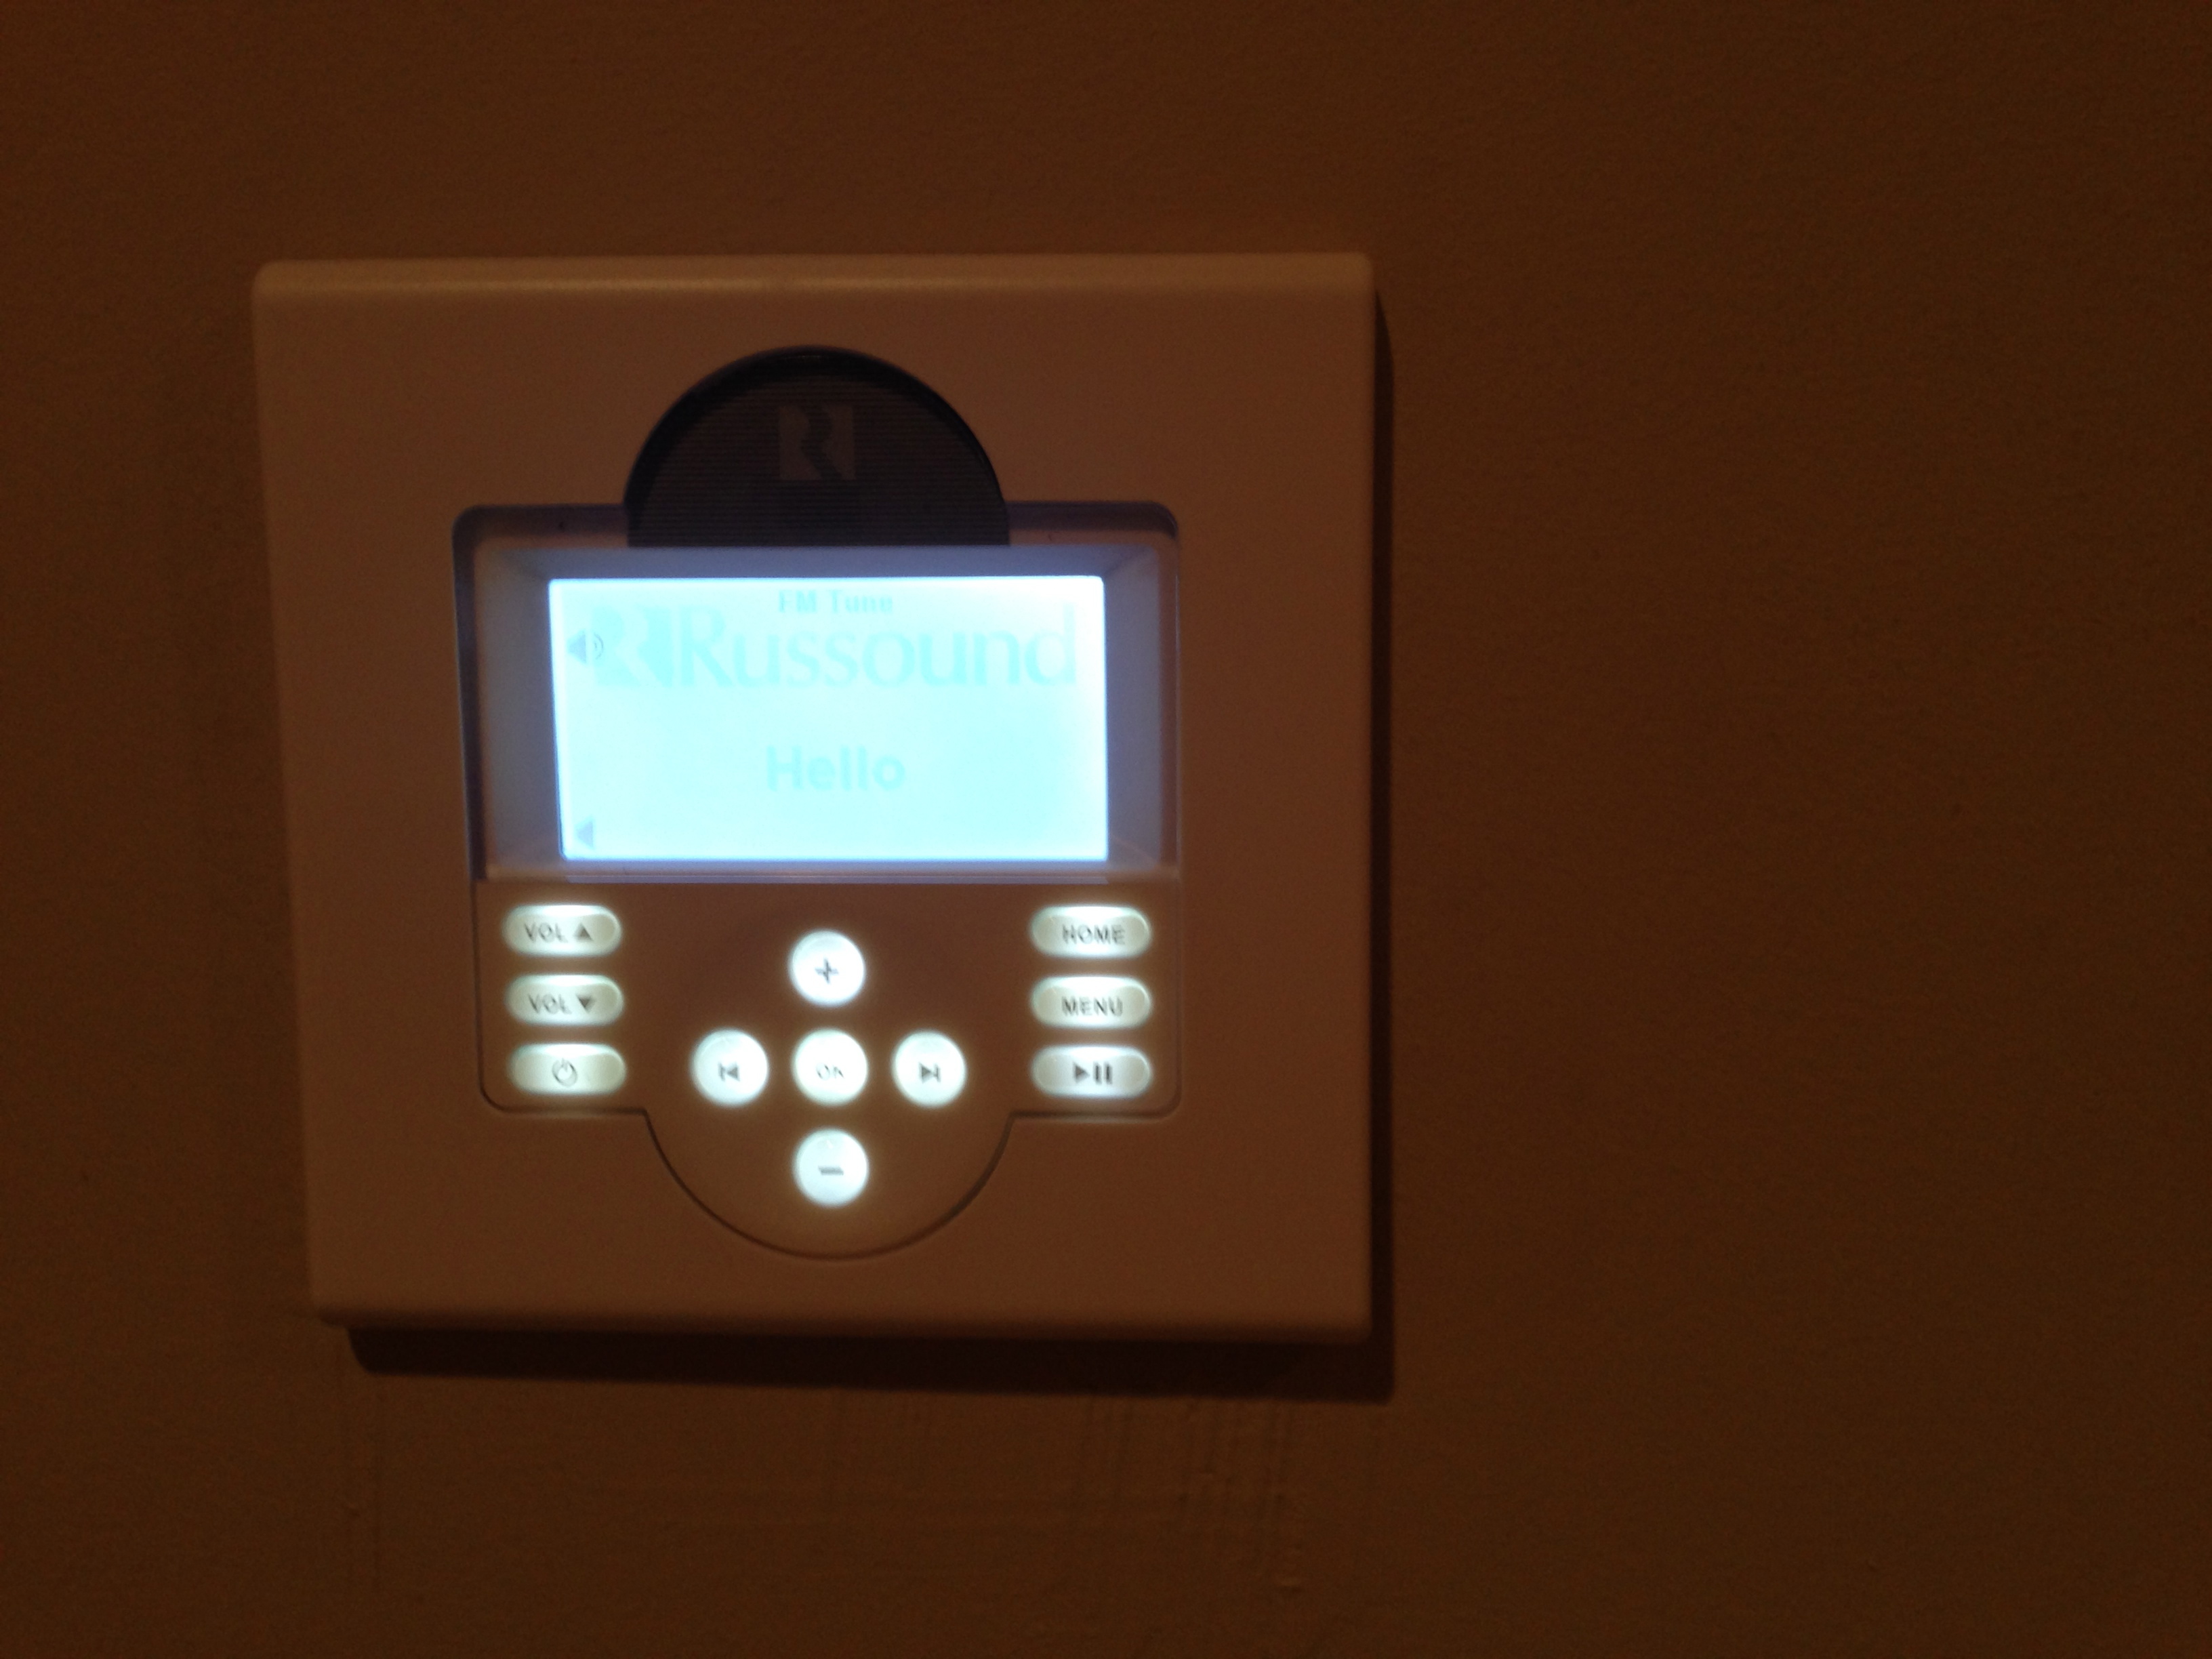
 Wall Controller and Ceiling speaker The system is wired in a very cool way. The speaker wires go directly from the central controller/amp (located in my entertainment rack) Directly to each speaker. Then, a simple CAT 5 wire goes to each control panel in each room from the central controller. The control panel in each room acts as a "remote control" which tells the central controller the volume level, source, etc. of the speakers in that zone. Since I mounted the Russound where ALL my sources are in my entertainment rack, I can change the source to be a built in tuner (in the Russound), the Laptop in my rack (I will explain later) that plays winamp, the downstairs DVR tuned to a music channel (as explained above), and I even decided to put a remote port in the kitchen where someone can plug in their phone, iPod, etc. and play music throughout my entire house. As I alluded to above there is software you can download for this system and a ton of customization you can do. I have kept it somewhat simple and use it just to play music in my house from any of the sources I mentioned. However, once I put a antenna on the included tuner, I found that better than my alarm clock to wake me up in the morning and while I was getting ready, I could use the Russound to listen to the local radio station (KROQ) that I enjoy listening to while ironing, eating breakfast, etc. So, I find that I use this almost every day when I get up and go to work, and when I take a shower/ shave/ etc., its great to have some music running in the background. Russound has done a great job building an app for this system. The app did cost $20 bucks but was worth the cost. However, this is the one app in everything that is iOS only (and thus keeping me from getting an android). In the use case I gave you above in the morning: I roll over, grab my iPhone, pull up the Russound app, select the master bedroom and turn the system on playing the radio in my bedroom. All without getting out of bed. Then, as I walk into the dining room, I power on that zone from the app and make sure the radio source is selected. All from my phone without needing to use the control panels. Of course I still sometimes use the control panels (redundancy) and to have a manual way for someone to use this system without my phone. This app works because the Russound has a cat 5 network connection (and an IP address) and is network connected. If you like music, you will like the Russound. It really lets you enjoy music throughout your home whenever you want. It also has cool features like party mode which lets you control the entire system from one panel (or the app) and links all the zones to one, for when entertaining. Despite its pricey cost, I think this system is well worth it for the music lover. Windows Laptop and Winamp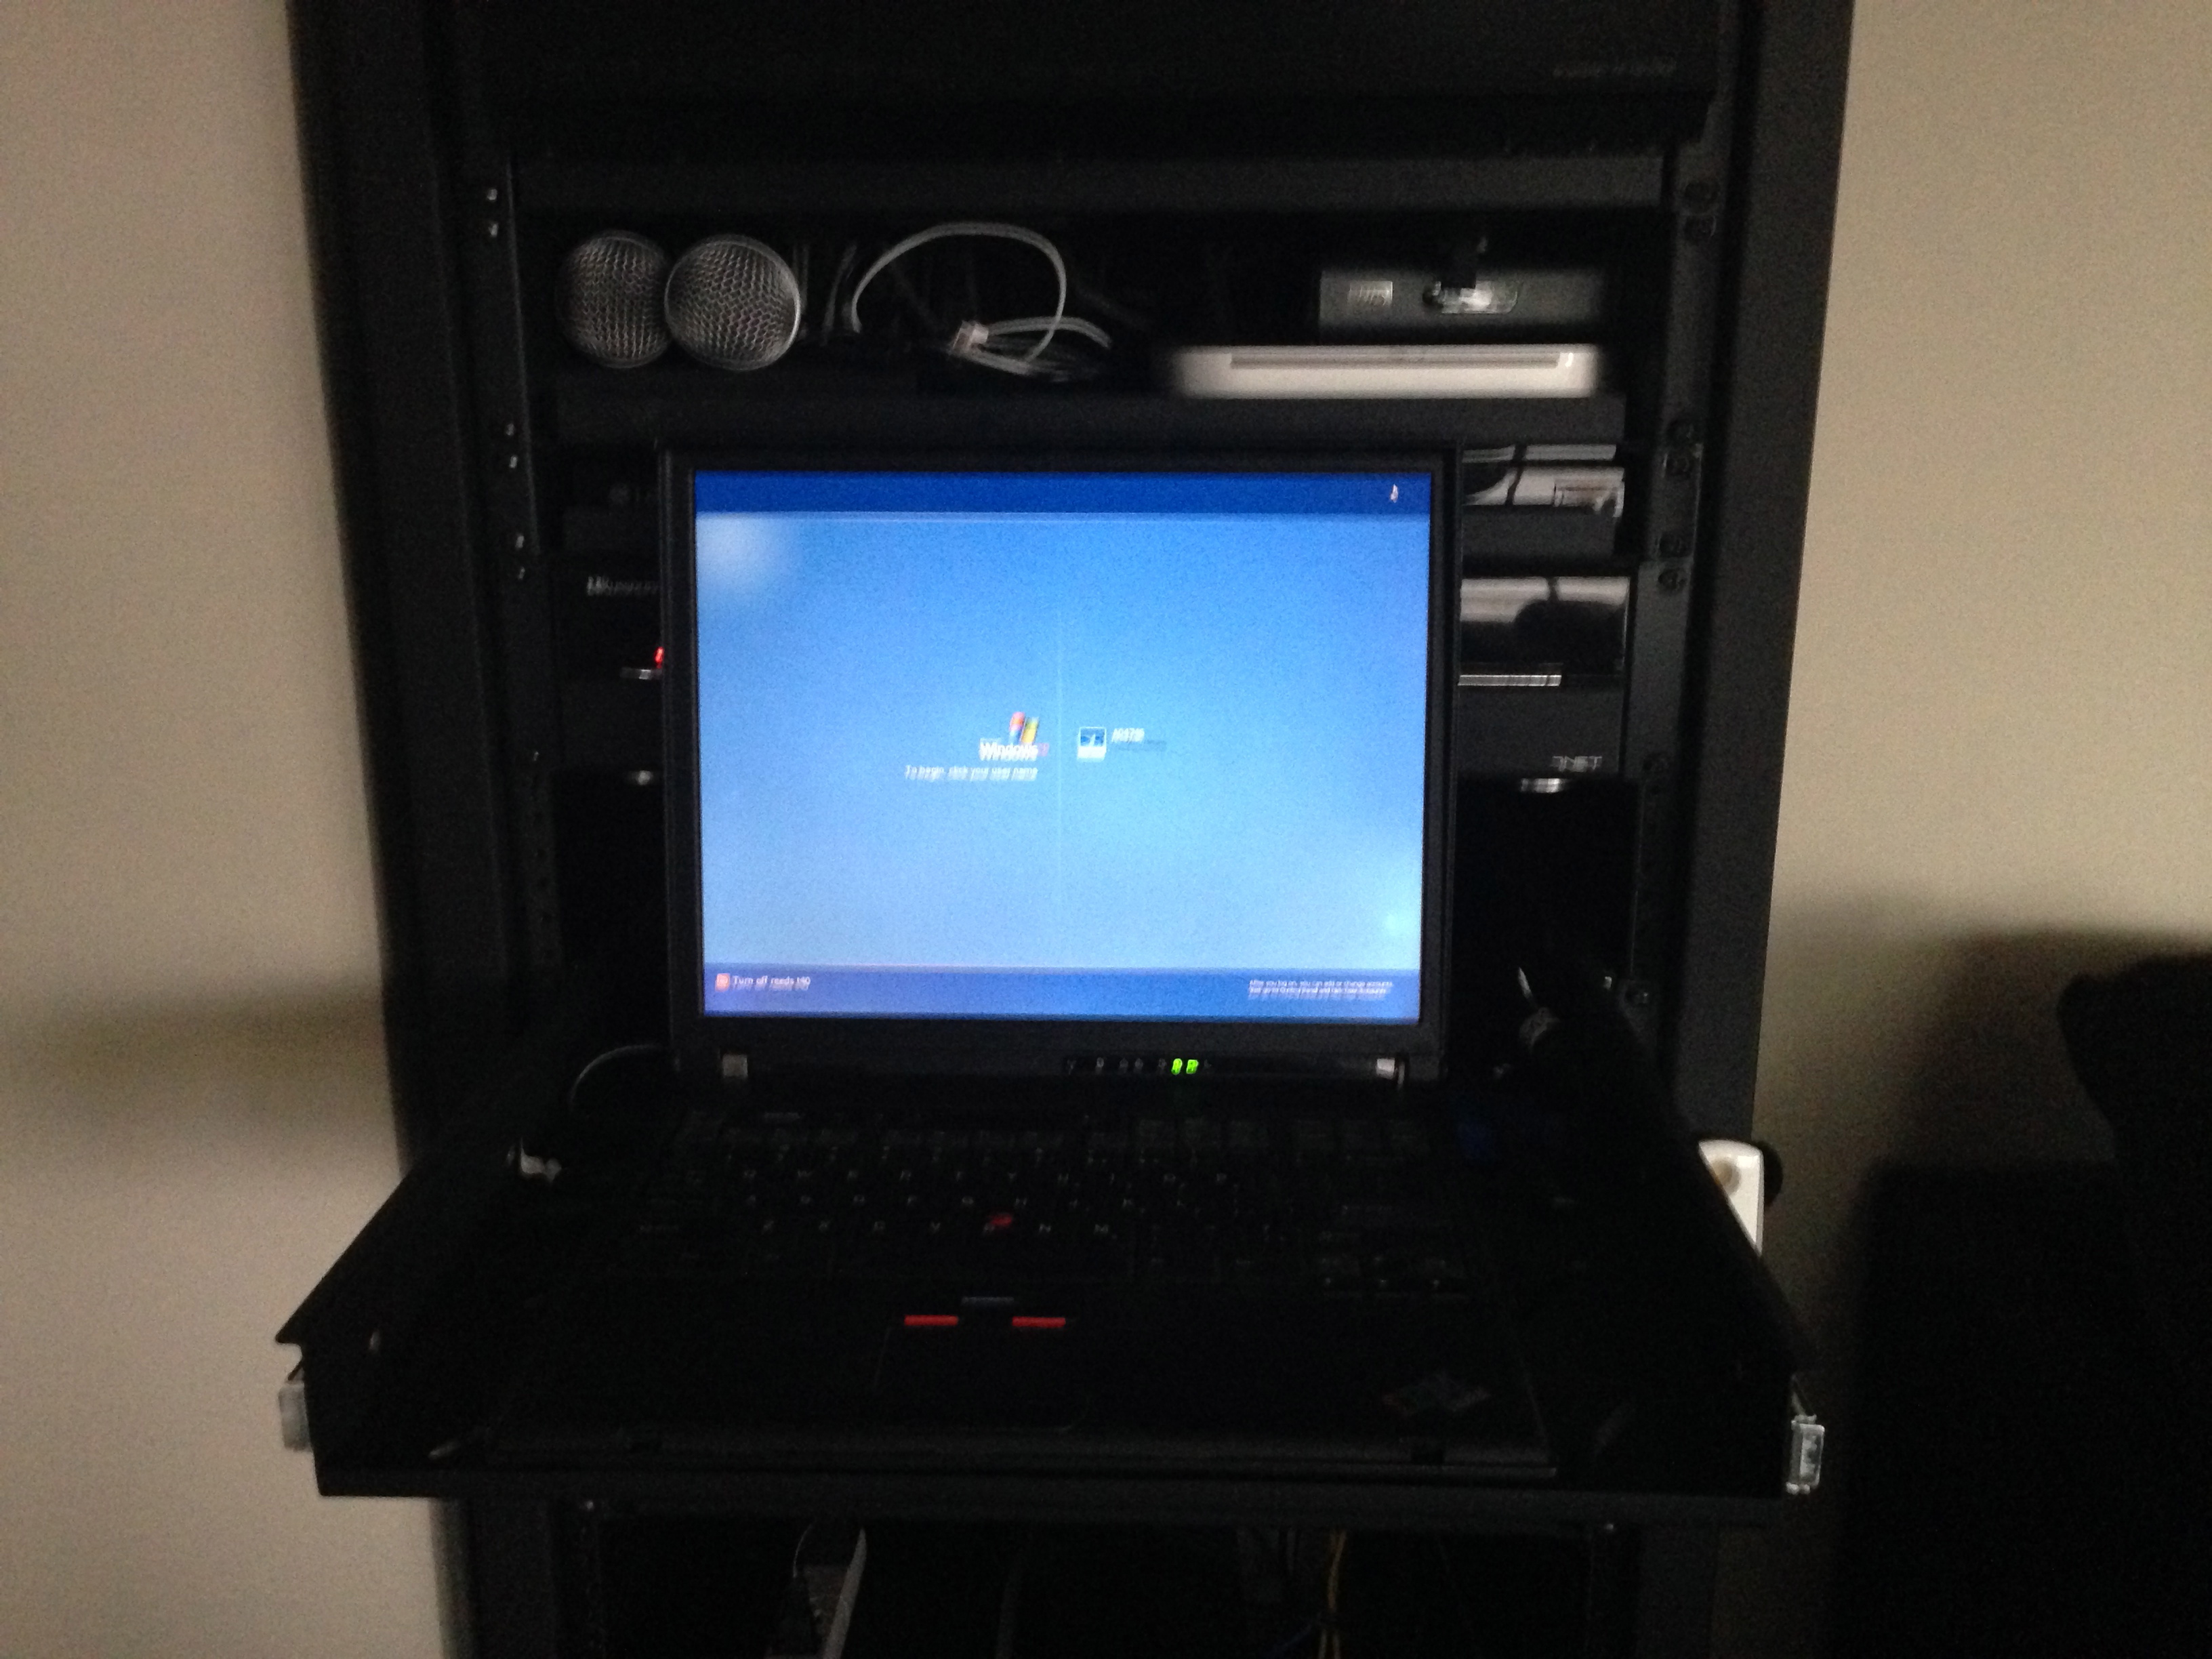 laptop open on slide out drawer I have talked about a laptop I have in my entertainment rack. This laptop is an old laptop I have that I wasn't using but offers me a few features I use almost daily. First, I have this on a wired connection. This lets me use this workstation as a quick way to move files around my network over a fast wired connection rather than wifi. Second, I run winamp on this computer. I use winamp because iTunes sucks (generally), cant load my entire music library (over 100,000 songs) without crashing, and is overall bloat ware when I don't even purchase musicm from the ioTunes store. Winamp allows me to create simple playlists that are portable, in a system that is simple, and it just works. Also, I can hook my iPod/ iPhone up to this computer to synch music that is on my synology (as a mapped drive). I find that I use this computer quite a bit and, as such, one of the next things I do will be to upgrade this to a windows 7/8 based, more powerful computer. It's on my list. Because I use winamp, there is a small app I paid $1.99 for called wMote. This is an app that lets me control the winamp located on this computer via my iphone. Whenever I am listening to music via winamp, this app is open on my phone. It allows me to change tracks, playlists, etc.. Very cool and only $1.99. In addition to this laptop, I have a mac mini wired (via HDMI) into my Onkyo for doing internet browsing on the TV or projector and for using my plex system to watch movies or TV. Before I go into the specifics on how I use this, I will say that my Onkyo, TV, etc. needs to be on for me to have the wireless keyboard and mouse on my coffee table work. Instead of turning all that stuff on every time I need to press a button on the imac, I use woftware called "teamviewer" which is simply a remote desktop software allowing me to log into the Macmini from this IBM laptop when/ if I need to make any adjustments. It's really convenient and teamviewer is free. I also enjoy the occasional Karaoke Jam (cable guy anyone?)! I use this IBM PC as the interface to the MP3+G files (over 500,000 of them) living on my Synology NAS. The audio output from this laptop goes into a small mixer with a wireless mic system connected as well. I simply flip a switch on a separate power strip and it all turns on. Since I already have VGA running to each TV, I put a simple VGA switch that takes the security camera VGA or the IBM laptop VGA and puts it out to the TV/ projector/ or any tv in the house. This way, when the IBM is selected, I "extend my windows desktop" to the additional displays that put the lyrics screen on the second screen allowing me to use the laptop screen as the control for the next karaoke track, etc. Because I have a quite large library of Karaoke tracks, this can be really fun when I have people over for a party. We have even nicknamed it "Reed-A-Roke". Mac Mini and Plex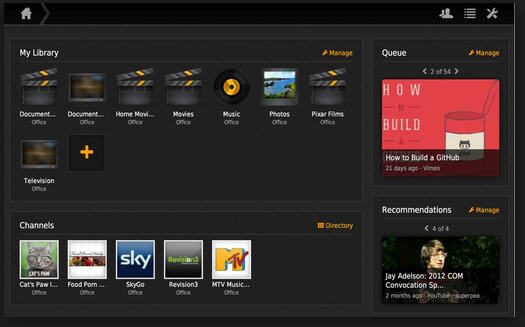 As I said the mac mini serves a few functions. First, when using plex to watch movies, this mac mini is essentially the player. Plex is an application that databases (scans, catalogs, etc.) my content located on a mapped drive on my synology and the server function runs on this mac mini because it is a powerful computer that I leave powered on all the time. This server allows me to stream movies to my ipads or even out to the world as I travel around. The mac mini has the horsepower to do this transcoding. Plex is a very cool single software application that I think will be the future, once it is more stable and some features are added. In addition, I like to take some of my content with me for airplane usage on my ipad which always requires me to handbrake/ transcode the content. I use this macmini (which is usually just sitting idle) to do that transcoding (and the teamviewer software to check progress/ add stuff to the transcode queue). If I have some friends over and we want to look at something online, I can use this computer to browse the web, watch YouTube, etc.. I'm also still trying to find other ways to use this computer. WDTV (Western Digital TV)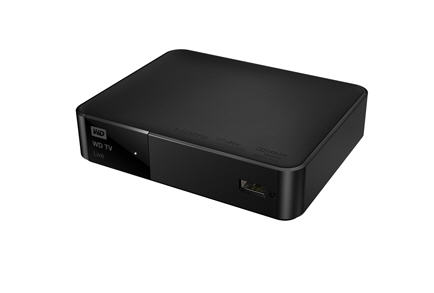 Plex is a very functional and a very cool application that has a ton of functionality. But, its just software. While it technically is in beta, it works well, but like most things in beta is not 100% perfect. That said, I have a WDTV (western digital TV) which is similar to a roku or other hardware streaming device. The cool thing about the WDTV is that it is a very robust and functional device. It can transcode virtually any codec, even play DVD menus, and is very simple to use. It allows you to browse the network through a remote control to find your content, and since my content is mostly organized by folder, I just pull up the folder of what I want to watch and click one button on the WDTV remote and I am watching the content I want chose. It's reliable, only crashed on me a few times, is internet connected (for Netflix if I used that), and is simply wired via a HDMI out into my Onkyo system. I would love to get rid of this extra box, but I cant- it just works (on every codec I throw at it), always decodes the right audio track correctly (sorry plex), and is a tiny little box. Due to its simplicity, I have given a bunch of these away to friends and family for their use. They can simply hook up a hard drive to a USB port on the WDTV and play whatever content is on that drive. ChromeCast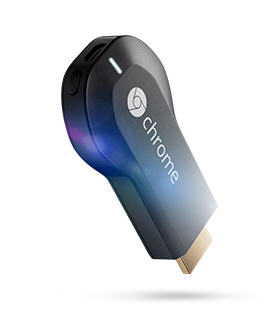 Newer to the system is a ChromeCast device. This is a very inexpensive device marketed by Google that allows you to directly stream YouTube to your system. I chose to plug the chromcast into the back of my Onkyo system which means that I can put it on the Projector and/or the LCD and it plays through the big sound system- great for watching cool YouTube content. I think a device like this could replace the WDTV and the mac mini, but its not there yet. Plex does have a plugin for the chromecast, so maybe one day when plex makes this function available to normal (non plex pass) people like me, I will move my system that way. For now, its fun to watch YouTube stuff on the chromecast and I can even mirror my Chrome browser window from my computer up there if I want to browse the web on my projector when friends are over (better than everyone passing around an iPad or huddling around the laptop screen). iPadsI have a few Ipads in my home. One travels with me when I am on the road. This has transcoded content on it and LTE for working/ webbing on the road. It's a great device I WONT travel without. The other iPad is one that stays on my coffee table for looking up IMDB stuff, browsing the web, streaming my plex server when I am on my elliptical working out. Ipads and IPhones (tables and smartphones) have really changed the way I interact with the web and computer. I never thought it possible but I do use these devices mostly to browse on the web. Before I had an Ipad, I turned my desktop computer on almost daily. Now, I find that I turn my desktop on maybe once a week to pay a few bills and pretty much anytime I need to create any content (no phone or tablet I have used is good for creating content- but then again, I haven't used the Surface yet which may be the first tablet that hits that mark). ContentI have to be very careful what I put here because this one could get me into trouble. I used to have a very large DVD collection and before that a great VHS collection. I live to watch movies. The main impetus to build the wdtv/ plex/ etc. streaming system above is that I had DVDs as a medium. I hate loading them, I hate that they are slow to load, I hate that they make noise, and I can only have one at a time. Once media streamers like WDTV became available, I digitized all of my DVDs and even Blu-ray's that I rent or friends have rented. Now, all my content (all 15 tb of it) is digital and acts as my own personal video on demand system. It allows me to work through series (madmen, breaking bad, etc.) one episode at a time at my own pace. I did get the 3 month Netflix trial and used it all of one time. I'd rather have control of my own content and as I said at the top, I don't want another monthly fee. I do also have amazon prime which I have used all of one time on my master bedroom Panasonic TV, but again its easier to stream directly from my own synology / Plex server (with none of the bandwidth/ net neutrality issues). So, I rent DVDs from redbox and other sources to watch on my system (you are getting paid Hollywood), but have no desire to play that from a disc connected to my system. I do have a Blu-ray player (that I got for free with a TV purchase) connected to my system, and I have used it a total of 2 times to confirm my audio settings from a test disc. Initially, I didn't even have a Blu-ray player and I was renting Blu-ray's, only to digitize them on my desktop using MakeMKV, move them over to my synology and watch them all digital on my WDTV. A little more work, but I also get to re-watch them later if I wanted to. I have also digitized the collections of a few of my friends. When it's a DVD, I try to keep the menus and the video_TS folders in tact so you get the menu and extra content. This has caused one single problem with Plex because plex cannot stream DVD menus/ etc. to a web based device (iPad) or my Panasonic TV. Small annoyance but I feel it's worth it to keep the original content in tact. Since I essentially have the disc image stored on my synology, I can always convert them to MKVs later if I choose. No plans yet. So that's all I'm going to say about content to keep myself out of trouble. 3D ContentI have downloaded a few movies that are made in 3d. Obviously, avatar looks amazing and it's the movie I use to show off the 3d on the projector. It's quite mesmerizing, but since it is the movie that started the 3d trend, it stands to reason. I have YET to watch a movie 3d on my bedroom TV (‘cause why would I want to if I have a huge projector in the other room), but have used this to confirm functionality vs. the projector and for testing. Part of my "beef" with 3D is the lack of content. Verizon has very little and horribly mislabeled content on their VOD system for 3d. I might use that more if there were more content available from Verizon (ESPN PEOPLE!!) and if their free VOD has some titles that were labeled correctly (side by side vs. frame interleaved) because none of my devices support frame interleaving (which devices do!?!?) I can only watch a few titles. At this point (start of 2014) 3d may be dead in the home expect for a few special movies (avatar, gravity, etc.)... But, if the NFL was to be available in 3d, I would reconsider. MiscSo anytime you have sensitive devices, you obviously should have them on surge suppressors. In my case I have opted to put a few of my more important devices on UPS (uninterruptable power supplies) so if the power goes out for a short (under 1 hour) amount of time, my device will stay on and powered. Also, if people decide to cut my power thinking that it will bypass anything, it will not.
Radio reception generally sucks where I live so I put a powered booster which gives me great radio reception to my Russound. SummaryI have spend a tremendous amount of money and time on the systems, electronics, installation, etc. that I talk about above. Overall, I think that any system is only as good as the installation and the users. I am a good user cause I know how to do all this stuff, but I have tried to make it simple so that if anyone ever needs to use this stuff, they would be able to figure it out. A system like this is constantly evolving. I am adding new devices as I find and like them and changing things to keep up with the times. Will I ever be done, probably not. But this is something that I enjoy playing with and fixing. The conveniences added to my daily life make most of this worth it. I hope, one day, its like the jetsons around here and everything is integrated right and voice activated. Maybe, just maybe, that will happen in my lifetime- but could you imagine the monthly fee on that?!?!! All The LinksIf you have any questions, comments or want more detail (surprisingly, there is a ton of detail not included), feel free to email me at CTSVETT@verizon.net. |